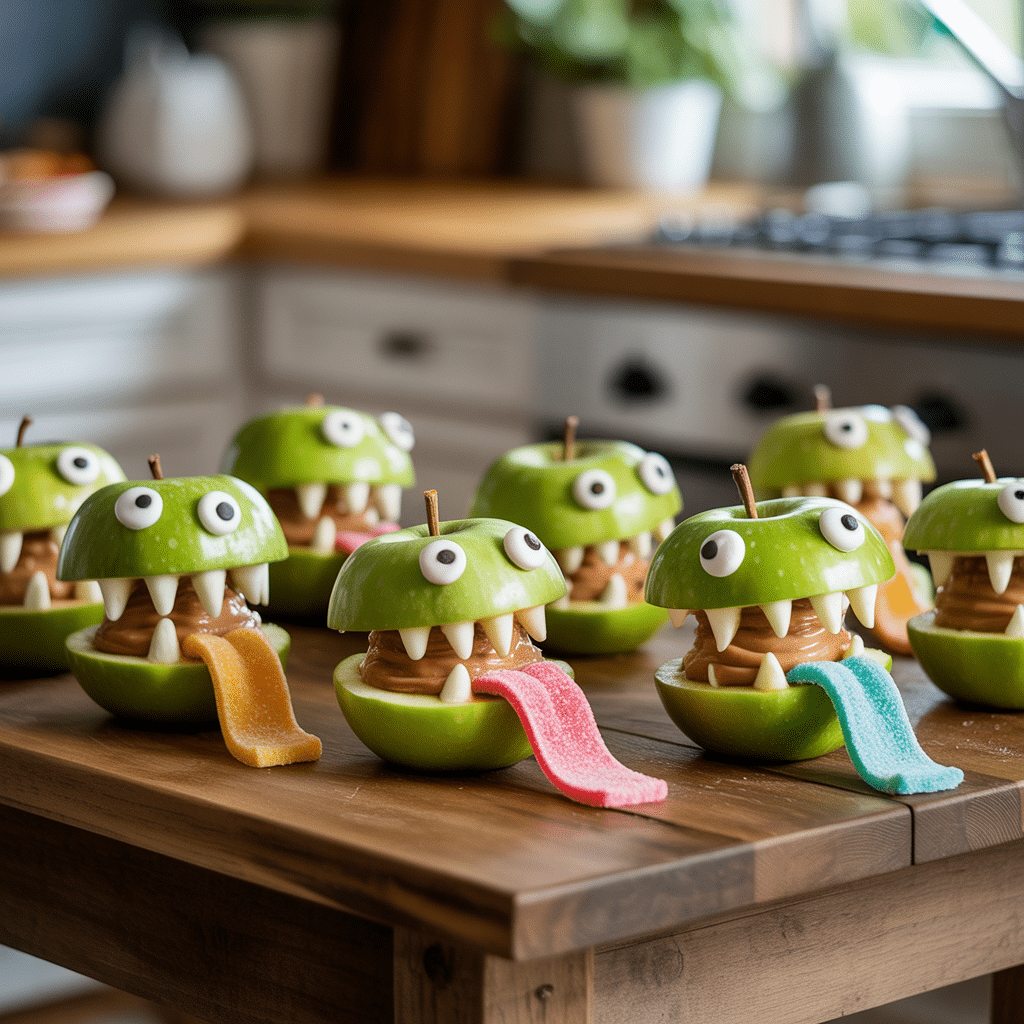
Is there anything better than a Halloween snack that’s equal parts adorable, delicious, and downright simple to throw together? I don’t think so. These Monster Apple Bites with Peanut Butter & Candy Tongues are my go-to when I need a spooky snack that’s a total crowd-pleaser without keeping me in the kitchen all night. They’re the perfect little project to do with the kids, and honestly, they always disappear faster than a ghost in the night. Let’s get to it, y’all.
Top Reasons To Make It
You’ll love these little monsters for so many reasons. First, they come together in about 15 minutes flat—a true lifesaver on a busy Halloween night. Second, they’re a fun way to sneak a little fruit into the holiday sugar rush. And third, they’re just so customizable. No peanut butter? No problem. Want to get extra creative? Go for it. They’re the perfect easy Halloween food that looks like you fussed, but we’ll keep that our little secret.
Ingredients
- 3 large, crisp red apples (like Gala or Fuji): For the monster’s mouth and a sweet crunch.
- 1/4 cup creamy peanut butter: The “glue” for the teeth and a classic, tasty pairing.
- 1/4 cup almond butter or sunflower seed butter: A great nut-free alternative for allergies.
- 1-2 tbsp honey or maple syrup: For a touch of sweetness to balance the tart apple.
- Sliced almonds (about 1/4 cup): These make for perfectly spooky monster teeth.
- 1 package red fruit roll-ups or red licorice laces: For the hilarious, slithering candy tongues.
- Mini chocolate chips or edible candy eyes: To give your monsters some personality and a finished look.
Instructions
- Wash and dry your apples thoroughly. Using a sharp knife, slice each apple into quarters. Cut out the core from each quarter, then slice each quarter in half again so you have 8 wedges per apple. These are your monster mouths.
- Take each apple wedge and carefully slice a horizontal cut into the center of the skin-side, being careful not to cut all the way through. This creates a pocket for your monster’s mouth to open.
- In a small bowl, stir together the peanut butter (or your chosen butter) and honey until smooth and slightly softened. This makes it much easier to spread.
- Now for the fun part! Spread a little of the peanut butter mixture inside the mouth slit you created.
- Press sliced almonds into the peanut butter along the top and bottom of the mouth to create sharp, monster teeth.
- Cut the fruit roll-up or licorice into small, tongue-shaped strips. Tuck one end into the very back of the mouth, letting the rest drape out creepily.
- Finally, add two mini chocolate chips or edible candy eyes above the mouth onto the apple skin. And you’re done! So good.
Variations & Substitutions
These are so, so easy to adapt to whatever you have on hand or any dietary needs. For a nut-free version, sunflower seed butter is my absolute favorite swap—it has a great color and taste. If you’re avoiding dairy, the mini chocolate chips can be skipped; just use more edible eyes. Not a fan of peanut butter? Cream cheese sweetened with a little honey makes a fantastic monster mouth filler. And for the tongues, you could even use a thin strip of red bell pepper for a less sugary option.
Serving Ideas & Pairings
These spooky snacks are perfect on their own, but they’re also the star of any Halloween party spread. Pile them high on a platter next to some mummy dogs or a creepy-crawly charcuterie board for the ultimate Halloween finger foods. They pair wonderfully with a savory main like a hearty chili or stew for a full spooky dinner that balances the sweet and savory. For a kids’ party, serve them alongside other Halloween candy classics for a mix of silly and sweet.
Storage & Reheating
These bites are best enjoyed the day they’re made, as the apples will start to brown and the peanut butter can get a little soft. If you must make them ahead, you can prep the components separately: mix the peanut butter spread, slice the apples, and keep the apple wedges submerged in a bowl of cold water with a squeeze of lemon juice for up to 4 hours to prevent browning. Then, just pat them dry and assemble right before your party starts. I do not recommend freezing them.
Pro Tips For Perfect Monster Bites
- Use crisp, firm apples. Softer apples will get mushy when you cut into them.
- If your nut butter is too thick, warm it for just 10 seconds in the microwave to make it easier to spread.
- Let the kids handle the assembly line! It’s a fun, easy job for little hands.
- Don’t stress about perfection. Crooked teeth and lopsided eyes just add to the monster charm.
- Honestly, if you’re short on time, you can skip the mouth slit and just spread the peanut butter on the flat side of the apple wedge—they’ll still be delicious.
Frequently Asked Questions
- Q: Can I make these Halloween themed food ideas ahead of time?
A: You can prep the parts a few hours ahead, but I highly recommend assembling right before serving for the freshest look and crunch. - Q: What are other easy Halloween food ideas for a party?
A: These monster bites are great next to things like clementine pumpkins, cheese ball eyeballs, or even a simple bloody punch! - Q: My apples are browning. What did I do wrong?
A> You didn’t do anything wrong! Apples just oxidize. The lemon juice bath trick mentioned in the storage section is your best defense for make-ahead spooky snacks.
