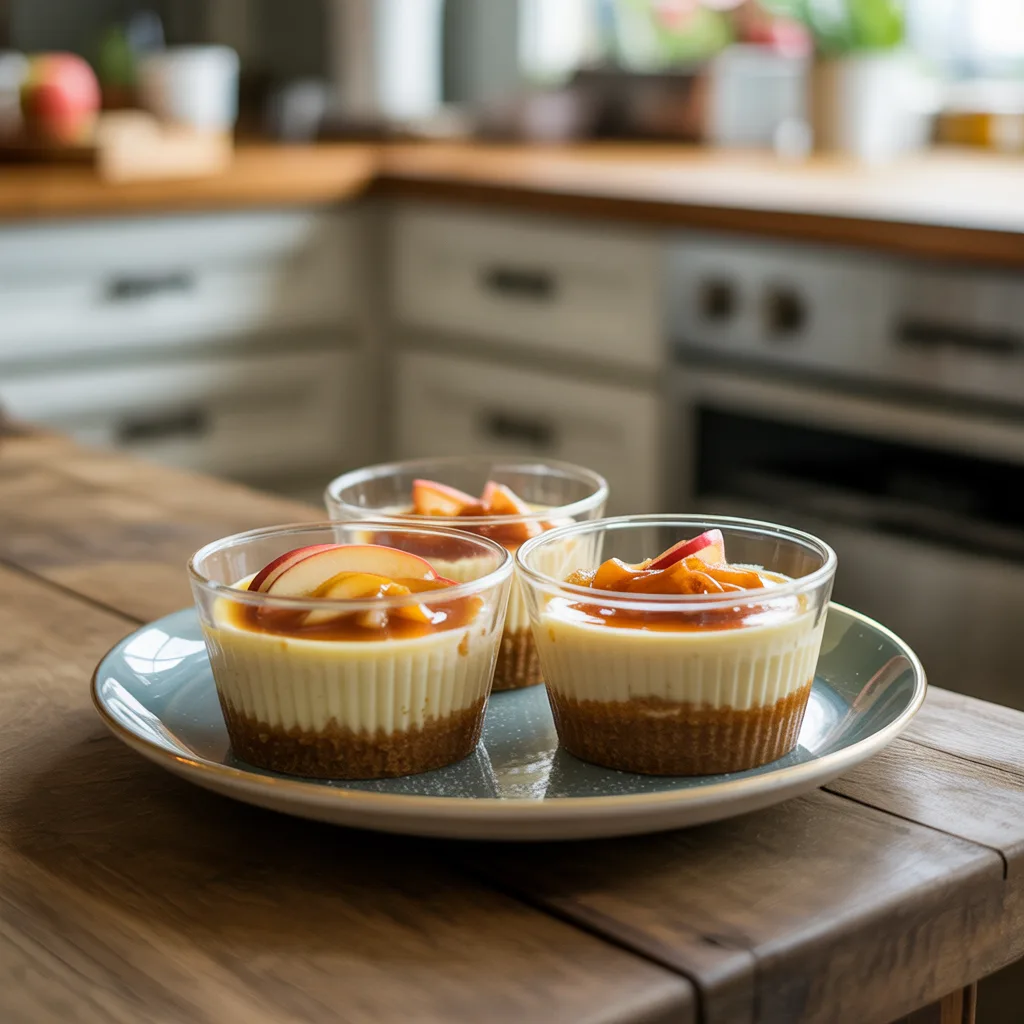
Is there anything better than cheesecake? Okay, maybe cheesecake you don’t have to slice and serve. These little Apple Cider Cheesecake Cups are my new favorite way to do dessert, especially when the holidays are breathing down my neck and I need something impressive without the fuss. They capture all the cozy, spiced flavor of a fall afternoon in a single-serving jar. No water bath, no cracking, and no stress. Just creamy, dreamy goodness. Let’s get to it.
Why You’ll Love This
These mini desserts are a total game-changer for your Thanksgiving spread. They’re individually portioned, which means no fighting over who got the bigger slice. They come together so much faster than a whole cheesecake, and you can make them a day or two ahead. That’s a win in my book. The flavor is pure autumn magic—warm apple cider and a hint of cinnamon swirled into that classic creamy filling, all sitting on a buttery graham cracker crust. So good.
Equipements Needed
- 12 (4-oz) mason jars or small dessert cups: The perfect single-serving size.
- Electric hand mixer or stand mixer: For getting that filling perfectly smooth and lump-free.
- Medium mixing bowl: For your crust.
- Small saucepan: For reducing the apple cider into a flavor-packed syrup.
- Measuring cups and spoons: For accuracy, honey.
Ingredients
- 1 ½ cups graham cracker crumbs: For that classic, buttery base we all love.
- 6 tbsp unsalted butter, melted: This binds the crumbs together for the crust.
- 2 cups apple cider: You’ll reduce this down to a concentrated ½ cup for maximum flavor.
- 16 oz (2 blocks) full-fat cream cheese, room temp: This is non-negotiable for the best creamy texture.
- ⅔ cup granulated sugar: Sweetens the filling just right.
- 2 large eggs, room temp: Helps set the filling as it bakes.
- 1 tsp vanilla extract: Adds a warm, cozy depth.
- ½ tsp ground cinnamon: For that essential fall spice flavor.
- ¼ tsp ground nutmeg: A little extra warmth that pairs perfectly with apple.
- A pinch of salt: Balances all the sweetness and makes the flavors pop.
Step By Step
- First, preheat your oven to 325°F (165°C). Get those jars ready on a baking sheet—it makes moving them in and out of the oven so much easier.
- Pour the apple cider into a small saucepan. Bring it to a boil over medium-high heat, then reduce it to a simmer. Let it cook for about 15-20 minutes, until it’s reduced to roughly ½ cup. It’ll be syrupy and fragrant. Set it aside to cool completely.
- While that’s reducing, make your crust. In a medium bowl, mix the graham cracker crumbs and melted butter until it looks like wet sand. Spoon about 1 ½ tablespoons of the mixture into the bottom of each jar and press it down firmly with the back of a spoon.
- Now, for the filling. In a large bowl, beat the room-temperature cream cheese with an electric mixer until it’s completely smooth and no lumps remain. This is the secret! Scrape down the sides of the bowl.
- Add the sugar and beat again until it’s fully incorporated. Then, add the eggs one at a time, beating on low speed after each addition until just combined. You don’t want to overbeat here.
- Mix in the vanilla, cinnamon, nutmeg, and that pinch of salt. Finally, gently whisk in the cooled, reduced apple cider until the whole mixture is smooth and uniform.
- Carefully pour or spoon the filling over the crust in each jar, leaving about ¼ inch of space at the top.
- Bake for 18-22 minutes. The edges should be set, but the centers will still have a little jiggle to them—that’s perfect. They’ll firm up as they cool.
- Let the jars cool completely on the counter, then pop on the lids and transfer them to the fridge to chill for at least 4 hours, but honestly, overnight is even better.
Tips For Success
- Room temperature ingredients are absolutely key. Cold cream cheese will leave you with a lumpy filling, and cold eggs won’t incorporate as well. Plan ahead!
- Don’t skip reducing the apple cider! This step intensifies the flavor so, so much. You’ll thank me later.
- When pressing the crust, really pack it in there. A firm press means your crust won’t crumble apart when you dig in with a spoon.
- Honestly, the hardest part is waiting for them to chill. But it’s worth it, I promise. The flavor gets better and the texture becomes perfectly sliceable.
- If you’re nervous about the jars, you can bake these in a muffin tin lined with liners! Just reduce the baking time by a few minutes.
Variations & Substitutions
- Gluten-Free: Use your favorite gluten-free graham crackers or ginger snap cookies for the crust.
- Dairy-Free: Swap the cream cheese for a dairy-free alternative and use a plant-based butter. The texture might be slightly different, but it’ll still be delicious.
- Flavor Twist: Add a tablespoon of bourbon or rum to the reduced apple cider for a grown-up kick. Or, for a non-alcoholic option, a teaspoon of molasses adds great depth.
- Top It Off: Right before serving, add a dollop of whipped cream and a drizzle of caramel sauce for extra decadent Thanksgiving desserts.
Serving Ideas & Pairings
These little cups are a star on their own, but they love company. They fit right in with all your other Thanksgiving food ideas. I love serving them alongside a plate of classic pumpkin pie or pecan pie bites. For a fun contrast of textures, offer some crisp, spiced cookies. And a hot cup of coffee or a glass of cold milk is the perfect partner to cut through the richness. They’re one of those fun Thanksgiving desserts that looks fancy but is secretly a breeze.
Storage & Reheating
Store these cuties tightly covered with their lids or with plastic wrap in the refrigerator. They’ll keep beautifully for up to 4 days. You can also freeze them for up to 2 months. To freeze, make sure they are completely chilled, then put the lids on tightly. Thaw overnight in the fridge before serving. Do not try to rewarm them—they are meant to be served chilled!
Frequently Asked Questions
- Can I make these Apple Cider Cheesecake Cups ahead of time? Absolutely! In fact, I highly recommend it. Making them a day or two ahead allows the flavors to meld and makes your Thanksgiving day so much easier.
- I don’t have mason jars. What can I use instead? No problem! A muffin tin lined with paper or silicone liners works perfectly. Just adjust the baking time down to about 15-18 minutes.
- My reduced apple cider is super thick and sticky. Is that right? Yes! That means you’ve done it perfectly. You’ve concentrated all that wonderful apple flavor into a syrup.
- Are these considered Thanksgiving treats or Thanksgiving desserts? Why not both? They’re sweet enough for dessert but small enough that you could sneak one as a treat with your afternoon coffee while you’re cooking.