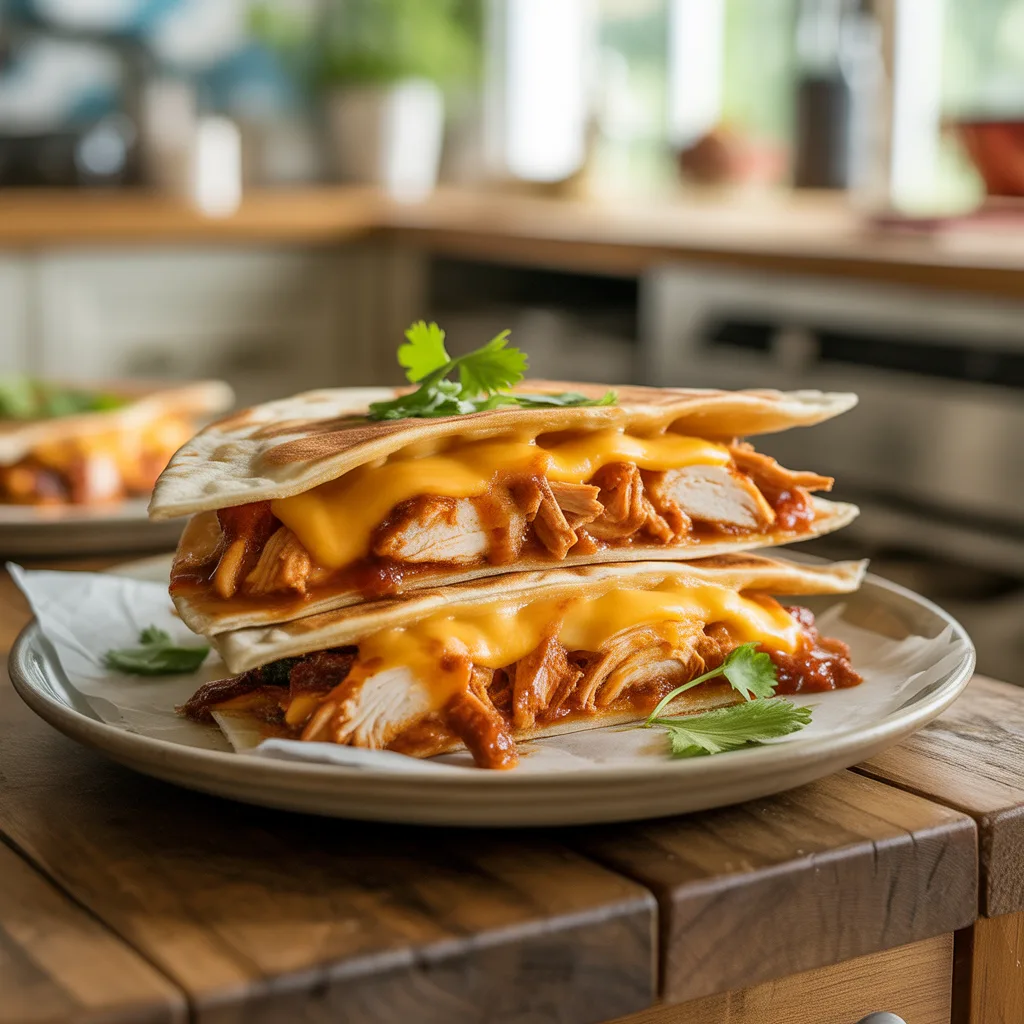
Ever find yourself staring into the fridge at lunchtime, wishing something delicious would just magically appear? Well, friend, let me introduce you to your new favorite fix: BBQ Chicken & Cheddar Tortilla Melts. Imagine all the cozy, melty goodness of a grilled cheese, but we’re wrapping it all up in a warm, crispy tortilla with tender shredded chicken and your favorite tangy BBQ sauce. It’s a handheld lunch that’s ridiculously easy to throw together and even easier to love. Perfect for those busy days when you need a satisfying meal in minutes.
Why You’ll Love This Recipe
You’re going to adore this recipe because it checks all the boxes for a busy life. First, it’s incredibly fast. We’re talking less than 15 minutes from fridge to plate. Second, it uses simple ingredients you probably already have on hand, making it a fantastic way to use up leftover rotisserie chicken or last night’s grilled chicken breasts. And third, the flavor is just unbelievable. That combination of smoky BBQ sauce, sharp cheddar, and the crispy tortilla is a total home run. So good. It’s a recipe that feels indulgent but is so, so easy to make any day of the week.
Ingredients
- 2 cups cooked chicken, shredded (about 2 breasts or 1 rotisserie chicken’s worth – for a quick, protein-packed base)
- 1/2 cup your favorite BBQ sauce, plus more for serving (for that classic sweet and smoky flavor)
- 4 large burrito-size flour tortillas (the perfect vessel for holding all the goodness)
- 1 1/2 cups shredded sharp cheddar cheese (because everything is better with melty cheese)
- 2 tablespoons unsalted butter, softened (for getting that golden-brown, crispy exterior)
- 1/4 cup red onion, finely diced (adds a nice little crunch and bite)
- 2 tablespoons fresh cilantro, chopped (optional, for a bright, fresh finish)
Step by Step Method
- In a medium mixing bowl, combine the shredded chicken and BBQ sauce. Stir until the chicken is evenly coated.
- Lay one tortilla flat on a clean work surface. Sprinkle a quarter of the shredded cheese over one half of the tortilla. This creates a melty barrier that helps hold everything together.
- Spoon a quarter of the BBQ chicken mixture (about 1/2 cup) over the cheese. Top with a sprinkle of red onion and cilantro, if using.
- Fold the bare half of the tortilla over the filled side, pressing down gently.
- Spread a thin layer of softened butter on the top outer side of the tortilla. This is our secret for the most incredible, golden crispness.
- Heat a large skillet or griddle over medium heat. Place the tortilla melt in the skillet, buttered-side down. Cook for 3-4 minutes, until the bottom is golden brown and crispy.
- While the first side is cooking, carefully spread butter on the now-upward-facing side of the tortilla.
- Using a wide spatula, gently flip the melt. Cook for another 3-4 minutes on the second side, until golden brown and the cheese is utterly molten. Repeat with the remaining ingredients. Slice in half and serve immediately!
Easy Lunch Ideas For Work
Packing a lunch for work doesn’t have to be a chore. The key is having a few go-to recipes that are easy to assemble and transport well. These BBQ Chicken & Cheddar Tortilla Melts are a star player. You can easily prep the chicken filling the night before and keep it in a container in the fridge. In the morning, just assemble your melt, wrap it tightly in foil, and throw it in your lunch bag. Pop it in the toaster oven at work for a few minutes to get it hot and crispy again—it’s way better than any sad desk salad! For other simple lunch ideas, think about easy wraps, hearty grain bowls with pre-cooked quinoa, or even a thermos of your favorite soup.
Creative Variations
This recipe is a wonderful blank canvas. Feel free to get creative based on what you have in the kitchen! For a little kick, add a few slices of pickled jalapeño or a pinch of red pepper flakes to the filling. If you’re not a cheddar person, Monterey Jack or pepper jack cheese would be fantastic. You could even add a scoop of canned black beans or some sweet corn kernels to the chicken mixture to stretch it further. For a tangy twist, a light drizzle of ranch dressing inside before folding it up is honestly a game-changer. Don’t be afraid to make it your own!
Serving Ideas & Pairings
These melts are a complete meal all on their own, but if you’re looking to round things out, a simple side is all you need. A crisp, cool side salad with a light vinaigrette is the perfect contrast to the warm, rich melt. For a no-utensils-needed lunch, a handful of baby carrots or apple slices on the side works great. And if you’re serving these for a casual dinner, a big bowl of tortilla soup or a simple black bean corn salad would be absolutely perfect alongside them.
Storage Tips
These are always best served immediately, but if you have leftovers, let them cool completely to room temperature. Wrap each melt individually in plastic wrap or aluminum foil and store them in an airtight container in the refrigerator for up to 3 days. I don’t recommend freezing them, as the tortilla can become soggy when thawed. To reheat, your best bet is a toaster oven or a conventional oven preheated to 375°F. Bake for 8-10 minutes, or until hot all the way through and crispy. The microwave will work in a pinch, but it will soften the tortilla.
Air Fryer Settings
If you want an even easier method with less hands-on time, your air fryer is your best friend here! Assemble the melts as directed, but instead of buttering the outside, give them a quick spritz with cooking spray. This helps achieve that fantastic crunch. Preheat your air fryer to 370°F. Place one or two melts in the basket, making sure they aren’t overlapping. Air fry for 5-6 minutes, flipping halfway through, until the tortillas are golden brown and perfectly crispy. It’s a nearly hands-off way to get a fantastic result.
Leftover Ideas
Got a little extra BBQ chicken mixture left in the bowl? Don’t you dare toss it! That stuff is liquid gold for other quick meals. Spoon it over a baked potato for an instant loaded BBQ chicken potato. Toss it with some cooked pasta and a little extra BBQ sauce for a fun twist on pasta salad. Or, my personal favorite, use it as a topping for a quick lunch pizza on a pre-made crust or even an English muffin. So many possibilities!
FAQs
- Can I make these ahead for meal prep? Absolutely! You can mix the chicken and BBQ sauce up to 3 days in advance and keep it sealed in the fridge. Assemble the melts the morning you plan to eat them for the best texture.
- What are some other healthy lunch ideas for work that are similar? You can lighten this recipe up by using whole wheat tortillas, low-sugar BBQ sauce, and part-skim cheese. It’s still packed with flavor but feels a little lighter.
- My tortilla is burning before the cheese melts. What did I do wrong? Your heat is likely too high! These need a steady medium heat to cook through gently without burning the outside. If your stove runs hot, try moving to medium-low.
- Can I use corn tortillas instead? You can, but they are more prone to cracking when folded. I’d warm them first to make them pliable, and you might want to use two per melt, layering them like a cross for extra strength.