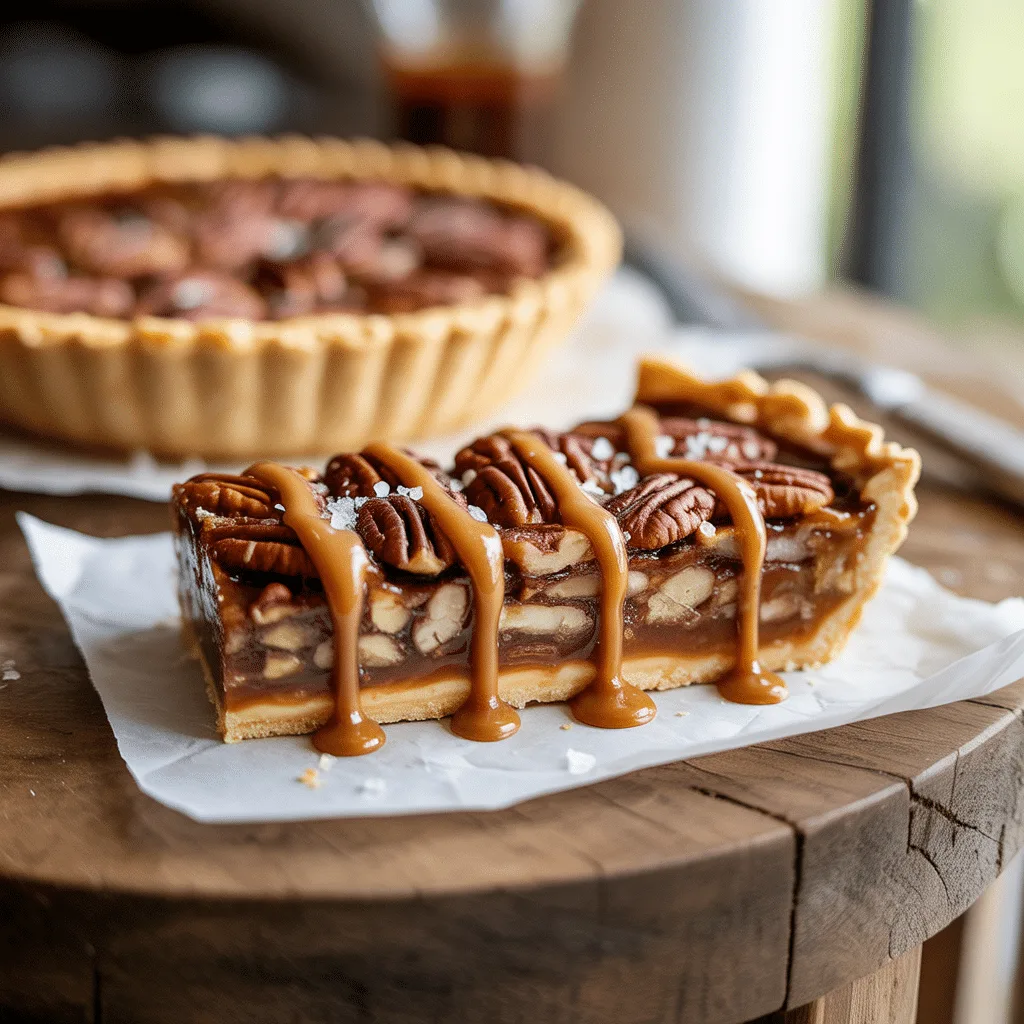
Is there anything better than the smell of pecans and butter toasting in your kitchen? I’m here to tell you, these Brown Butter Pecan Pie Bars are about to become the star of your dessert table. They capture every single bit of that classic, gooey pecan pie flavor we all crave, but they’re so much easier to serve to a crowd. No more fussing with slicing a delicate pie!
Why You’ll Love This
You get that deep, nutty, caramel-like flavor of brown butter in every single bite. So good. The shortbread crust is buttery and crisp, providing the perfect sturdy base for that rich, sweet filling. And the best part? You can cut them into neat little squares, making them the ultimate grab-and-go Thanksgiving treat. They are a total crowd-pleaser and, honestly, so much less stressful to make than a traditional pie.
Equipements Needed
- A 9×13 inch baking pan
- Parchment paper
- A medium saucepan
- A large mixing bowl
- A hand mixer or stand mixer
- A whisk and a spatula
- A small bowl for mixing spices
Ingredients
For the Shortbread Crust:
- 2 cups all-purpose flour: The sturdy foundation for our bars.
- 1/2 cup granulated sugar: Just a touch of sweetness for the base.
- 1/2 teaspoon salt: Balances all the sweet flavors.
- 1 cup (2 sticks) unsalted butter, cold and cubed: For a flaky, tender crust.
For the Brown Butter Pecan Filling:
- 1 cup (2 sticks) unsalted butter: We’ll brown this for maximum flavor.
- 1 cup packed light brown sugar: Adds a deep molasses flavor.
- 1/2 cup honey: For that classic, sticky-sweet pecan pie texture.
- 1/3 cup granulated sugar: Sweetens and helps the filling set.
- 1/4 cup heavy cream: Makes the filling luxuriously rich and creamy.
- 2 teaspoons pure vanilla extract: A must for that warm, aromatic flavor.
- 1/2 teaspoon salt: Cuts through the sweetness perfectly.
- 3 large eggs, lightly beaten: Binds the filling together as it bakes.
- 3 1/2 cups pecan halves: The star of the show! You can chop some if you like.
Step By Step
- Preheat your oven to 350°F (175°C). Line your 9×13 inch baking pan with parchment paper, leaving some overhang on the sides. This will make it super easy to lift the whole slab out later for clean slicing.
- Make the crust: In your large bowl, whisk together the flour, sugar, and salt for the crust. Add the cold, cubed butter and use a pastry cutter, two forks, or your mixer on low to work it in until the mixture looks like coarse crumbs and holds together when you pinch it.
- Press the crust mixture firmly and evenly into the bottom of your prepared pan. I like to use the flat bottom of a measuring cup to really pack it down. Bake for 18-20 minutes, or until the edges are just starting to turn a light golden brown. Let it cool slightly while you make the filling.
- Brown the butter: While the crust is baking, place the 1 cup of butter for the filling in your medium saucepan over medium heat. Melt the butter, then continue to cook it, swirling the pan occasionally, for about 5-7 minutes. You’ll see little brown bits form at the bottom and it will smell wonderfully nutty. Immediately remove it from the heat and pour it into a heatproof bowl to stop the cooking. Let it cool for about 10-15 minutes. You want it warm, not piping hot.
- Finish the filling: To the slightly cooled brown butter, whisk in the brown sugar, honey, granulated sugar, heavy cream, vanilla, and salt until everything is smooth and well combined. Whisk in the lightly beaten eggs until just incorporated. Finally, fold in all of those gorgeous pecan halves until they’re fully coated.
- Assemble and bake: Pour the pecan filling mixture over the warm crust and spread it out evenly. Pop it back into the oven and bake for 25-30 minutes. The filling should be set around the edges but still have a very slight jiggle in the center when you give the pan a gentle shake. It will firm up as it cools!
- Cool completely: This is the hardest part—you have to let these bars cool completely in the pan set on a wire rack. I know, the wait is torture! For the cleanest slices, I sometimes even pop the whole pan in the fridge for an hour or two after it’s reached room temperature. Then, use the parchment paper to lift the entire block out onto a cutting board before slicing into squares.
Brown Butter Techniques
Don’t let browning butter intimidate you! It’s simple and adds a incredible depth of flavor. Just remember to use a light-colored saucepan so you can easily see the color change. Melt your butter over medium heat, then let it cook. You’ll hear it crackle and pop as the water cooks off. Then, it will foam up. Keep swirling the pan. Soon, you’ll see little golden-brown specks forming at the bottom and that nutty aroma will hit you. That’s your cue to take it off the heat immediately and pour it out. If you walk away and it burns, there’s no saving it—you’ll have to start over. But trust me, you’ve got this!
Variations & Substitutions
- Gluten-Free: Swap the all-purpose flour in the crust with a 1-to-1 gluten-free baking blend.
- Dairy-Free: Use plant-based butter and a thick, full-fat canned coconut milk in place of the heavy cream.
- A Lighter Sweetener: You can use all honey or all maple syrup instead of the granulated and brown sugar combo, though the texture and set will be slightly softer.
- Add a Kick: Stir 1/4 teaspoon of cayenne pepper into the filling with the salt for a sweet and spicy kick. Honestly, it’s a game-changer if your crowd likes a little heat.
- Chocolate Drizzle: Melt some semi-sweet chocolate chips with a tiny bit of coconut oil and drizzle it over the cooled bars for a fancy finish.
Serving Ideas & Pairings
These bars are decadent all on their own, but a little dollop of freshly whipped cream or a scoop of vanilla bean ice cream takes them to another level. They are the perfect ending to any feast among your Thanksgiving desserts. I love serving them on a big platter alongside other easy Thanksgiving treats like spiced cupcakes or a simple fruit tart. They also make a wonderful gift for neighbors or friends during the holidays!
Storage & Reheating
Store any leftover bars in an airtight container at room temperature for up to 3 days. For longer storage, they keep beautifully in the fridge for up to a week. You can also freeze them! Just wrap individual bars tightly in plastic wrap and then place them in a freezer-safe bag for up to 3 months. Thaw in the fridge or on the counter. I think they taste best at room temperature or even slightly warmed for about 10 seconds in the microwave. That makes the filling a little gooey again. So, so good.
Frequently Asked Questions
- Can I make these ahead of time? Absolutely! These are one of the best make-ahead Thanksgiving dessert ideas. Bake them 1-2 days before, let them cool completely, and store them covered at room temperature. Slice them right before serving.
- My filling bubbled over a bit. What happened? Oh honey, I’ve been there! Your pan might have been a little too full. It’s okay, it still tastes amazing. Just place a baking sheet on the rack underneath your pan next time to catch any drips.
- Can I use pre-chopped pecans? You sure can. I like the look of the halves, but chopped pecans work just fine and might be easier to slice through. Just make sure you still have 3 1/2 cups total.
- Why did my crust get soggy? This usually happens if the filling is poured onto a completely cool crust. Make sure your crust is still slightly warm from its first bake—this helps create a barrier and keeps it crispy.