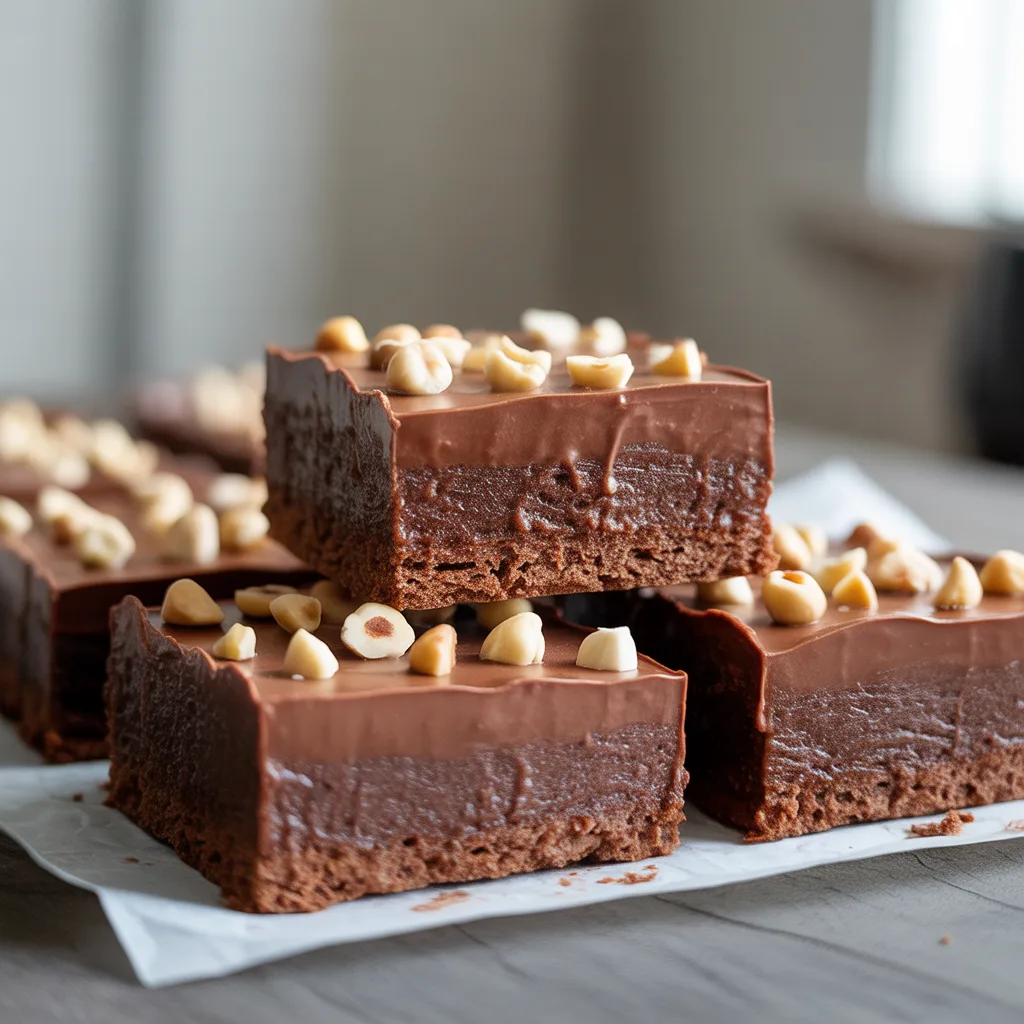
You know those days when a sweet tooth hits out of nowhere, but you don’t have the time or energy for a complicated baking project? That’s exactly where these Chocolate Hazelnut Dessert Bars come to the rescue. Imagine a rich, fudgy base with a texture that’s almost like a brownie, but even simpler. It’s topped with a creamy, dreamy layer of chocolate-hazelnut spread and a generous crunch of toasted nuts. It’s the kind of treat that feels fancy but is built on the simplest ingredients. Basically, it’s a little piece of indulgence you can whip up without turning your kitchen upside down. Perfect for a last-minute potluck contribution or a well-deserved weeknight treat.
Why You’ll Love This Recipe
Honestly, what’s not to love? These bars are a total crowd-pleaser, and they come together with minimal fuss. You don’t need a mixer or any special equipment, and the ingredient list is short and sweet. They’re the perfect solution for when you need a delicious dessert but life is moving a mile a minute. The combination of deep chocolate and nutty hazelnut is a classic for a reason—it’s comforting, a little bit decadent, and always satisfying. And because they’re bars, they’re so easy to serve. No slicing a cake or scooping ice cream, just grab and go. So good.
Equipment Needed
You really don’t need anything fancy for this recipe, which is part of its charm. Here’s the short list:
- An 8×8 inch baking pan
- Parchment paper
- Two mixing bowls (one medium, one large)
- A whisk and a spatula
- Measuring cups and spoons
That’s it! No stand mixer or special tools required.
Ingredients
- 1 cup all-purpose flour: The sturdy base that gives our bars structure.
- 1/2 cup granulated sugar: Adds just the right amount of sweetness to balance the chocolate.
- 1/2 cup unsalted butter, melted: Creates a rich, tender crumb and buttery flavor.
- 1 large egg: Binds everything together for the perfect bar texture.
- 1/4 cup unsweetened cocoa powder: Provides that deep, rich chocolate flavor we all crave.
- 1 teaspoon vanilla extract: Enhances all the other flavors in the bar.
- 1/2 teaspoon baking powder: Gives the base a little lift so it’s not too dense.
- 1/4 teaspoon salt: Crucial for making the chocolate taste even more chocolatey.
- 1 cup chocolate-hazelnut spread: The star of the show! This creates the irresistible creamy layer.
- 1/2 cup chopped hazelnuts: For that essential nutty crunch on top.
Step by Step Method
- First, preheat your oven to 350°F (175°C). Grab an 8×8 inch baking pan and line it with parchment paper, leaving some overhang on two sides. This little trick is a lifesaver for getting the bars out cleanly later!
- In a medium bowl, whisk together the flour, cocoa powder, baking powder, and salt. This ensures all our dry ingredients are evenly distributed so every bite is perfect.
- In a larger bowl, stir the melted butter and sugar together. Then, mix in the egg and vanilla extract until everything is well combined and smooth.
- Now, gently fold the dry flour mixture into the wet butter mixture. Stir just until you no longer see streaks of flour. Don’t overmix! A few lumps are just fine.
- Transfer this thick batter to your prepared pan. Use a spatula or your fingers to press it into an even layer across the bottom.
- Bake for 15-18 minutes. The edges will start to pull away from the pan, and the top will look set. It might still seem a tad soft in the very center, and that’s okay—it will continue to set as it cools.
- As soon as the base comes out of the oven, carefully drop spoonfuls of the chocolate-hazelnut spread over the hot surface. Let it sit for a minute to soften, then use an offset spatula or the back of a spoon to spread it into a smooth, even layer. Sprinkle the chopped hazelnuts all over the top, pressing them in gently.
- Let the pan cool completely on a wire rack. This is the hardest part—waiting! But it’s essential for clean cuts. Once cool, use the parchment paper to lift the whole slab out of the pan onto a cutting board. Slice into bars and enjoy!
Serving Ideas & Pairings
These bars are fantastic all on their own, but a little pairing can make them feel extra special. For a real treat, serve them slightly warmed with a scoop of vanilla bean ice cream—the contrast between the warm, fudgy bar and the cold, creamy ice cream is just heavenly. They’re also wonderful with a cold glass of milk or a hot cup of coffee. If you’re thinking about breakfast ideas (because who says you can’t have chocolate for breakfast?), one of these bars alongside your morning yogurt and fruit is a delightful way to start the day. For a fun twist on mini desserts, simply cut them into smaller, bite-sized pieces for a party platter.
Variations & Substitutions
One of the best things about a simple recipe is how easy it is to make it your own! Here are a few ideas:
- Nut-Free: If you have an allergy, simply leave off the hazelnut topping and use a sunflower seed butter instead of the chocolate-hazelnut spread.
- Different Nuts: Almonds or pecans would be delicious substitutes for the hazelnuts.
- Gluten-Free: Swap the all-purpose flour for a 1:1 gluten-free baking blend.
- Extra Chocolate: For the ultimate chocolate lover, stir a half-cup of chocolate chips into the base batter before pressing it into the pan.
- Sea Salt Finish: A light sprinkle of flaky sea salt over the top right after adding the nuts takes the flavor to a whole new level.
Storage Tips
These bars store beautifully, making them a great make-ahead option. Keep them in an airtight container at room temperature for up to 3 days. If your kitchen is warm, or if you want them to last a bit longer, pop the container in the fridge for up to a week. They also freeze perfectly! Wrap individual bars tightly in plastic wrap and then place them in a freezer bag. They’ll keep for up to 3 months. Thaw at room temperature whenever a craving strikes.
Doneness Test
The key to perfect bars is not overbaking the base. You’ll know it’s ready when the edges are firm and have started to pull away from the sides of the pan. The center will still look a little soft and might jiggle slightly if you shake the pan, but it shouldn’t be wet or liquidy. Remember, it will continue to cook and set as it cools on the counter. If you insert a toothpick, it might have a few moist crumbs clinging to it, but it shouldn’t have wet batter. It’s better to have a slightly underdone bar than a dry, overbaked one.
FAQs
- Can I make these bars ahead of time? Absolutely! In fact, I think they taste even better the next day. The flavors have more time to meld together, making them one of the best easy desserts for preparing in advance for a party or busy week.
- My chocolate-hazelnut spread is too thick to spread. What should I do? This is a common issue! Just pop the closed jar in a bowl of warm water for a few minutes to loosen it up. You can also microwave the amount you need for about 10-15 seconds, stirring well, to make it more pourable.
- Are there any healthy dessert swaps I can make? You can try using white whole wheat flour and reducing the sugar by a tablespoon or two. The results will be a bit heartier but still a delicious dessert. For a different twist, you could even swirl the hazelnut spread into plain Greek yogurt for a lighter topping.