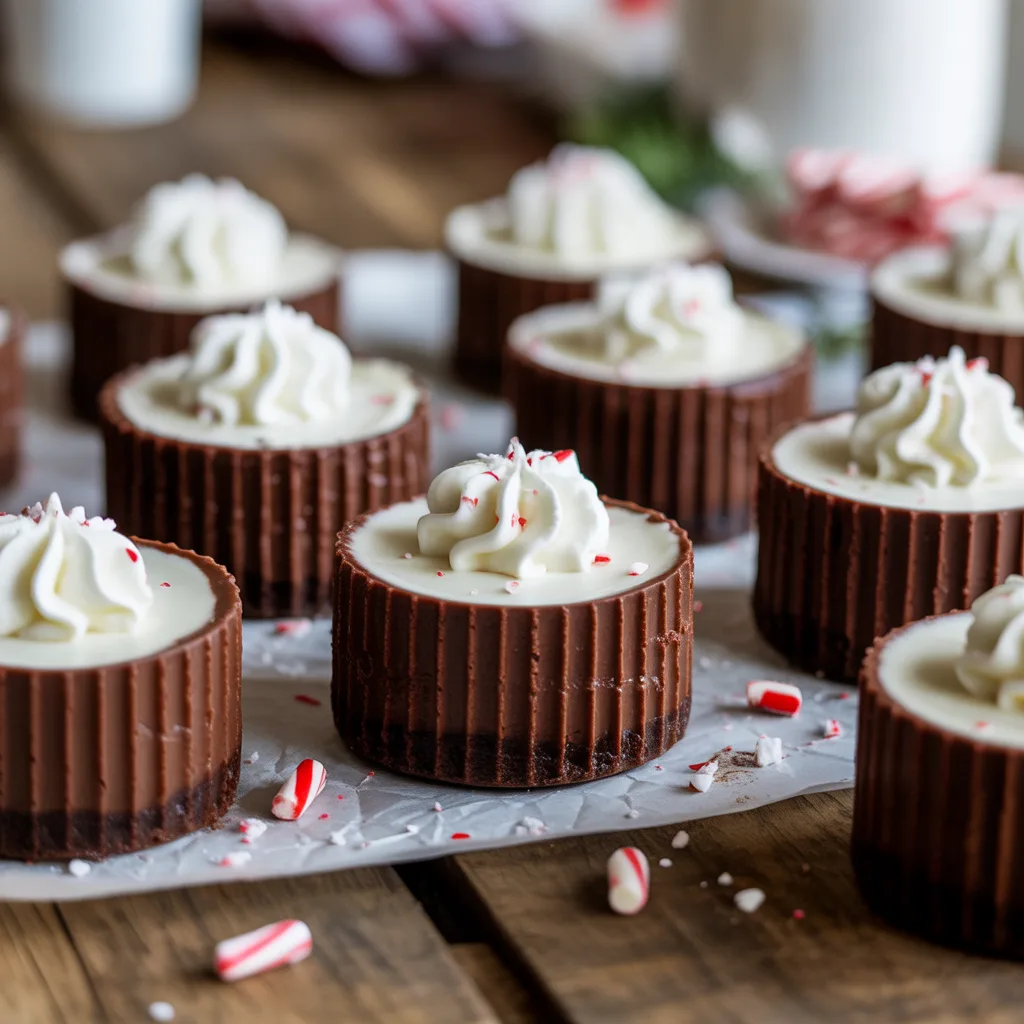
Picture this: all the rich, creamy decadence of a classic New York cheesecake, but in a perfect, pop-in-your-mouth size that’s infused with the cool, festive flavor of peppermint and a chocolatey cookie crust. These Chocolate Peppermint Cheesecake Mini Bites are the ultimate party dessert, bringing that wow factor without the stress of slicing a whole cake. They’re just the right amount of sweet, with a little crunch and a whole lot of holiday spirit. Seriously, is there anything more festive than chocolate and peppermint? I don’t think so.
Why You’ll Love This Delicious Dessert
Well, for starters, they are incredibly easy to make. You don’t need any fancy springform pans or a water bath. A simple muffin tin is your best friend here. They’re perfect for holiday baking because they look like you spent hours, but the hands-on time is really quite short. They’re also so versatile for any gathering, whether it’s a fancy Christmas party or a casual Christmas brunch. And because they’re individually portioned, there’s no fussing with serving utensils—just set them out and watch them disappear. So good.
Ingredients
Let’s gather up our ingredients. Using full-fat, room-temperature ingredients is the secret to a smooth, lump-free filling. Trust me on this.
- For the Crust:
- 1 ½ cups chocolate wafer cookie crumbs (about 25 cookies): gives a rich, chocolatey base.
- 6 tablespoons unsalted butter, melted: acts as the binder to hold the crust together.
- 2 tablespoons granulated sugar: adds a touch of sweetness to balance the cocoa.
- For the Filling:
- 16 ounces full-fat cream cheese, softened: this is the star, providing that classic creamy texture.
- ⅔ cup granulated sugar: sweetens the filling perfectly.
- 2 large eggs, room temperature: help set the cheesecake as it bakes.
- ½ cup sour cream, room temperature: adds a wonderful tang and creamy richness.
- 1 teaspoon vanilla extract: enhances all the other flavors.
- 1 teaspoon peppermint extract: gives that unmistakable, refreshing holiday flavor.
- 2 tablespoons all-purpose flour: helps stabilize the filling so it doesn’t crack.
- A pinch of salt: balances the sweetness.
- For the Topping:
- ½ cup heavy whipping cream: whips up light and fluffy.
- 2 tablespoons powdered sugar: sweetens the cream without grittiness.
- Crushed candy canes or peppermint candies: for that festive crunch and pop of color.
- Chocolate sauce, for drizzling: because more chocolate is always a good idea.
Step-By-Step Method
Ready to make some magic? Here’s the step-by-step method to perfect mini cheesecakes.
- Preheat your oven to 300°F (150°C). Line a standard 12-cup muffin tin with paper or foil liners. This makes cleanup a dream.
- Make the crust: In a medium bowl, stir together the chocolate cookie crumbs, melted butter, and 2 tablespoons of sugar until it resembles wet sand. Press about 1 ½ tablespoons of the mixture firmly into the bottom of each muffin cup. I like to use a small glass or measuring cup to press it down evenly. Bake for 5 minutes, then remove and let it cool slightly.
- Make the filling: In a large bowl, beat the softened cream cheese with an electric mixer until it’s completely smooth and no lumps remain. This is the most important step for a silky texture! Gradually beat in the ⅔ cup of sugar until well combined.
- Add the eggs, one at a time, beating on low speed after each addition just until blended. You don’t want to overbeat and incorporate too much air. Scrape down the sides of the bowl.
- Beat in the sour cream, vanilla extract, peppermint extract, flour, and salt. Mix until everything is just combined and smooth.
- Divide the filling evenly among the muffin cups, filling them almost to the top. Smooth the tops with a spoon.
- Bake for 18-22 minutes, or until the edges are set but the centers still have a slight jiggle when you gently shake the pan. They will firm up as they cool.
- Let the cheesecakes cool completely in the pan on a wire rack, then transfer them to the refrigerator to chill for at least 3 hours, or ideally overnight.
- Before serving, whip the heavy cream and powdered sugar until stiff peaks form. Pipe or dollop onto each mini cheesecake. Top with crushed candy canes and a drizzle of chocolate sauce.
Oven Temperatures for Perfect Baking
Baking at a lower temperature, like 300°F, is the key to a creamy, dreamy cheesecake that doesn’t puff up and then fall. It’s a gentle heat that cooks them through evenly without browning the tops or causing cracks. If your oven runs hot, you might even consider dropping it to 275°F. An oven thermometer is a cheap and invaluable tool to make sure your oven is telling you the truth! If you see the tops starting to brown, they’re done.
Flavor Twists for Your Mini Bites
These little bites are a wonderful canvas for creativity. If you want to mix things up beyond the classic chocolate peppermint combo, here are a few ideas:
- Cookies and Cream: Swap the chocolate cookie crust for an Oreo crust (use the whole cookie, filling and all) and fold ½ cup of crushed Oreos into the filling. Omit the peppermint extract.
- Chocolate Ganache Top: Instead of whipped cream, top each chilled bite with a layer of simple chocolate ganache made with equal parts hot cream and chocolate chips.
- Mocha Swirl: Replace the peppermint extract with 1 tablespoon of instant espresso powder dissolved in 1 teaspoon of hot water. Swirl it through the filling with a knife for a marbled effect.
Serving Ideas & Pairings for the Holidays
These mini bites are stars on their own, but they play well with others! They’re the perfect addition to a platter of Christmas party food. Arrange them on a festive platter next to some other easy Christmas treats like sugar cookies or fudge. For a Christmas brunch, they’re a delightful sweet option alongside savory quiches and pastries. I love serving them with a hot cup of coffee or a glass of cold milk. The contrast is just perfect.
Storage Tips for Leftover Treats
Leftovers? They’ll keep beautifully in an airtight container in the refrigerator for up to 5 days. If you’ve already topped them with whipped cream, it’s best to add that fresh right before serving. The crushed candy topping might bleed color if stored for too long, so I usually add that at the last minute, too.
Make-Ahead & Freezer Options
This is maybe the best part! These are fantastic make-ahead Christmas desserts. You can bake the cheesecake bases (without any toppings) and freeze them for up to 2 months. Just place the cooled bites on a baking sheet until frozen solid, then transfer them to a freezer-safe bag or container. Thaw overnight in the fridge before topping and serving. Honestly, having a stash of these in the freezer makes impromptu holiday guests a joy, not a stress.
FAQs About Chocolate Peppermint Cheesecake
- Can I make these without a muffin tin? You sure can! A square 8×8 baking pan lined with parchment paper works well. Just press the crust into the bottom, spread the filling over top, and bake for 30-40 minutes at 300°F until the edges are set. You’ll just cut them into squares instead of having rounds.
- My filling is lumpy. What happened? This almost always means your cream cheese wasn’t soft enough. Let it sit on the counter for a good hour or two until it’s easily indented with your finger. Beating the cream cheese alone until it’s perfectly smooth before adding anything else is the key to success.
- Can I use a different extract? Absolutely. If you’re not a peppermint fan, almond extract would be lovely, or you could use a bit of orange extract for a chocolate-orange combination. Just stick to about 1 teaspoon total.
- Are these too rich for a holiday party? Never! Their small size makes them the perfect little indulgence. They’re rich, but not overly so, and that hit of cool peppermint actually makes them feel a bit lighter. They are always, always a hit.
No matter how you serve them, these Chocolate Peppermint Cheesecake Mini Bites are sure to become a new holiday tradition.