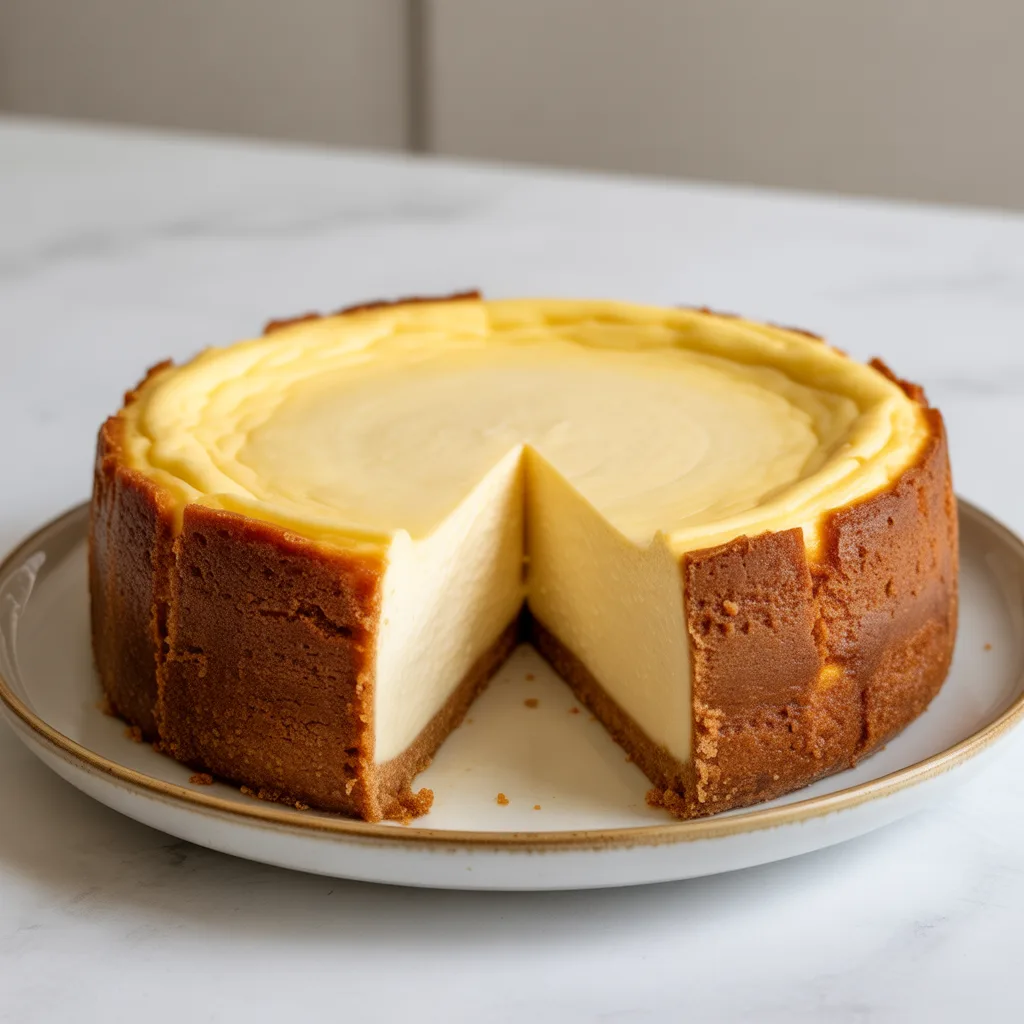
There’s nothing quite like slicing into a perfect, creamy New York-style cheesecake. You know the one—tall, decadently smooth, with a thick, buttery graham cracker crust that holds its own against the rich filling. It’s the kind of dessert that feels like a special occasion all on its own. But have you ever wondered how those fancy bakeries get it so incredibly perfect, with no cracks and that signature creamy texture? Well, it’s not nearly as hard as it looks. With a few simple tricks and a little patience, you can absolutely make a show-stopping Classic Bakery-Style Cheesecake with Buttery Graham Crust right in your own kitchen.
Why You’ll Love This Cheesecake Recipe
Honestly, what’s not to love? This recipe is your golden ticket to a dessert that feels professional but is totally approachable. The texture is everything—so, so creamy and luxuriously smooth. It slices like a dream, and that buttery graham crust is the perfect crunchy contrast. It’s a total crowd-pleaser for potlucks, holidays, or just because it’s Tuesday. And the best part? You don’t need any fancy equipment or culinary school skills. Just a little bit of love and the willingness to follow a few simple tips. So good.
Equipment Needed for Cheesecake
You don’t need a ton of specialty gear, but a few key items make this process so much easier. A 9-inch springform pan is non-negotiable—it has the removable sides that let you get that gorgeous cheesecake out in one piece. A stand mixer or a good handheld electric mixer is a lifesaver for getting that super smooth, lump-free filling. And while you can use a regular baking dish, a high-sided roasting pan is perfect for creating the essential water bath without any spills.
Ingredients
- For the Buttery Graham Crust:
- 2 cups graham cracker crumbs: For that classic, slightly sweet, and sturdy base.
- 1/2 cup unsalted butter, melted: To bind the crumbs and add that irresistible, rich flavor.
- 1/4 cup granulated sugar: A bit of sweetness to balance the crust.
- For the Cheesecake Filling:
- 4 (8-ounce) blocks full-fat cream cheese, room temperature: The essential star of the show for a rich and creamy texture.
- 1 1/2 cups granulated sugar: Sweetens the filling without making it grainy.
- 1 cup full-fat sour cream, room temperature: The secret weapon for incredible tang and smoothness.
- 1 teaspoon pure vanilla extract: Adds a warm, classic flavor base.
- 4 large eggs, room temperature: They give the cake its structure and richness.
- 1/4 cup all-purpose flour: Just a bit helps stabilize the filling to prevent cracks.
Step by Step Method
- Prep your pan and oven. Preheat your oven to 325°F (163°C). Wrap the outside of a 9-inch springform pan tightly with a double layer of heavy-duty aluminum foil. This is our insurance policy against any water from the water bath seeping in. Then, lightly grease the inside of the pan.
- Make the crust. In a medium bowl, mix the graham cracker crumbs, melted butter, and sugar until it resembles wet sand. Press the mixture firmly and evenly into the bottom and about halfway up the sides of your prepared pan. Bake forli>
- Start the filling. In a large bowl, beat the room-temperature cream cheese with an electric mixer on medium speed until it’s completely smooth and creamy. This should take about 2 minutes. Scrape down the bowl well.
- Add sugar and flavor. Gradually beat in the sugar until it’s fully incorporated. Then, beat in the sour cream and vanilla extract.
- Incorporate eggs and flour. Add the eggs one at a time, beating on low speed just until the yolk disappears into the mixture after each addition. Over-beating the eggs incorporates too much air, which can lead to cracks. Finally, beat in the flour just until it’s combined. Be careful not to overmix.
- Prepare for the water bath. Bring a kettle or pot of water to a boil. Place your foil-wrapped springform pan into a larger roasting pan. Pour the cheesecake filling into the cooled crust.
- Bake. Carefully place the roasting pan in the preheated oven. Pour the boiling water into the roasting pan around the springform pan until it comes about halfway up the sides. This water bath is the magic trick for that perfect, creamy texture and crack-free top.
- Bake for 1 hour to 1 hour and 15 minutes. The edges will look set, but the center will still have a slight jiggle when you gently shake the pan. That’s exactly what you want.
- Cool slowly. Turn the oven off, crack the oven door open, and let the cheesecake cool inside the oven for 1 hour. This gradual cooling is another key step to prevent cracking.
- Chill. Remove the cheesecake from the oven and water bath, then run a thin knife around the edge of the pan to loosen it. Let it cool to room temperature on a wire rack, then cover and refrigerate for at least 8 hours, or ideally overnight, before slicing and serving.
Creative Variations on Cheesecake
The beauty of a great base recipe is how easily you can dress it up. For a chocolate lover’s dream, swirl in a cup of melted and cooled semi-sweet chocolate into the filling before baking. If you adore those no bake cheesecake recipes but want the firmness of a baked one, fold a cup of whipped cream into the filling for an extra fluffy texture. For a Biscoff cheesecake twist, simply replace the graham crackers with crushed Biscoff cookies in the crust. And the world of cheesecake toppings is your oyster—from a simple berry compote to a rich chocolate ganache or a drizzle of salted caramel.
Make-Ahead & Freezer Tips
This dessert is a dream for planning ahead. You can bake the cheesecake up to 3 days in advance and keep it tightly covered in the refrigerator until you’re ready to serve. It also freezes beautifully for up to 3 months. To freeze, place the cooled cheesecake (without any toppings) on a baking sheet and freeze until solid, about 4-6 hours. Then, wrap it tightly in two layers of plastic wrap and a layer of aluminum foil. Thaw it overnight in the refrigerator before serving.
Serving Ideas & Pairings for Cheesecake
A plain slice is perfection, but a few additions can make it a real showstopper. Fresh berries or a quick strawberry sauce are classic cheesecake desserts for a reason—that tart fruit cuts through the richness perfectly. For a decadent touch, top it with hot fudge and a handful of toasted pecans. A dollop of freshly whipped cream is never a bad idea. And if you’re thinking about other cheesecake cake recipes, try layering slices with chocolate cake crumbs and frosting for a incredible dessert trifle.
Storage & Reheating Tips
Store any leftovers covered tightly in the refrigerator for up to 5 days. Cheesecake is best served cold straight from the fridge. I don’t recommend reheating it, as that can change its beautiful texture. For individual mini desserts, you can bake the batter in a muffin tin lined with liners (just reduce the baking time significantly!) for easy, single-serve portions.
FAQs About Classic Cheesecake
- Why did my cheesecake crack? The most common culprits are overmixing the batter (which adds too much air), a sudden temperature change, or overbaking. Using a water bath and cooling the cake slowly in the turned-off oven are your best defenses against cracks. But hey, even if it cracks, it still tastes amazing—just cover it with whipped cream or fruit!
- Can I make this without a water bath? You can, but I really don’t recommend it for the best cheesecake recipe results. The water bath provides gentle, even heat that cooks the cheesecake slowly and prevents the edges from overcooking before the center is done. It’s the key to that professional, creamy texture.
- How do I get clean slices? For those picture-perfect slices, dip a sharp knife in hot water, wipe it dry, and then make your cut. Repeat this dipping and wiping between every single slice for a gorgeous cheesecake aesthetic.
- What’s the best cream cheese to use? Always use full-fat, brick-style cream cheese for baking. The spreadable kind in tubs has different stabilizers and a higher water content, which can throw off the texture of your final bake.
There you have it, friends—your guide to creating a truly unforgettable Classic Bakery-Style Cheesecake with Buttery Graham Crust. It’s a labor of love that pays off in spades with every creamy, dreamy bite.