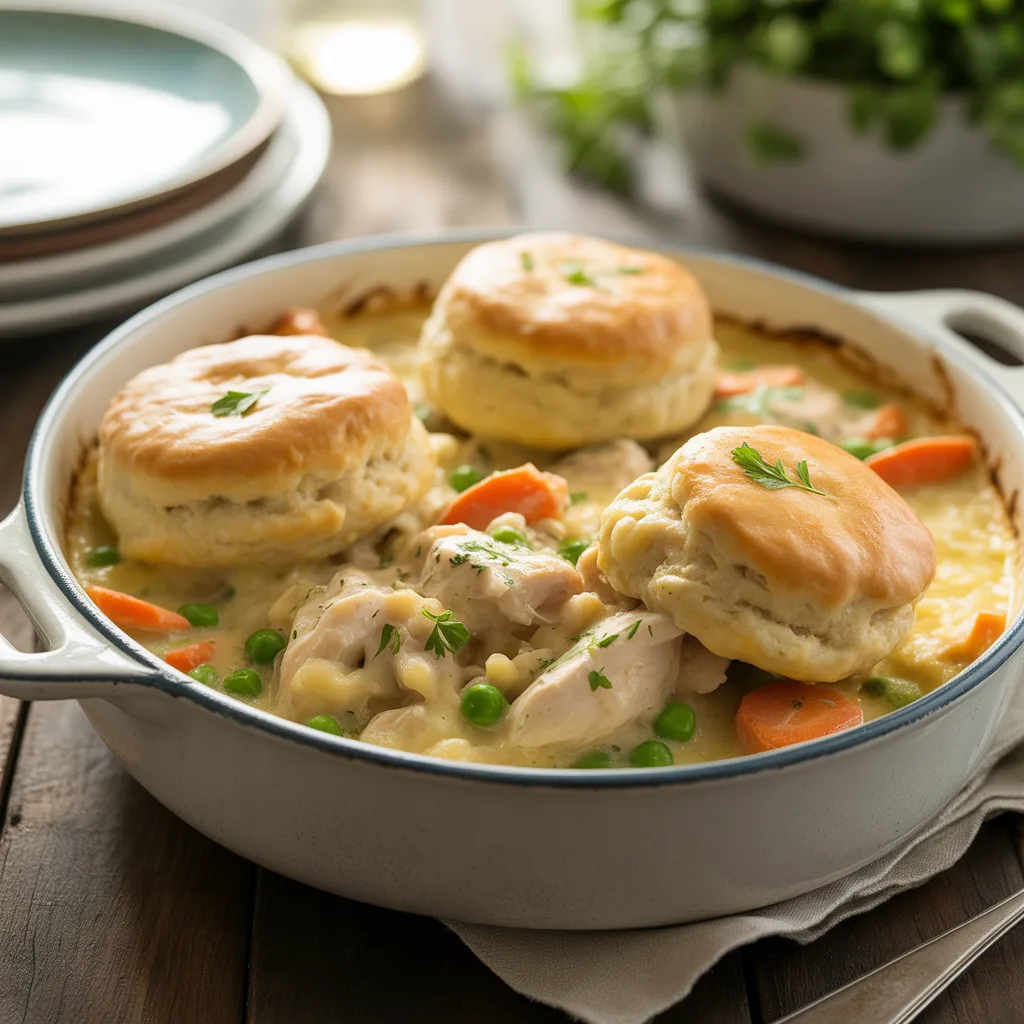
Is there anything that feels more like a warm hug from your kitchen than a Classic Chicken & Biscuit Bake? It’s that quintessential comfort food, the kind that makes everybody gather around the table the second they smell it. Picture this: a creamy, savory filling packed with tender chicken and vegetables, all topped with flaky, golden-brown biscuits that bake right on top. It’s a complete meal in one dish, and it’s the kind of recipe that feels fancy but is honestly so approachable. It’s a modern take on the pot pie, born from the need to get a wholesome, delicious dinner on the table without a mountain of fuss. Pure comfort.
Why You’ll Love This Comforting Meal
You’re going to love this dish because it just works. It’s the ultimate answer to your dinner ideas for comfort foods, delivering on every promise. It’s incredibly filling and satisfying, turning simple ingredients into a meal that feels special. And talk about yummy meals! The combination of that rich, herby filling and the buttery biscuit topping is just perfection. It’s also deceptively simple, requiring mostly pantry staples and minimal prep work. You can even use a rotisserie chicken to make it even quicker. So much flavor for so little effort. A total weeknight hero.
Ingredients
- 3 cups cooked chicken, shredded or cubed (from a rotisserie chicken or 2 large cooked breasts)
- 1/4 cup unsalted butter (for that rich, savory base)
- 1 medium yellow onion, diced (adds a sweet, aromatic depth)
- 2 celery stalks, diced (for a classic flavor and a bit of crunch)
- 2 medium carrots, diced (brings sweetness and color)
- 2 cloves garlic, minced (essential for that flavor foundation)
- 1/3 cup all-purpose flour (to thicken our creamy sauce)
- 2 cups chicken broth (forms the liquid base of our sauce)
- 1 cup whole milk or half-and-half (creates a luxuriously creamy texture)
- 1 cup frozen peas (adds a pop of color and sweetness)
- 1 teaspoon dried thyme (for that earthy, comforting herb note)
- 1/2 teaspoon poultry seasoning (elevates the chicken flavor)
- Salt and black pepper to taste
- 1 (16 oz) can of refrigerated biscuit dough (our easy, flaky topping)
Step-By-Step Method
- First, preheat your oven to 375°F (190°C) and grab a 9×13 inch baking dish. You don’t need to grease it.
- In a large skillet or Dutch oven, melt the butter over medium heat. Add your diced onion, celery, and carrots. Cook them for about 6-8 minutes, stirring now and then, until the onions are see-through and the veggies have started to soften. Toss in the garlic and cook for one more minute until it’s fragrant.
- Sprinkle the flour over the vegetable mixture. Stir constantly for about a minute to cook off the raw flour taste. It’ll look pasty, and that’s exactly what you want.
- Slowly pour in the chicken broth and milk, stirring continuously. Keep stirring until the mixture is smooth and begins to thicken. This should take 3-5 minutes. Bring it to a gentle simmer.
- Take the skillet off the heat. Stir in the shredded chicken, frozen peas, dried thyme, poultry seasoning, and a good amount of salt and pepper. Give it a taste. Does it need more salt? More pepper? Adjust it now. Pour this delicious filling into your waiting baking dish.
- Open your can of biscuits and place them evenly on top of the chicken mixture. You should get about 8 biscuits.
- Pop the dish into the preheated oven and bake for 20-25 minutes. You’re looking for the filling to be bubbly around the edges and the biscuits to be a beautiful golden brown on top.
- Let it sit for about 5-10 minutes before serving. This lets the filling set up a bit so it’s not too soupy. Then, dig in!
Oven Temperatures for Perfect Baking
Getting the oven temp right is key for this Classic Chicken & Biscuit Bake. A steady 375°F (190°C) is the sweet spot. It’s hot enough to cook the biscuit dough all the way through, giving you a fluffy interior, while also browning the top to a perfect golden crunch. And it’s gentle enough that the creamy filling underneath bubbles and heats through without burning or boiling over. If you find your biscuits are browning a little too fast, you can loosely tent the dish with a piece of foil for the last 5-10 minutes of baking. But honestly, I rarely need to.
Creative Variations for Your Bake
This recipe is a wonderful canvas for your own tasty meals. Feel free to get creative!
- Cheesy Delight: Stir a cup of shredded sharp cheddar cheese into the filling right before you add the biscuits. You could even sprinkle a little extra on top of the biscuits halfway through baking.
- Veggie Swap: Not a fan of peas? Try chopped green beans, corn, or even some sliced mushrooms sautéed with the other veggies.
- Herb Garden: Fresh herbs make everything better. Swap the dried thyme for a tablespoon of fresh chopped thyme or rosemary.
- A Little Zing: Add a splash of balsamic vinegar to the filling along with the broth for a subtle, complex tang that cuts through the richness.
- From Scratch: If you have a little extra time, homemade drop biscuits are fantastic. Just whip up a simple dough from flour, baking powder, cold butter, and milk.
Storage Tips for Leftovers
This bake makes fantastic leftovers! Let it cool completely, then cover the baking dish tightly with plastic wrap or aluminum foil, or transfer portions to airtight containers. It’ll keep in the fridge for 3-4 days. To reheat, I find the oven is best for keeping the biscuits from getting soggy. Warm it in a 350°F oven for about 15-20 minutes, until heated through. You can microwave individual portions for a quick fix, but the biscuits will soften. It also freezes well before baking. Assemble the dish but don’t add the biscuit topping. Cover and freeze. When you’re ready, thaw it in the fridge overnight, add the biscuits, and bake as directed, adding a few extra minutes if needed.
Serving Ideas & Pairings
This truly is a complete meal, but a little something on the side never hurts. A simple, crisp green salad with a tangy vinaigrette is my go-to because it balances the richness of the bake perfectly. For a real down-home feast, some garlicky sautéed green beans or roasted broccoli would be delicious. And if you’re serving a crowd at a potluck, this dish is always a star. Just be prepared to share the recipe!
Doneness Test for Chicken
If you’re cooking your own chicken instead of using a rotisserie bird, getting it just right is crucial. The safest and most accurate way to know if chicken is done is to use an instant-read thermometer. You’re aiming for an internal temperature of 165°F (74°C) in the thickest part of the meat. If you don’t have a thermometer, pierce the chicken with a fork. The juices should run completely clear, not pink. And the meat should be white all the way through with no translucent or pinkish areas. So, so tender when it’s cooked just right.
FAQs About Classic Chicken & Biscuit Bake
- Can I use canned biscuits? Absolutely! They are the shortcut that makes this one of those quick food recipes we all love. They bake up fluffy and golden and save you a ton of time.
- Can I make this ahead of time? You sure can. Prep the filling up to a day ahead, store it covered in the fridge, and then just top with the biscuits and bake when you’re ready. It might need a few extra minutes in the oven since it’s starting cold.
- My filling is too thin. How can I thicken it? If it’s still on the stove, let it simmer a bit longer. If it’s already baked, you can mix a tablespoon of cornstarch with two tablespoons of cold water and stir it into the hot filling, then return it to the oven for a few minutes to bubble and thicken.
- What’s the best way to get good looking food for serving? Let it rest! Those 5-10 minutes after it comes out of the oven are crucial. It allows the sauce to set, making it much easier to scoop out neat, beautiful portions instead of a soupy mess.