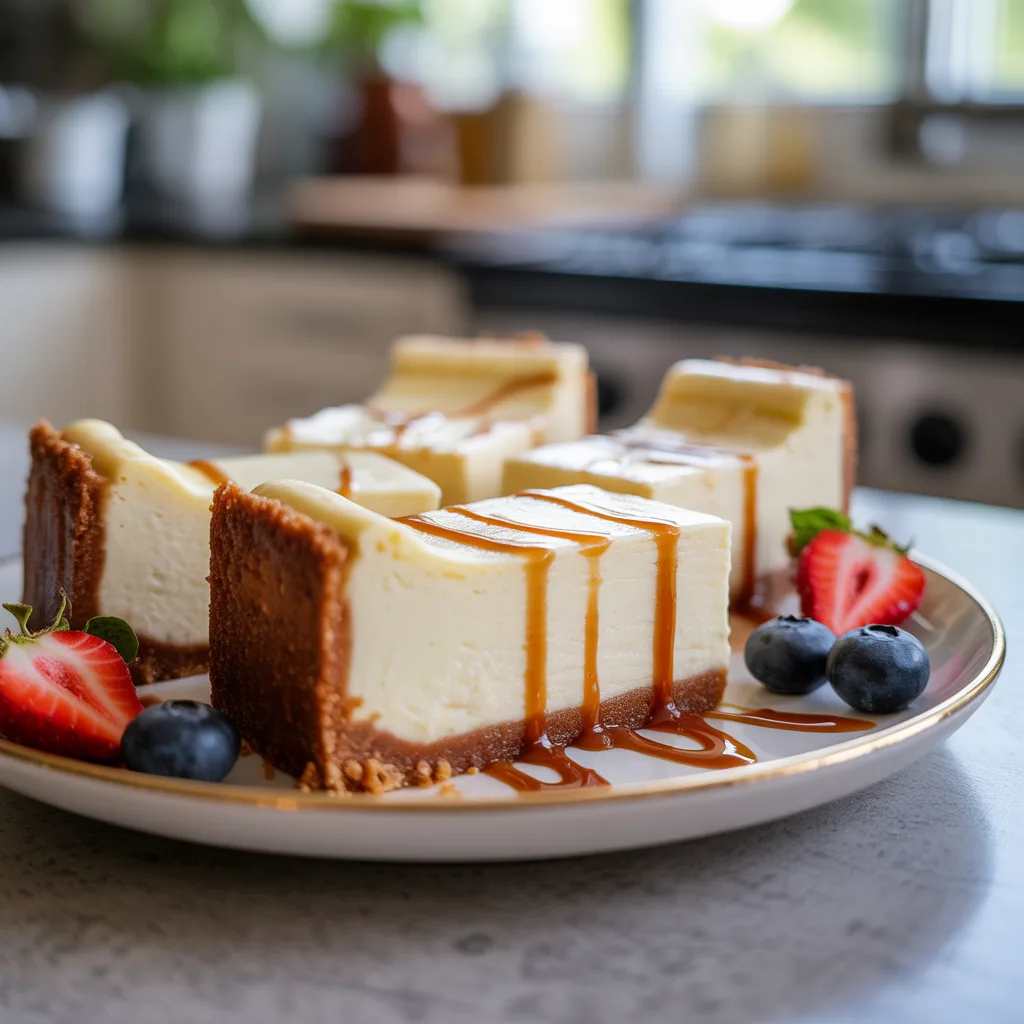
Let’s be real, sometimes you just need a little slice of heaven without the fuss of a whole cheesecake. Am I right? That’s where these dreamy Creamy Vanilla Cheesecake Bars come in. They’ve got all the rich, velvety goodness you crave, but they’re baked in a simple pan and cut into fuss-free bars. No water bath, no fancy springform pan. Just straightforward, oven-friendly baking that delivers a seriously impressive treat. Whether it’s a last-minute potluck or a just-because Tuesday, this recipe is your new best friend.
Why You’ll Love This
You’ll love this recipe because it’s the definition of easy desserts with few ingredients. We’re talking about a short list of things you probably already have in your kitchen. The crust is a simple press-in situation—no rolling pin required. And the filling? It’s creamy, it’s smooth, and it bakes up perfectly every time. These bars are the ultimate cross between a classic cheesecake and a no-brainer bar cookie. So good.
Equipements Needed
- One 8×8 inch baking pan: The perfect size for thick, satisfying bars.
- Parchment paper: For the easiest cleanup and removal you’ve ever seen.
- Medium mixing bowl: For whipping up that buttery crust.
- Large mixing bowl and electric mixer: To get that filling silky smooth without breaking a sweat.
- Rubber spatula: To scrape every last bit of deliciousness into the pan.
- Measuring cups and spoons: For keeping things simple and accurate.
Ingredients
- For the Crust:
- 1 ½ cups graham cracker crumbs: This gives us that classic, slightly sweet base we all love.
- 6 tablespoons unsalted butter, melted: This acts as the glue, holding our crust together perfectly.
- 2 tablespoons granulated sugar: Just a touch to sweeten the deal.
- For the Filling:
- 16 ounces (two blocks) full-fat cream cheese, softened: This is the star, so room temperature is key for a lump-free filling.
- ⅔ cup granulated sugar: Sweetens the cheesecake without making it overly sweet.
- 2 large eggs, room temperature: They help set the filling as it bakes for that perfect texture.
- 1 ½ teaspoons pure vanilla extract: The secret to that warm, classic flavor we’re after.
- ½ cup sour cream, room temperature: The magic ingredient for an extra layer of creaminess and a slight tang.
- A tiny pinch of salt: To balance all the sweetness and make the flavors pop.
Step By Step
- First, preheat your oven to 325°F (163°C). Line your 8×8 pan with parchment paper, letting the edges hang over two sides. This creates handles so you can lift the whole slab of cheesecake out later. A little spritz of cooking spray on the pan under the paper helps it stay put.
- Make the crust. In your medium bowl, stir together the graham cracker crumbs, the 2 tablespoons of sugar, and the melted butter. Keep mixing until the crumbs are evenly moist and look like wet sand.
- Press the crust mixture firmly and evenly into the bottom of your prepared pan. I like to use the flat bottom of a measuring cup to really pack it down. Bake this for 10 minutes, then set it on a wire rack to cool slightly while you make the filling.
- Now, for the creamy part. In your large bowl, beat the softened cream cheese with an electric mixer on medium speed until it’s completely smooth. This should take about 1-2 minutes. Scrape down the sides of the bowl.
- Add the ⅔ cup of sugar and beat again until everything is well combined and creamy.
- Beat in the eggs, one at a time, making sure the first egg is fully incorporated before adding the next. Scrape the bowl again.
- Mix in the vanilla extract, sour cream, and that tiny pinch of salt. Beat on low speed just until the batter is smooth and uniform. Be careful not to overmix!
- Pour the filling over your slightly cooled crust and spread it out evenly with a spatula.
- Bake for 35-40 minutes, or until the edges are set but the center still has a slight jiggle when you gently shake the pan. It will firm up as it cools.
- Let the cheesecake cool completely in the pan on a wire rack. Then, cover it and refrigerate for at least 4 hours, but honestly, overnight is best. This patience is the secret to getting clean slices.
- Once it’s thoroughly chilled, use the parchment paper handles to lift the whole block out of the pan. Place it on a cutting board and slice into bars with a sharp knife dipped in hot water.
Oven Temperatures
This recipe is designed for a standard conventional oven at 325°F (163°C). If you have a convection oven, you can reduce the temperature to 300°F (149°C). The baking time might be slightly less, so start checking for that perfect jiggle around the 30-minute mark. All ovens run a little different, so knowing your own is the best tool you have.
Variations & Substitutions
- Chocolate Desserts Twist: For a swirl, melt ½ cup of chocolate chips with a teaspoon of oil, let it cool slightly, then dollop it over the filling and swirl with a knife before baking.
- Lemon Bliss: Replace the vanilla with 2 tablespoons of fresh lemon juice and a tablespoon of zest for a bright, sunny flavor.
- Berry Swirl: Swirl in ¼ cup of your favorite seedless berry jam before baking.
- Gluten-Free: Use gluten-free graham crackers for the crust.
- Lighter Option: You can use reduced-fat cream cheese and sour cream, but honestly, the texture will be a bit less rich and creamy. It still makes for a yummy food experience, just a little different.
Serving Ideas & Pairings
These creamy vanilla cheesecake bars are fantastic all on their own. But if you want to dress them up, a handful of fresh berries, a drizzle of caramel or chocolate sauce, or even a dollop of whipped cream takes them to the next level. They’re the perfect ending to a busy weeknight dinner, but fancy enough for a weekend gathering. For a fun twist on mini desserts, just cut them into smaller squares. They pair wonderfully with a hot cup of coffee or a glass of cold milk.
Storage & Reheating
Store these delicious desserts in an airtight container in the refrigerator for up to 5 days. They also freeze beautifully! Wrap individual bars tightly in plastic wrap and then place them in a freezer bag. They’ll keep for up to 2 months. Thaw in the fridge overnight before serving. There’s no need to reheat—they are best enjoyed cold straight from the fridge.
Frequently Asked Questions
Can I use low-fat cream cheese? You can, but the texture won’t be as rich or firm. For the creamiest result, I really recommend full-fat.
Why do all my ingredients need to be at room temperature? This is the #1 tip for avoiding a lumpy filling! Room temp ingredients blend together smoothly and create that dreamy, creamy texture we’re after.
Can I make these into Mini Desserts? Absolutely! You can bake this in a muffin tin lined with paper liners. Just reduce the baking time to about 15-20 minutes.
Are these considered Healthy Desserts? Well, they’re a treat, for sure. But making them at home means you control the ingredients, and a little square of something this satisfying can be part of a balanced approach. For breakfast ideas, I’d say these are a special weekend treat, not an everyday start.
My center jiggles a lot—is it done? Yes! You want that jiggle. It should look set around the edges but wobble like Jell-O in the middle. It will firm up perfectly in the fridge. Taking it out too late can lead to cracking.