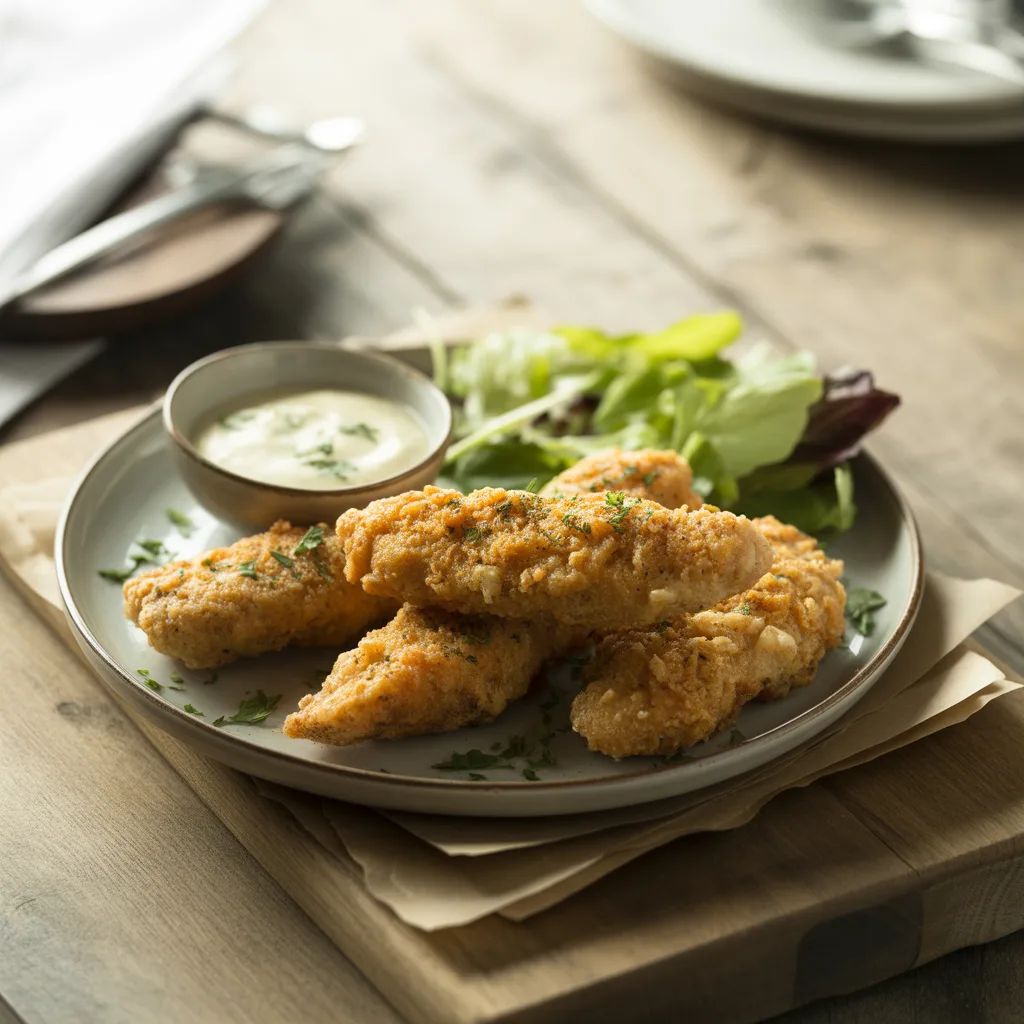
Is there anything better than a plate of golden-brown, juicy chicken tenders? They’re the ultimate dinner peace treaty in my house, pleasing even the pickiest of eaters. But let’s be real, the frozen bagged kind can only get you so far. What if I told you that whipping up your very own Crispy Parmesan Chicken Tenders is easier than you think, and about a hundred times more delicious? We’re talking a crispy, cheesy, flavor-packed crust that gives you that perfect crunch when you bite into it. Plus, my method is pretty much foolproof. So, grab your baking sheet, and let’s get cooking!
Why You’ll Love This
You’re going to adore these homemade chicken tenders for so many reasons. First up, they’re baked, not fried, which means less mess and a little less guilt for those comforting meals we all crave. The combination of panko breadcrumbs and real Parmesan cheese creates a crust that’s shatteringly crisp and packed with savory flavor. It’s a simple recipe that delivers seriously yummy meals on a busy weeknight. And honestly, the smell that fills your kitchen while these are baking? Pure happiness. It’s one of those delicious food recipes that feels like a warm hug.
Equipements Needed
- Rimmed Baking Sheet: Essential for catching any drips and giving the tenders plenty of room to get crispy.
- Parchment Paper or a Silicone Baking Mat: This is my non-stick secret weapon for easy cleanup. Trust me on this one.
- Three Shallow Dishes: You’ll need these for the classic breading station—think pie plates or wide soup bowls.
- Whisk or Fork: For mixing up your wet ingredients.
- Tongs: Your best friend for flipping those tenderloins without losing any of that precious coating.
- Meat Thermometer (optional but helpful): For perfect doneness every single time.
Ingredients
- 1 ½ pounds chicken tenderloins: The star of our show, ready to be coated in goodness.
- 1 cup all-purpose flour: The first layer that helps everything else stick.
- 1 teaspoon garlic powder: For that essential savory backbone.
- 1 teaspoon smoked paprika: Adds a subtle depth and beautiful color for that good looking food finish.
- 1 ½ cups panko breadcrumbs: The key to an extra crispy, crunchy crust.
- 1 cup grated Parmesan cheese: Use the real stuff from the refrigerated section for the best flavor.
- 1 teaspoon Italian seasoning: A little herbaceous flair that makes it all sing.
- 2 large eggs: Binds the breading to the chicken.
- ¼ cup milk or buttermilk: Creates the wet dip for the perfect adhesive.
- ½ teaspoon salt: To season every single bite.
- ¼ teaspoon black pepper: A little kick to balance the richness.
- Cooking spray or 2 tablespoons olive oil: To help the breading turn that gorgeous golden brown.
Step By Step
- First, preheat your oven to 400°F (200°C). Line that baking sheet with parchment paper and give it a quick spritz with cooking spray. This is our no-stick insurance policy.
- Now, set up your breading station. You’ve got three dishes. In the first one, whisk together the flour, garlic powder, smoked paprika, salt, and pepper. In the second dish, beat the eggs and milk (or buttermilk) until they’re totally smooth. In the third and final dish, stir together the panko, Parmesan cheese, and Italian seasoning. See? Organized and ready for action.
- Time for the fun part! Take one chicken tender and dredge it in the flour mixture, making sure it’s lightly coated on all sides. Give it a little shake to get rid of any extra flour.
- Next, dip the floured tender into the egg mixture, letting any excess drip back into the bowl. You want it wet, but not drowning.
- Finally, press the tender firmly into the panko-Parmesan mixture. Really get it in there! You want a nice, even, thick coating. Place the finished tender on your prepared baking sheet. Repeat with all the remaining chicken, giving them a little space on the pan so they crisp up nicely.
- Lightly spray the tops of all the tenders with cooking spray or drizzle with olive oil. This is the magic step for that beautiful, browned crunch.
- Bake for 15-18 minutes, then carefully flip each tender over. Bake for another 5-10 minutes, or until the coating is deep golden brown and the chicken is cooked through. The internal temperature should read 165°F on a meat thermometer. And if you don’t have one, just cut into the thickest part of the biggest tender—the juices should run clear, with no pink in sight.
- Let them rest on the pan for about 5 minutes before serving. This helps the crust set and keeps it super crispy.
Serving Ideas & Pairings
These tenders are the ultimate blank canvas for tasty meals. My family loves them with a big side of creamy mashed potatoes and some simple steamed green beans. It’s the definition of dinner ideas comfort foods. For a lighter option, they’re fantastic on top of a crisp garden salad with a lemony vinaigrette. And you can’t go wrong with classic dipping sauces! Marinara, honey mustard, ranch, or even a quick aioli are all winners. So good. They also make for fun and interesting food recipes when you chop them up and toss them into a wrap or on top of a rice bowl for lunch the next day.
Variations & Substitutions
Don’t be afraid to make these your own! That’s the beauty of homemade comfort food.
- Gluten-Free: Swap the all-purpose flour for a 1:1 gluten-free flour blend and use gluten-free panko breadcrumbs.
- Dairy-Free: Omit the Parmesan cheese and add an extra ¼ cup of panko with a pinch of salt. Use a dairy-free milk alternative.
- Spicy Kick: Add ½ teaspoon of cayenne pepper or a dash of hot sauce to the egg mixture. Honestly, if you hate heat, skip the cayenne.
- Italian Herbs: Add a tablespoon of chopped fresh parsley or basil to the panko mixture for a brighter flavor.
- Different Crunch: Swap half the panko for crushed cornflakes or crackers for a different texture.
Storage & Reheating
Leftovers? Let the tenders cool completely, then store them in an airtight container in the fridge for up to 3 days. To freeze, place the cooled tenders in a single layer on a parchment-lined baking sheet and freeze until solid. Then, transfer them to a freezer bag. They’ll keep for up to 2 months. To reheat, the oven or an air fryer is your best bet for keeping that crispiness. Bake at 375°F for about 10-12 minutes (15-18 if frozen), or air fry at 375°F for 3-5 minutes (5-8 if frozen), until hot and crispy. Microwaving will work in a pinch, but the crust will get a bit soft.
Frequently Asked Questions
- Can I use chicken breasts instead of tenders? Absolutely! Just slice boneless, skinless chicken breasts into 1-inch thick strips. You might need to add a minute or two to the baking time.
- Why are my tenders not crispy? The most common culprit is crowding the pan. Give them space! Also, make sure you pressed the coating on firmly and used that little bit of oil or cooking spray.
- Can I make these ahead of time? You can set up the breading station and even coat the tenders a few hours ahead. Keep them in a single layer on the baking sheet in the fridge until you’re ready to bake. This is a great trick for quick food recipes on a crazy night.
- What’s the best dipping sauce? Oh, that’s a matter of taste! My personal favorite is a mix of ranch dressing with a little squirt of sriracha. But marinara is a classic for a reason.