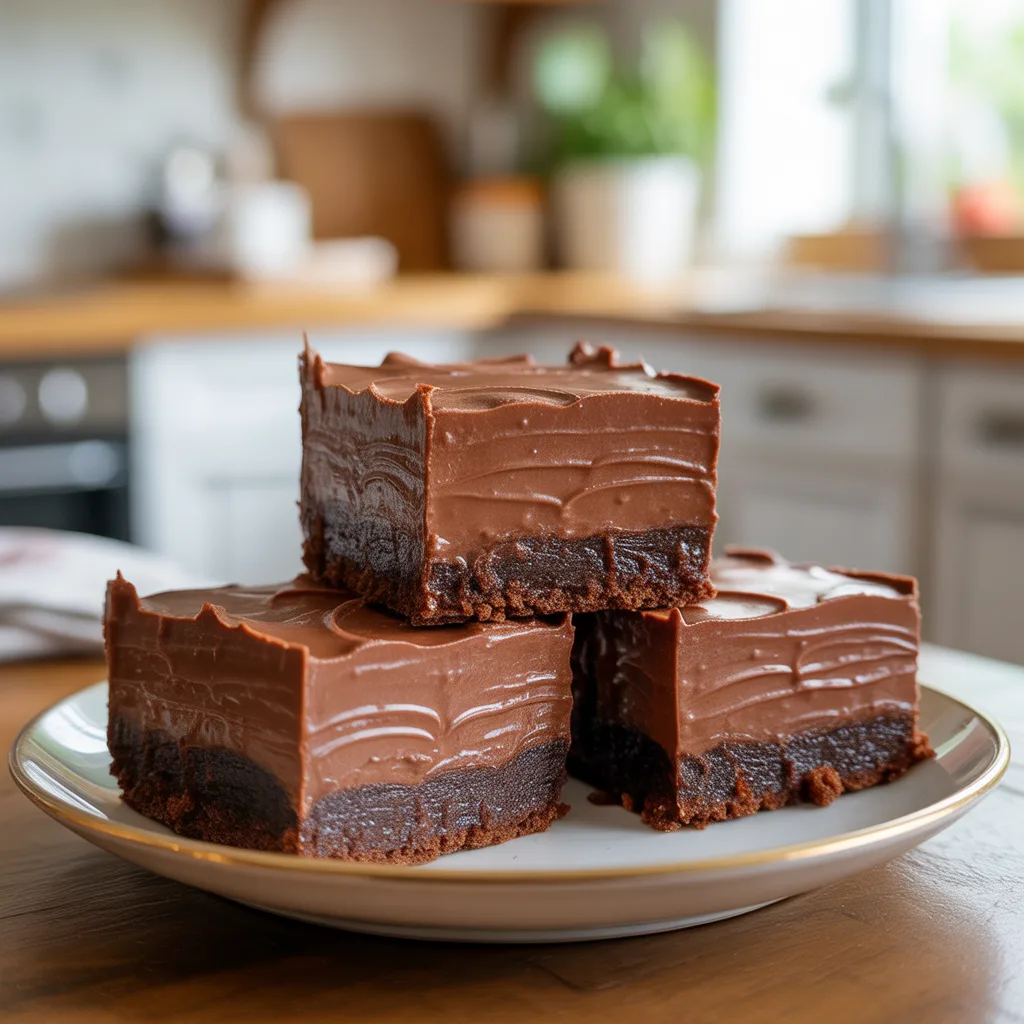
You know those days when just the thought of making a pie crust feels like too much? When you’re craving something decadent and chocolatey but your energy is running on empty? That’s precisely where these Easy Chocolate Cream Pie Bars come in. They deliver all the creamy, dreamy satisfaction of a classic cream pie but without the fuss. Honestly, I think these might just become your new secret weapon for potlucks, last-minute treats, or those “I just need a little something sweet” moments. Who can resist a dessert that’s this simple and satisfying?
Why You’ll Love This
You’ll love this recipe because it’s incredibly forgiving. No special skills are required here. The crust is a simple press-in situation, and the filling comes together in minutes. It’s the kind of recipe that feels like a hug in a baking dish—comforting, reliable, and always welcome. Plus, it uses mostly pantry-staple ingredients, so you can probably whip it up without an extra trip to the store. So good.
Equipements Needed
You won’t need any fancy gadgets for this one. A standard 9×9 inch baking pan is perfect. You’ll also want some parchment paper to line it for easy removal. A medium mixing bowl, a saucepan for melting, a whisk, and a spatula are pretty much all it takes. A hand mixer can make the filling extra smooth, but a little elbow grease with a whisk works just fine, too.
Ingredients
- 1 ½ cups finely crushed chocolate wafer cookies (about 30 cookies) – for that sturdy, no-roll crust
- 6 tablespoons melted butter – to bind the crust together
- 1 cup granulated sugar – for sweetness
- ⅓ cup all-purpose flour – to thicken the filling perfectly
- ¼ teaspoon salt – to balance the sweetness
- 3 large eggs – the base of our rich, custardy filling
- 1 ½ teaspoons vanilla extract – for that warm, classic flavor
- ½ cup unsalted butter, melted – for a super rich and silky texture
- 4 ounces semi-sweet chocolate, melted and slightly cooled – for deep chocolate flavor
- Optional: Whipped cream or chocolate shavings for serving – because a little flair is always fun
Step By Step
- First, heat your oven to 350°F (175°C). Line your 9×9 inch baking pan with parchment paper, leaving some overhang on two sides. This little trick is a lifesaver for getting the bars out later.
- In your mixing bowl, stir together the crushed chocolate cookies and the 6 tablespoons of melted butter until it looks like wet sand. Press this mixture firmly and evenly into the bottom of your prepared pan. Pop it in the oven for 8 minutes. This pre-bakes the crust just enough so it stays crisp.
- While the crust is baking, whisk the sugar, flour, and salt together in a large bowl. Add the eggs and vanilla and whisk until everything is smooth and well-combined.
- Slowly whisk in the ½ cup of melted butter and the melted chocolate until the filling is glossy and uniform. It will be thin, and that’s exactly what you want.
- Carefully pour the filling over the hot crust. It might jiggle a bit—that’s okay! Return the pan to the oven and bake for 25-30 minutes. The edges should be set, but the center will still have a slight wobble. It will firm up as it cools.
- Let the pan cool completely on a wire rack, then cover it and refrigerate for at least 4 hours, or ideally overnight. This chilling time is non-negotiable for that perfect, sliceable texture.
- Once chilled, use the parchment paper to lift the entire slab out of the pan. Place it on a cutting board and slice into bars with a sharp knife. Serve cold!
Easy Dessert Tips For Success
- Don’t skip the chilling step. I know it’s tempting to dig in, but this is what gives you those clean, beautiful slices.
- For super neat cuts, wipe your knife clean between each slice.
- If your crust seems crumbly when you’re pressing it in, add one more tablespoon of melted butter.
- Feel free to use a pre-made chocolate cookie crust if you’re in a real pinch. No judgment here!
- For an extra touch, sprinkle a little flaky sea salt on top right before serving. It makes the chocolate flavor pop.
- And if you’re feeling fancy, a dollop of whipped cream never hurts. Never.
Ways To Customize Your Bars
The beauty of these Easy Chocolate Cream Pie Bars is how easily you can make them your own. For a minty twist, add a ¼ teaspoon of peppermint extract to the filling. Love coconut? Toast some shredded coconut and sprinkle it over the filling before baking. You could even swirl in a couple tablespoons of peanut butter or caramel sauce for a fun surprise. For a nutty crunch, press some chopped pecans or almonds into the crust along with the cookie crumbs. The possibilities are pretty much endless.
Storage & Reheating
Store these bars covered tightly in the refrigerator. They’ll keep beautifully for up to 4 days. You can also freeze them for up to 3 months. Just place the bars in a single layer on a parchment-lined baking sheet to freeze solid, then transfer them to a freezer bag. Thaw in the fridge overnight before serving. There’s no need to reheat—they are best enjoyed cold straight from the fridge.
Serving Ideas & Pairings
These bars are rich, so a small square is often plenty. They are fantastic all on their own, but a cup of strong black coffee or a glass of cold milk is the perfect partner to cut through the richness. For a special occasion, serve them alongside a scoop of vanilla bean ice cream. The contrast between the cold, creamy bar and the slightly melty ice cream is just divine. They also make for lovely, portable treats packed in a lunchbox for a sweet surprise.
Frequently Asked Questions
- Can I use a different type of cookie for the crust? Absolutely! Graham crackers work wonderfully for a sweeter crust. Oreos (filling and all) would also be delicious for a double-chocolate version.
- My filling sank a little in the middle after baking. Is that okay? Yes, that’s completely normal. It might sink slightly as it cools, creating a denser, fudgier layer. It’s part of the charm!
- Can I make these gluten-free? You sure can. Just use a certified gluten-free chocolate cookie for the crust and a 1-to-1 gluten-free flour blend in the filling.
- I don’t have semi-sweet chocolate. What can I use? You can use an equal amount of dark or milk chocolate chips. The flavor will be a bit different, but it will still be delicious. These Easy Chocolate Cream Pie Bars are a testament to the fact that the best desserts don’t have to be complicated.