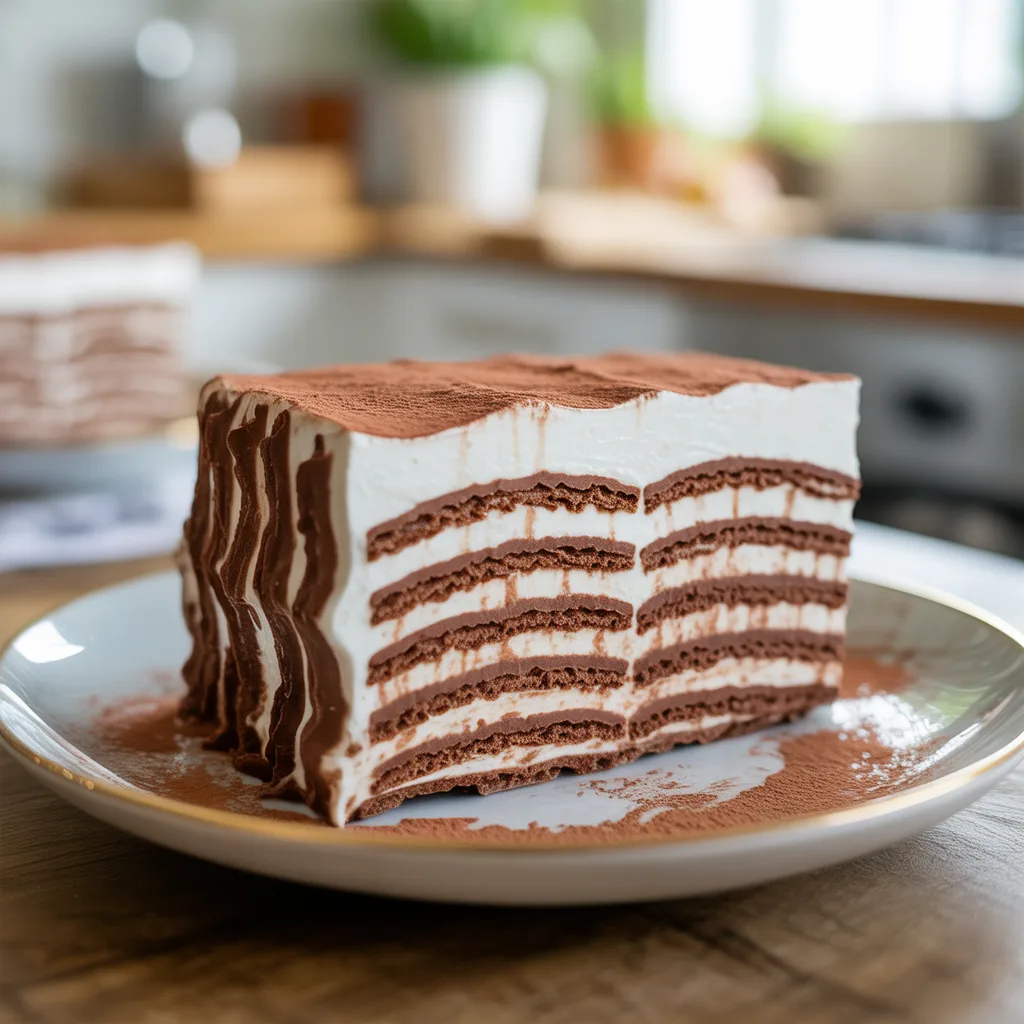
Is there anything more magical than a dessert that basically makes itself while you’re busy doing a million other things? I don’t think so. This Easy Chocolate Wafer Icebox Cake (Slice & Serve) is a throwback treasure that my own Memaw used to whip up when a crowd was coming. It’s the ultimate no-bake wonder, relying on a simple magic trick: crisp chocolate wafers turning impossibly soft and cake-like after a long, cozy nap in the fridge. It’s the kind of fuss-free, make-ahead dessert that looks stunning but is secretly one of the simplest things you’ll ever make. So good.
Why You’ll Love This
You’ll love this recipe because it’s the holy grail for busy people. It requires zero baking, uses just a handful of ingredients you can keep on hand, and the final result is an elegant, sliceable dessert that looks like you spent all day in the kitchen. It’s a lifesaver for potlucks, holidays, or those nights when a sweet tooth strikes and you need a solution, fast. The combination of creamy filling and fudgy, softened cookies is a textural dream, a true tribute to yummy food that doesn’t require a culinary degree.
Equipements Needed
- A 9×5-inch Loaf Pan: This gives you the perfect shape for those beautiful, clean slices.
- Plastic Wrap: Essential for lining the pan and making the cake easy to remove.
- Electric Mixer (or strong arms!): To whip the cream into stiff, fluffy peaks.
- Rubber Spatula: For gently folding and spreading without deflating all that airy goodness.
- Offset Spatula or Butter Knife: For getting those sides nice and smooth.
Ingredients
- 2 cups heavy whipping cream: The base for our light yet rich whipped filling.
- 1/4 cup granulated sugar: Just enough sweetness to balance the dark chocolate.
- 1 teaspoon pure vanilla extract: Adds a warm, classic flavor depth.
- 1 (9-ounce) box chocolate wafer cookies: The star of the show that transforms into the “cake” layers.
- Optional: Chocolate shavings or cocoa powder for dusting: For that final aesthetic food touch.
Step By Step
- First, line your 9×5 loaf pan with plastic wrap, letting plenty hang over the sides. This is your secret weapon for a clean release later. Trust me on this.
- In a large bowl, use your electric mixer to beat the heavy cream, sugar, and vanilla on medium-high speed until stiff peaks form. That means when you lift the beaters, the cream stands up in nice, firm points. Don’t go too far or you’ll start making butter!
- Now, spread a thin layer of the whipped cream on the bottom of the prepared pan. This is your foundation.
- Arrange a single layer of chocolate wafers on top of the cream, breaking a few cookies if needed to fill in any gaps. It doesn’t have to be perfect.
- Spread a generous layer of whipped cream over the cookies, completely covering them. Then, add another layer of cookies. You’ll repeat this—cookies, cream, cookies, cream—until you run out of cookies, ending with a final thick layer of whipped cream on top.
- Use your offset spatula to smooth the top. Then, gently fold the overhanging plastic wrap over the top to seal it.
- This is the hard part: patience. Refrigerate the cake for at least 8 hours, but honestly, 24 hours is even better. The cookies need time to soften and become cake-like. It’s a waiting game worth playing.
- To serve, simply unwrap the top, invert the pan onto a serving platter, and peel off the plastic wrap. Slice and enjoy the magic!
Serving Ideas & Pairings
This cake is a star on its own, but a little flourish never hurts. For a beautiful finish, dust the top with cocoa powder or sprinkle on some chocolate shavings right before serving. It adds such a pretty touch and makes it look like it came from a professional bakery. If you’re feeling fancy, a few fresh raspberries or a drizzle of salted caramel on the plate alongside each slice is just divine. It pairs wonderfully with a cup of strong coffee to cut through the sweetness, making it a perfect dessert for a dinner party or a special family treat.
Variations & Substitutions
- Flavor Twists: Add a tablespoon of instant espresso powder to the cream for a mocha kick, or fold in a half-cup of crushed peppermint candies for a holiday version.
- Dairy-Free: Use well-chilled canned coconut cream instead of heavy whipping cream. And look for vegan chocolate wafer cookies.
- Lighter Option: You can use a stabilized whipped topping instead of whipped cream, but honestly, the real cream has a richness that’s just so, so much better.
- Change the Pan: For a classic round cake, use a springform pan and arrange the cookies in concentric circles. It makes for stunning mini desserts when sliced thinly.
Storage & Reheating
This cake is all about make-ahead ease! It will keep beautifully in the refrigerator, tightly covered, for up to 4 days. The texture actually improves over the first day or two. I do not recommend freezing it, as the whipped cream can become grainy and weepy when thawed. Since it’s a no-bake dessert, there’s no reheating involved—just slice and serve straight from the fridge.
Frequently Asked Questions
Can I use different cookies?
Absolutely! While traditional chocolate wafers are classic, you can get creative with other crisp cookies like graham crackers or even biscoff cookies for a different flavor profile. Just know the final texture will be a little different.
My cream isn’t whipping. What’s wrong?
The biggest culprit is usually a warm bowl or cream that isn’t cold enough. For best results, pop your bowl and beaters in the freezer for 15 minutes before you start. And make sure your cream is straight from the fridge.
How do I get perfect slices?
For the cleanest cuts, dip a sharp knife in hot water and wipe it dry between each slice. This is my go-to trick for all my layered dessert food ideas.
Is this one of those easy cakes recipes for beginners?
It absolutely is. If you can whip cream and stack cookies, you can make this stunning dessert. It’s practically foolproof and always impresses.