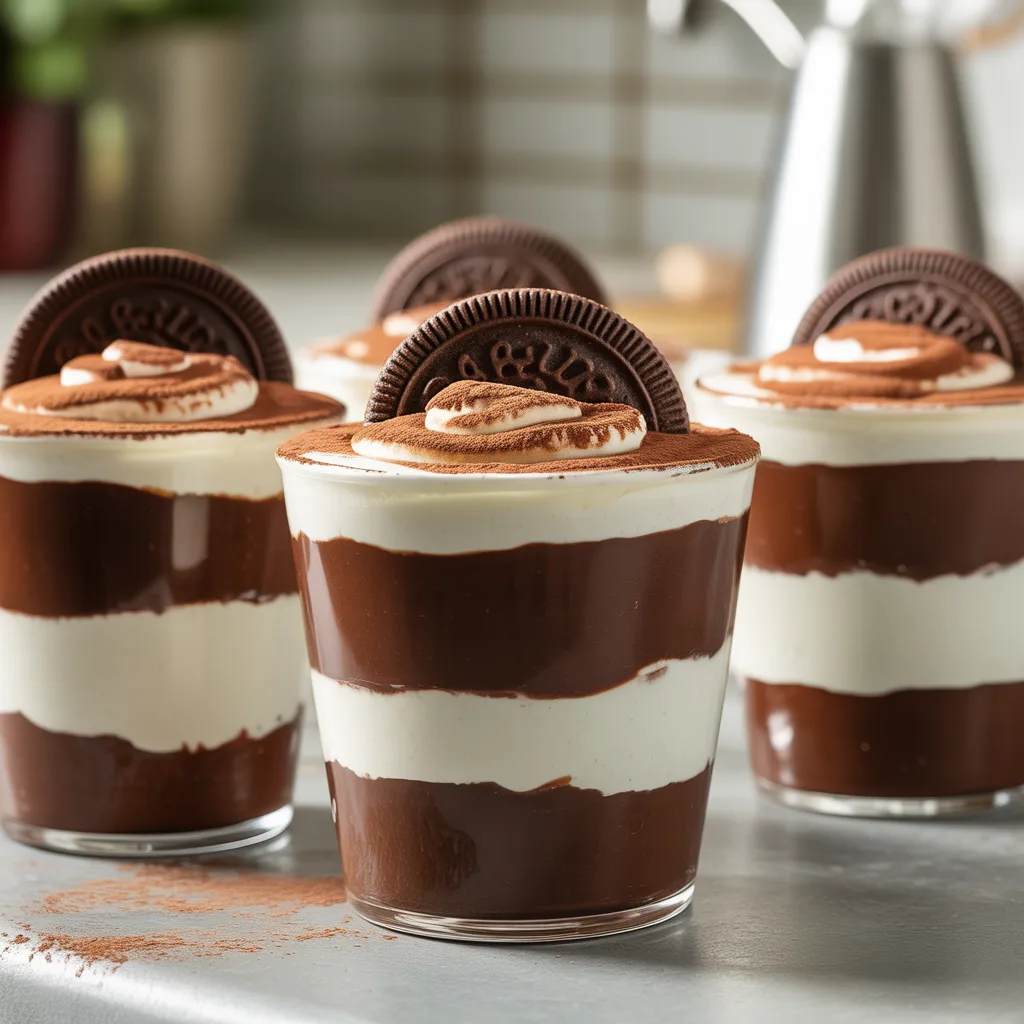
Ever find yourself staring into the fridge, hoping a little pot of something sweet and spectacular has magically appeared? Me too, honey. That’s exactly why I created these Layered Chocolate & Vanilla Dessert Cups. They’re the kind of fuss-free, make-ahead treat that feels fancy but is honestly a breeze to pull together. Perfect for when you need a little moment of joy, am I right?
Why You’ll Love This
This recipe is your new best friend. It’s no-bake, which is a lifesaver when your kitchen is already hot enough. You can make them days ahead, so you’re not scrambling when guests pop over. And the best part? That dreamy, creamy texture and gorgeous layers make it look like you spent hours in the kitchen. A total win-win.
Equipements Needed
- Electric Hand Mixer or Stand Mixer: For whipping that cream cheese and cream to fluffy perfection.
- Medium Mixing Bowl: Your main workstation for the filling.
- Measuring Cups and Spoons: For getting those layers just right.
- Spatula: To gently fold and layer without deflating all that airy goodness.
- 8 (6-ounce) Dessert Cups or Ramekins: Clear cups are my favorite because you can see all those beautiful layers!
Ingredients
- 1 (8 oz) block cream cheese, softened: This is the base for our creamy, tangy filling.
- 1/2 cup powdered sugar: Dissolves perfectly for a smooth sweetness without any grit.
- 1 teaspoon vanilla extract: Adds that classic, warm flavor we all love.
- 1 1/2 cups heavy whipping cream: Whipped up to give the whole thing a light, cloud-like texture.
- 1 (12 oz) package chocolate sandwich cookies, crushed: Forms the irresistible crunchy base and topping.
- 1 (3.9 oz) package instant chocolate pudding mix: Creates that rich, silky chocolate layer.
- 2 cups cold whole milk: The key to setting the pudding layer quickly and perfectly.
Step By Step
- First, let’s make the creamy vanilla layer. In your mixing bowl, beat the softened cream cheese, powdered sugar, and vanilla extract together on medium speed until it’s completely smooth and lump-free. This should take about 2 minutes.
- Now, pour in the heavy whipping cream. Turn your mixer up to high and whip it all together until you have stiff, beautiful peaks. This is the base of our dessert, so don’t be shy—get it nice and thick. It’ll take about 3-4 minutes.
- Grab your dessert cups. Spoon about two tablespoons of the crushed cookies into the bottom of each cup and press down gently with the back of a spoon. This is your foundation.
- Next, divide about two-thirds of your vanilla cream mixture evenly among the cups, smoothing it out over the cookie layer.
- Time for the chocolate! In a separate bowl, whisk the chocolate pudding mix with the cold milk for 2 full minutes. It will start to thicken up almost immediately. Let it sit for just a minute to set a tad more.
- Carefully spoon or pipe the chocolate pudding over the vanilla layer in each cup.
- Now, top each cup with the remaining vanilla cream mixture. And finally, sprinkle the rest of those crushed cookies on top for that final bit of crunch.
- Pop them in the fridge for at least 3 hours, but ideally 4 or more, to let everything set up and the flavors get to know each other.
Layering Techniques For Best Results
The secret to those picture-perfect layers is all in the wrist. When you’re spooning in the next layer, try placing the back of a spoon against the current layer and dolloping the new mixture onto that spoon. Let it gently spill over. This prevents you from plopping it down and creating messy, mixed layers. And for the top cookie layer, I like to use a small strainer to dust it on for a really even, professional look. So pretty.
Variations & Substitutions
This recipe is wonderfully flexible. For a nutty twist, swap the chocolate cookies for vanilla ones and add a tablespoon of instant coffee granules to the pudding. If you’re avoiding dairy, use your favorite plant-based cream cheese and whipping cream. And for a fruity version, try a layer of sweetened mashed raspberries between the vanilla and chocolate. Honestly, the possibilities are endless.
Serving Ideas & Pairings
I love serving these straight from the fridge with a little espresso shot for the grown-ups. They’re the ultimate mini desserts for a dinner party because everyone gets their own. For a real aesthetic food moment, garnish with a fresh raspberry or a tiny mint sprig right before serving. They pair beautifully with a simple cup of coffee—the bitterness really makes the sweet, creamy layers pop.
Storage & Reheating
These dessert cups need to stay chilled. Cover them tightly with plastic wrap and they’ll keep happily in the fridge for up to 4 days. I don’t recommend freezing them, as the creamy layers can get a bit icy and lose that wonderful texture when thawed. Just grab a spoon and enjoy them cold!
Frequently Asked Questions
- Can I make this as one big dessert instead? Absolutely! Just layer everything in a 9×13 dish for a fantastic, shareable trifle.
- My cream mixture is too runny. What happened? This usually means your cream cheese wasn’t quite soft enough or you under-whipped the cream. Make sure to beat it until those peaks are stiff and stand straight up.
- What are some other yummy food ideas for the layers? Try crumbling peanut butter cups instead of cookies, or use a butterscotch pudding for a whole new flavor profile. These are great baking ideas to get creative with.