Light, lemony, and wonderfully comforting, this Lemon Pudding Cake delivers two delightful textures in every spoonful—a soft cake on top and a luscious pudding layer underneath. Made with simple pantry staples and fresh lemon, it feels impressive without being complicated. Whether you’re serving family after supper or bringing something special to the table for guests, this sunny dessert always earns smiles.
Why You’ll Love This Lemon Pudding Cake
- Two Desserts in One: As it bakes, the batter transforms into a tender cake layer over a silky lemon pudding base.
- Bright Lemon Flavor: Fresh lemon zest and juice give every bite a vibrant citrus taste.
- Simple Ingredients: Everything comes together with everyday ingredients you may already have in your kitchen.
- Individual Servings: Baking in ramekins creates beautiful portions that feel extra special.
- Make-Ahead Friendly: The cakes can be prepared a day ahead and gently warmed before serving.
- Beautiful Presentation: A dusting of confectioners’ sugar and a handful of berries make an elegant finishing touch.
- Crowd-Pleasing Texture: The combination of fluffy cake and creamy pudding appeals to all kinds of dessert lovers.
Ingredients You’ll Need
One of my favorite things about Lemon Pudding Cake is how a handful of humble ingredients can create something that feels downright magical. The fresh lemon brings brightness, while the eggs and milk help create those signature layers that make this easy dessert so memorable.
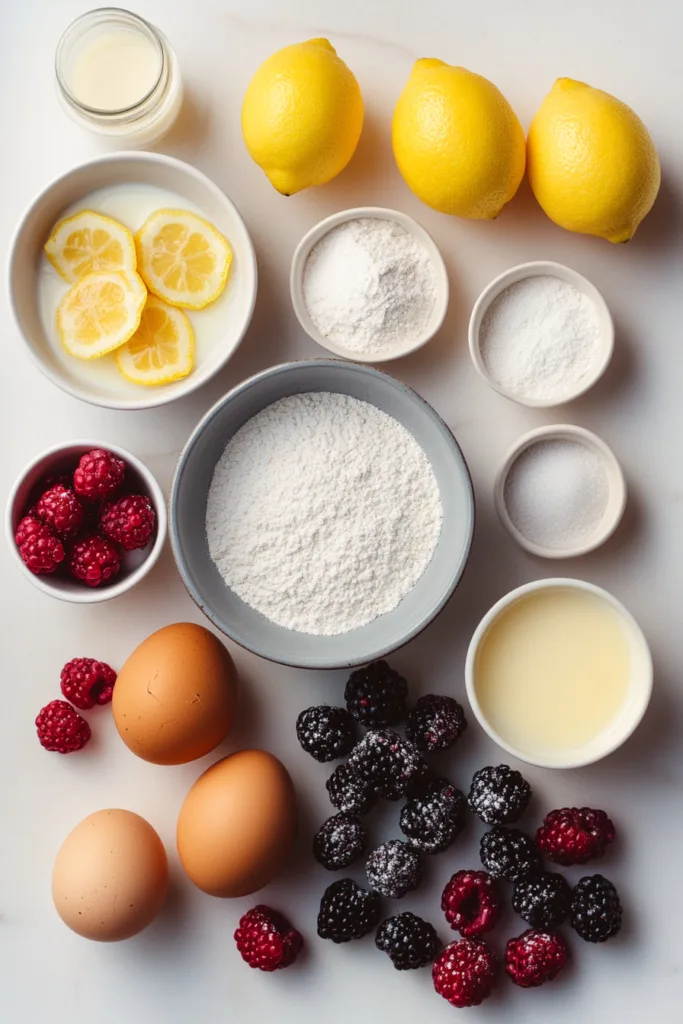
Every ingredient has an important job, so let’s take a closer look at what goes into this recipe.
- 3 large eggs, separated – The yolks add richness and structure to the batter, while the whipped egg whites create the light, airy texture that helps form the cake layer. Separating the eggs is essential to achieving the recipe’s signature texture.
- 1 cup milk (low-fat or whole) – Milk provides moisture and helps create the smooth pudding base beneath the cake. The full cup ensures the batter remains thin enough to separate into distinct layers during baking.
- 2 teaspoons lemon zest, from 2 lemons – Lemon zest adds concentrated citrus flavor and aroma. The measured amount provides noticeable lemon character without overwhelming the dessert.
- 6 tablespoons fresh lemon juice, from 2 lemons – Fresh lemon juice delivers the bright, tangy flavor that defines Lemon Pudding Cake. The balance between juice and sugar creates a sweet-tart dessert that feels refreshing.
- 2 tablespoons unsalted butter, melted – Melted butter contributes richness and a smooth mouthfeel while helping blend the ingredients together evenly. The quantity adds flavor without making the dessert heavy.
- ¼ teaspoon salt – A small amount of salt helps balance the sweetness and enhances the lemon flavor throughout the cake.
- 6 tablespoons all-purpose flour – Flour provides the structure needed for the cake layer to form during baking. This specific amount helps maintain the delicate balance between cake and pudding textures.
- 1 cup sugar – Sugar sweetens the dessert while balancing the tart lemon juice. It also contributes to the overall texture and consistency of the finished cakes.
- Fresh berries and confectioners’ sugar, for serving (optional) – These optional garnishes add color, visual appeal, and an extra touch of sweetness when serving. The berries pair beautifully with the bright lemon flavor.
What I love most about this ingredient list is that every single item earns its place. There aren’t any complicated additions or hard-to-find ingredients—just a handful of kitchen staples working together to create a dessert that feels like something you’d find at a favorite family gathering. The fresh lemon is the real star here, bringing a cheerful burst of flavor that makes every spoonful taste like sunshine.
Once everything is measured and ready to go, you’re only a few simple steps away from a batch of warm, fluffy Lemon Pudding Cakes that look impressive but come together with everyday ingredients and a little kitchen magic.
How to Make Lemon Pudding Cake
There’s something downright satisfying about watching this simple batter turn into two beautiful layers while it bakes. Every time I make Lemon Pudding Cake, it feels a little bit like kitchen magic—and the steps couldn’t be more straightforward.
Take your time with the egg whites and gentle folding, and the oven will do the rest of the work for you.

- Prepare the oven and ramekins by preheating the oven to 350°F (175°C), positioning a rack in the middle of the oven, and spraying six 6-ounce ramekins with nonstick cooking spray.
- Whisk together the egg yolks, milk, lemon zest, lemon juice, melted butter, and salt in a large bowl. Add the flour and sugar, then continue whisking until the mixture is completely smooth.
- Beat the egg whites in the bowl of an electric mixer until soft peaks form. Spoon about one-quarter of the beaten egg whites into the lemon mixture and whisk until smooth. Add the remaining egg whites and gently fold them into the batter with a rubber spatula until combined. The batter will be light, foamy, and liquidy.
- Fill the prepared ramekins evenly with the batter and place them inside a 9 x 13-inch baking dish. Pour room-temperature water into the baking dish until it reaches halfway up the sides of the ramekins.
- Bake for 45 to 50 minutes, or until the cakes are puffy and lightly golden on top. Carefully remove the ramekins from the water bath using tongs and place them on a cooling rack.
- Cool the cakes for about 20 minutes before serving. They may sink slightly as they cool, which is completely expected. Dust with confectioners’ sugar and serve with fresh berries if desired.
Tips for the Best Lemon Pudding Cake
- Separate the Eggs Carefully — Keeping the yolks and whites separate allows the whipped egg whites to create the signature light texture.
- Beat Only to Soft Peaks — The egg whites should form peaks that curl when the beaters are lifted from the bowl, just as directed in the recipe.
- Fold Gently — Carefully folding the remaining egg whites into the batter helps maintain the airy consistency needed for the cake layer to develop.
- Use the Water Bath — Filling the baking dish with water halfway up the ramekins is an important part of the baking process and should not be skipped.
- Expect Some Settling — The cakes naturally sink a bit while cooling. That’s part of the recipe and helps create the pudding-like layer underneath.
- Serve with Garnishes — Fresh berries and confectioners’ sugar add a beautiful finishing touch that complements the bright lemon flavor.
Storage & Make-Ahead Tips
Fridge: Once completely cooled, cover the ramekins and refrigerate for up to 3–4 days. The texture may become slightly denser after chilling, but the lemon flavor remains delicious.
Freezer: Wrap the cooled ramekins well and freeze for up to 3 months. Thaw overnight in the refrigerator before reheating and serving.
Make-Ahead: According to the recipe notes, these cakes can be made one day in advance. After they have cooled completely, cover with plastic wrap and store at room temperature. Before serving, remove the plastic wrap and warm the ramekins in a 350°F (175°C) oven for 10 to 15 minutes until heated through.
What to Serve With Lemon Pudding Cake
This dessert shines beautifully on its own, but a few simple accompaniments can make it feel even more special. Since the lemon flavor is bright and vibrant, lighter pairings work especially well.
- Fresh seasonal berries
- Hot coffee
- Hot tea
- Fresh fruit
- Light fruit salad
- Cold milk
Lemon Pudding Cake is one of those desserts that never fails to bring a little joy to the table. With its fluffy top, creamy pudding layer, and bright citrus flavor, it’s the kind of recipe that feels both nostalgic and special every single time you make it.
Frequently Asked Questions
Q: Why are the eggs separated in Lemon Pudding Cake?
The separated eggs create the unique texture that makes this dessert special. The yolks are whisked into the lemon mixture to provide richness, while the whites are beaten separately until soft peaks form. When folded into the batter, the whipped whites help create a light cake layer on top while allowing a pudding layer to develop underneath during baking.
Q: What does “soft peaks” mean for the egg whites?
Soft peaks form when the egg whites hold their shape but the tips curl over when the beaters are lifted. The recipe specifically notes that the peaks should curl rather than stand completely upright. Reaching this stage helps create the light, airy batter needed for the finished texture.
Q: Why is my batter so thin and foamy?
That’s exactly how the batter should look. After the beaten egg whites are incorporated, the recipe describes the batter as light, foamy, and liquidy. Although it may seem thinner than a traditional cake batter, this consistency is what allows the dessert to separate into distinct pudding and cake layers while baking.
Q: Why do the cakes sink after they come out of the oven?
A slight sinking is completely normal. The recipe specifically mentions that the cakes will settle a bit as they cool. This natural settling helps create the contrast between the fluffy top layer and the creamy pudding beneath, so there’s no need to worry if you notice a little collapse after baking.
Q: Do I really need the water bath?
Yes. The recipe directs you to place the ramekins in a larger baking dish and add water halfway up their sides before baking. This water bath is part of the method and helps the cakes bake as intended while developing their signature texture.
Q: Can I make Lemon Pudding Cake ahead of time?
Absolutely. The recipe notes state that the cakes can be prepared one day in advance. Once cooled completely, cover them with plastic wrap and keep them at room temperature. Before serving, warm them in a 350°F (175°C) oven for 10 to 15 minutes until heated through.
Q: What kind of milk works best?
The recipe allows either low-fat milk or whole milk. Both options work within the recipe as written, providing the moisture needed for the pudding layer and helping create the proper batter consistency.
Q: Is this a good dessert for warm-weather gatherings and summer meals?
The bright lemon flavor, light texture, and optional fresh berry topping make it a lovely choice when you’re looking for something refreshing to finish a meal. Served slightly warm with a dusting of confectioners’ sugar, it feels elegant while still being wonderfully comforting.

Lemon Pudding Cake
Ingredients
Method
- Preheat the oven to 350°F (175°C) and position a rack in the middle of the oven. Spray six 6-ounce ramekins with nonstick cooking spray.
- In a large bowl, whisk together the egg yolks, milk, lemon zest, lemon juice, melted butter, and salt.
- Add the flour and sugar and whisk until smooth.
- In the bowl of an electric mixer, beat the egg whites until soft peaks form.
- Whisk about one-quarter of the egg whites into the lemon mixture until smooth.
- Add the remaining egg whites and gently fold into the lemon mixture with a rubber spatula until smooth. The batter will be light, foamy, and liquidy.
- Place the prepared ramekins into a 9 x 13-inch baking dish.
- Ladle the batter evenly into the ramekins.
- Pour room-temperature water into the baking dish until it reaches halfway up the sides of the ramekins.
- Carefully place the baking dish in the oven and bake for 45 to 50 minutes, or until the cakes are puffy and lightly golden on top.
- Using tongs, carefully remove the ramekins from the baking dish and place them on a cooling rack.
- Let the cakes cool for about 20 minutes before serving.
- Dust with confectioners’ sugar and serve with fresh berries, if desired.