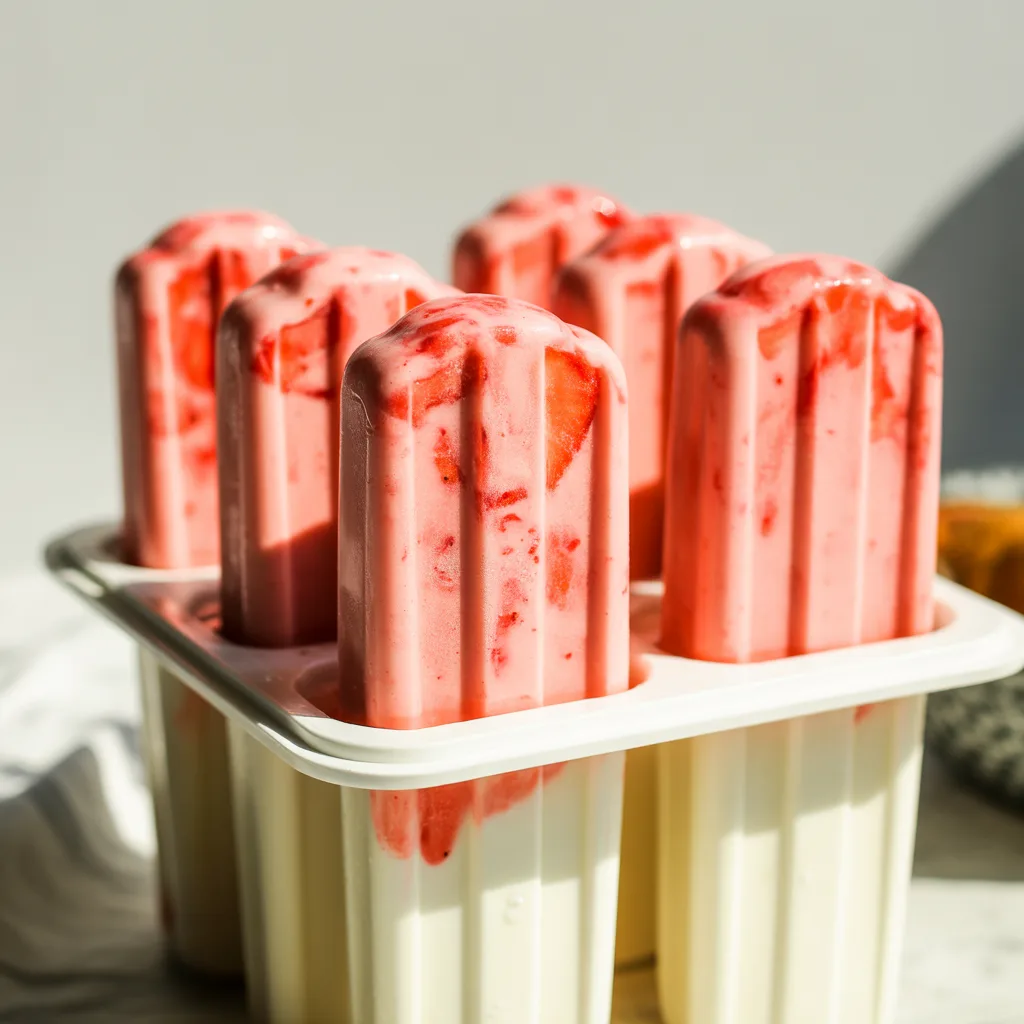
Is there anything better than a cold, sweet treat on a hot summer day? These no-bake, blissfully simple Strawberry Coconut Popsicles are here to answer that with a resounding no. They’re the perfect way to cool down, capture the essence of summer berries, and satisfy that dessert craving without any fuss. Plus, they just so happen to be a naturally delicious dairy free dessert and a gluten free dairy free dessert that everyone can enjoy.
Why You’ll Love This
You’ll love this recipe because it’s the definition of easy. We’re talking four simple ingredients, zero cooking required, and a final product that is as gorgeous as it is delicious. They are the ultimate make-ahead treat for a busy week, a pool party, or just because. Seriously refreshing. And because they’re made with real fruit and coconut milk, they feel like a wholesome, healthy dairy free sweet you can feel great about serving.
Equipements Needed
- 10 Popsicle Molds (with sticks!)
- Blender or Food Processor
- Measuring Cups
- Small Spoon or Spatula (for filling the molds)
Ingredients
- 1 lb fresh strawberries, hulled and halved (about 3 heaping cups; you want the sweet, ripe ones for the best flavor)
- 1 (13.5 oz) can full-fat coconut milk, well-shaken (this creates that dreamy, creamy texture)
- 1/4 cup pure maple syrup or agave nectar (adds the perfect natural sweetness)
- 1 tsp fresh lemon juice (a little bright acidity to make the strawberry flavor pop)
Step By Step
- Combine everything in your blender. Add the strawberries, coconut milk, maple syrup, and lemon juice.
- Blend until the mixture is completely smooth and creamy. No lumps!
- Taste and adjust. Give the mixture a quick taste. If your berries were a bit tart, you can add another tablespoon of maple syrup if you like.
- Pour and tap. Carefully pour the mixture into your popsicle molds, leaving about 1/4 inch of space at the top for expansion. Gently tap the molds on the counter a few times to release any air bubbles.
- Insert the sticks, cover, and freeze. Place the lids on your molds and insert the sticks. Freeze for at least 6 hours, but ideally overnight, until they are completely solid.
- To unmold, run warm water over the outside of the mold for just 10-15 seconds. Gently pull on the stick and they should slide right out.
Variations & Substitutions
- Berry Bliss: Swap half the strawberries for raspberries or blueberries for a mixed berry twist.
- Creamy Dreamy: For an even richer, creamier pop, use canned coconut cream instead of coconut milk.
- Sweet Swap: Honey works great here too if you don’t need the recipe to be strictly vegan.
- Tropical Twist: Add a handful of mango or pineapple chunks to the blender with the strawberries.
- Hint of Herbs: For a super gourmet touch, blend in 2-3 fresh basil or mint leaves.
Serving Ideas & Pairings
These popsicles are fantastic all on their own, obviously. But if you’re serving them for a party, consider setting up a toppings bar! Let guests roll their pops in dairy-free dark chocolate magic shell, sprinkles, or crushed freeze-dried strawberry powder. They also pair beautifully with a simple fruit salad or a glass of sparkling lemonade for the ultimate summer patio situation.
Storage & Reheating
Keep your popsicles in their molds, or transfer unmolded pops to an airtight freezer bag or container. They will keep their best texture and flavor in the freezer for up to 2 months. There’s no need to reheat—just enjoy them straight from the freezer! Pro-tip: if you’re storing them in a bag, place a small piece of parchment paper between each pop to prevent them from freezing together.
Pro Tips for Perfect Popsicles
- Shake that can! Always shake your can of coconut milk vigorously before opening to incorporate the cream and liquid.
- Don’t overfill. Leave that little bit of room at the top so your pops have space to expand as they freeze.
- The warm water trick is your best friend. Don’t skip it! A quick dip is all it takes to release your perfect pop.
- For pretty layered pops, you can reserve about 1/3 cup of the plain coconut milk mixture before adding the strawberries. Pour a little white layer into each mold, freeze for 30 minutes, then add the pink strawberry layer.
- Honestly, using the ripest, sweetest strawberries you can find is the single best thing you can do for flavor.
Frequently Asked Questions
- Can I use frozen strawberries? Absolutely! Just thaw them completely and drain any excess liquid before blending to keep your mixture from being too watery.
- Are these considered vegan dessert recipe is completely plant-based and vegan-friendly.
- My popsicles are a little icy. What happened? This can happen if your blender wasn’t powerful enough to get the mixture completely smooth, or if your fruit had a high water content. Using full-fat coconut milk and very ripe fruit helps create a creamier texture.
- Are these allergy friendly desserts? They are naturally gluten-free, dairy-free, and nut-free, making them a great option for many common allergies. Always check your specific ingredient labels to be sure.
- Can I make these without a popsicle mold? You can get creative! Small paper cups covered with foil (poke a stick through the foil) or even an ice cube tray for mini treats will work in a pinch.