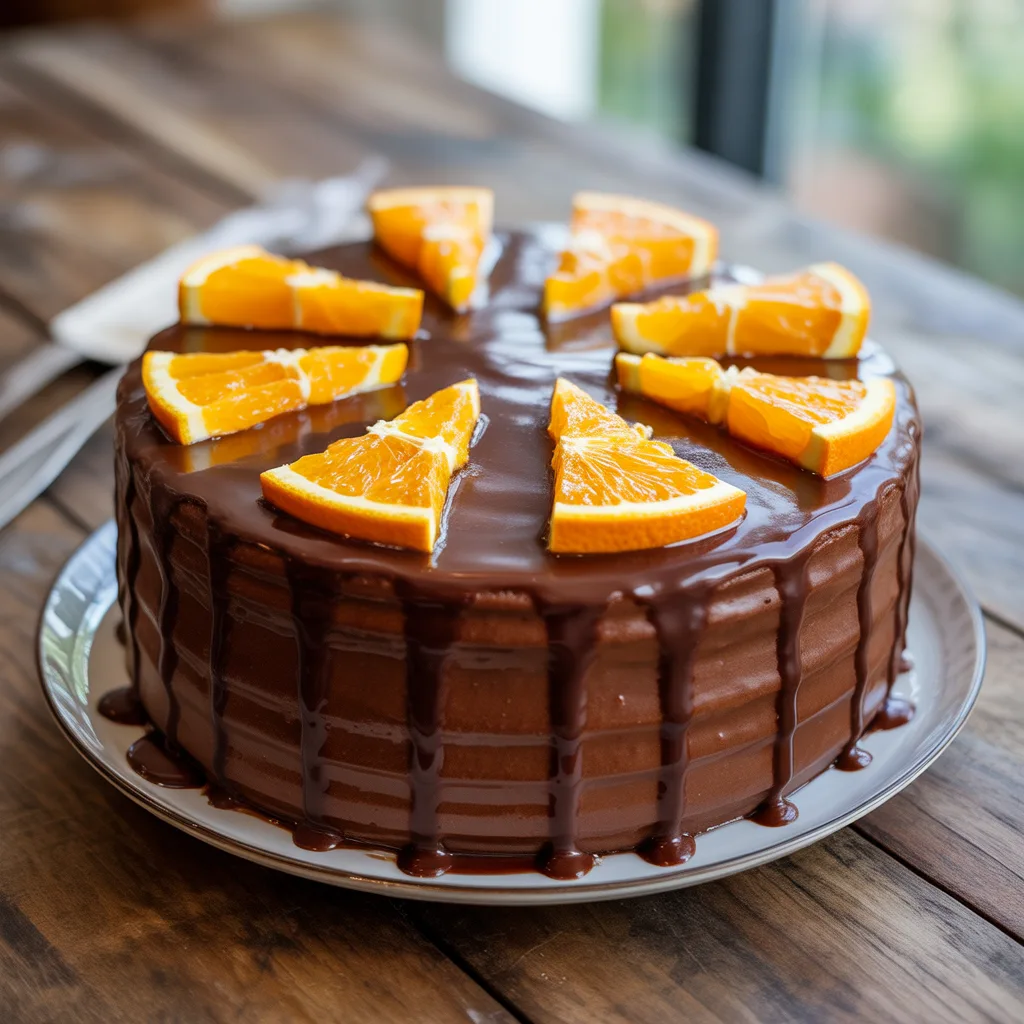
Is there any combination more classic, more downright *cheerful*, than chocolate and orange? It’s a match made in dessert heaven, and today we’re turning it into the most stunning, incredibly flavorful cake. This Chocolate Orange Cake with Light Sweet Glaze is the kind of showstopper that looks like you spent all day in the kitchen, but I promise it’s totally doable. Got a birthday coming up? A simple chocolate cake craving? This is your answer.
Why You’ll Love This
You’re going to adore this cake for so many reasons. First, the flavor is a dream—deep, rich chocolate paired with that bright, zesty orange punch. It’s a one-two punch of deliciousness. The texture? So, so tender and moist, thanks to a little secret: we’re using both oil and buttermilk for the perfect crumb. And that light sweet glaze on top? It’s the perfect finish, not overly sugary but just right. Honestly, this might just become your new go-to for all your Chocolate Birthday Cakes. It’s impressive without being complicated.
Equipements Needed
- Two 8-inch round cake pans
- Parchment paper
- Mixing bowls (one large, one medium)
- Whisk and rubber spatula
- Electric hand mixer or stand mixer
- Wire cooling rack
- Small saucepan or measuring cup for the glaze
Ingredients
- 2 cups all-purpose flour: The structure-builder for our cake.
- 2 cups granulated sugar: For just the right amount of sweetness.
- 3/4 cup unsweetened cocoa powder: Use a good quality one for deep chocolate flavor.
- 2 tsp baking soda: Our leavening agent to make the cake rise.
- 1 tsp baking powder: A little extra lift for a light crumb.
- 1 tsp salt: Balances and enhances all the other flavors.
- 2 large eggs, room temperature: Helps bind everything together.
- 1 cup buttermilk, room temperature: The key to incredible moisture and tenderness.
- 1/2 cup vegetable oil: Keeps the cake wonderfully moist.
- 2 tsp pure vanilla extract: A classic flavor base.
- Zest of 1 large orange: For that vibrant citrus aroma.
- 1 cup freshly squeezed orange juice: Infuses the entire cake with orange flavor.
- 1 cup boiling water: The secret to unlocking the cocoa’s richness.
- For the Light Sweet Glaze:
- 2 cups powdered sugar, sifted: Makes for a smooth, lump-free glaze.
- 3-4 tbsp fresh orange juice: Thins the glaze and adds more flavor.
- 1 tbsp light corn syrup (optional): Adds a beautiful shine to the glaze.
Step By Step
- Preheat your oven to 350°F (175°C). Grease two 8-inch round cake pans, line the bottoms with parchment paper, and grease the parchment. This guarantees your cakes will release perfectly.
- In your large mixing bowl, whisk together the dry ingredients: flour, sugar, cocoa powder, baking soda, baking powder, and salt. Whisk it really well so everything is evenly distributed.
- In your medium bowl, combine the wet ingredients: eggs, buttermilk, oil, vanilla extract, orange zest, and fresh orange juice. Whisk until it’s completely smooth.
- Pour the wet ingredients into the dry ingredients. Use your electric mixer on medium speed to beat everything together for about 2 minutes, until the batter is uniform. The batter will be quite thick at this point.
- Carefully pour in the boiling water. Start mixing on low speed, then increase to medium and mix until the water is fully incorporated. The batter will now be very thin—this is exactly what you want! It’s the key to a super moist cake.
- Divide the batter evenly between your two prepared pans. Bake for 30-35 minutes. You’ll know they’re done when a toothpick inserted into the center comes out with just a few moist crumbs attached.
- Let the cakes cool in their pans on a wire rack for 15 minutes. Then, run a knife around the edges and carefully invert them onto the rack to cool completely before glazing. Patience here is crucial for a beautiful finish!
- Make the glaze: In a medium bowl, whisk together the sifted powdered sugar, 3 tablespoons of orange juice, and corn syrup (if using) until smooth. If it seems too thick, add the last tablespoon of juice. It should be pourable but still thick enough to cling to the cake.
- Place your completely cooled cake on a serving plate. Pour the glaze over the top, letting it drip beautifully down the sides. Let it set for about 15 minutes before slicing.
Unique Chocolate Cake Decoration Ideas
This cake is a blank canvas for your creativity! For a Chocolate Cake Aesthetic that wows, try pressing chocolate shavings or curls onto the sides of the glaze before it sets. Feeling fancy? Top it with candied orange slices for a gorgeous, elegant look. For a fun, modern twist on Chocolate Truffle Cake Designs, place a ring of KitKat bars around the edge of the chilled, glazed cake—it creates a fantastic ‘fence’ you can fill with berries or more orange segments. A Kitkat Cake is always a crowd-pleaser! For an Oreo Cake vibe, crush some Oreos and sprinkle them on top. The options are endless for Unique Chocolate Cake Design.
Variations & Substitutions
Need to make a swap? No problem. If you don’t have buttermilk, make your own by adding 1 tablespoon of white vinegar or lemon juice to a cup of milk and let it sit for 5 minutes. For a dairy-free version, use your favorite non-dairy milk and a dairy-free yogurt for the buttermilk substitute. Not an orange fan? You can easily swap the orange juice and zest for strong brewed coffee to make a deeply rich mocha cake. Gluten-free? A 1-to-1 gluten-free flour blend works beautifully here. And if you want an even more intense chocolate hit, fold a cup of chocolate chips into the a slice is pure bliss. For a coffee break, it pairs perfectly with a hot latte or a cold glass of milk. If you’re serving it for a special occasion like a birthday, consider serving it with a fresh berry salad on the side to cut through the richness. So good.
Storage & Reheating
Store any leftover cake (if there is any!) covered at room temperature for up to 2 days. For longer storage, keep it in the refrigerator for up to 5 days. You can also freeze the unglazed cake layers tightly wrapped in plastic wrap and foil for up to 3 months. Thaw overnight in the fridge and bring to room temperature before glazing and serving. The cake is best enjoyed at room temperature, so if you do refrigerate it, let it sit out for 30 minutes before serving for the best texture.
Frequently Asked Questions
- Can I make this into cupcakes? Absolutely! This batter will make about 24 cupcakes. Line your muffin tin, fill the cups 2/3 full, and bake for 18-22 minutes, or until a toothpick comes out clean.
- My glaze is too thin/thick. How can I fix it? Too thin? Whisk in a little more sifted powdered sugar, a tablespoon at a time. Too thick? Add more orange juice, just a teaspoon at a time, until it reaches your desired consistency.
- Why did you add boiling water? It might seem strange, but it’s a classic baker’s trick! The hot water ‘blooms’ the cocoa powder, intensifying its chocolate flavor. It also helps create that incredibly moist texture we’re after.
- What’s the best way to zest an orange? Use a fine microplane zester and only grate the bright orange part of the skin. The white pith underneath is bitter, so you want to avoid that.