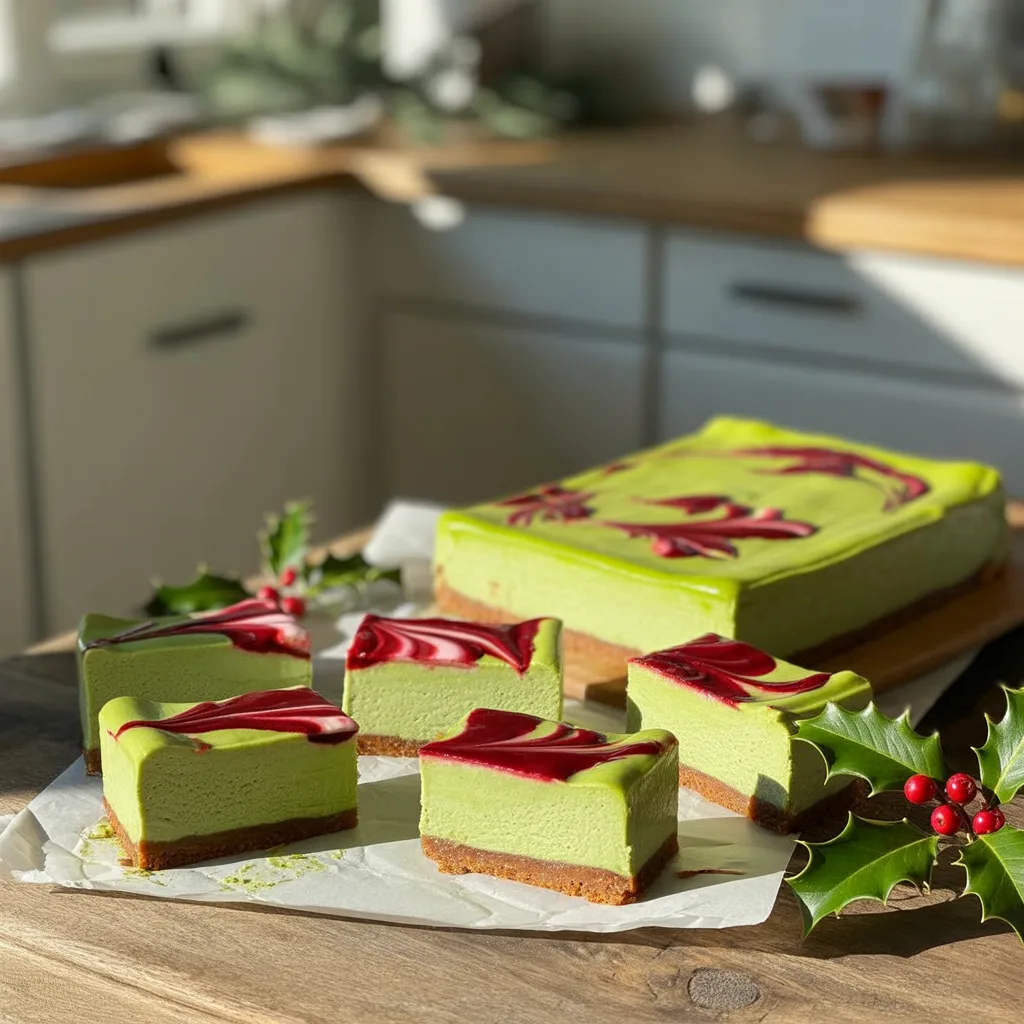
Have you ever tried to make a holiday dessert that’s both show-stopping and secretly simple? You know, the kind that makes everyone think you spent hours in the kitchen, but really, you were just clever about it? Well, pull up a chair, honey, because I’ve got a story and a recipe for you. It involves a certain North Pole dweller, a classic color scheme, and a cheesecake bar that’s about to become your new holiday best friend. Let’s talk about these Elf-Inspired Green & Red Cheesecake Bars.
Why You’ll Love This
These bars are the perfect solution for your busy holiday season. They combine the rich, creamy luxury of cheesecake with the fun, festive spirit of an elf’s wardrobe. They’re no-bake, which means your oven is free for other Christmas dinner heroes, and they come together in a flash. Seriously, the hardest part is waiting for them to set in the fridge. They’re the ultimate make-ahead dessert that delivers big on flavor and holiday cheer without any of the fuss. So good.
Equipements Needed
- 9×9 inch square baking pan
- Parchment paper
- Food processor or a zip-top bag and a rolling pin (for the crust)
- Electric hand mixer or stand mixer
- Two medium mixing bowls
- Spatula
Ingredients
- For the Crust:
- 2 cups shortbread cookie crumbs (about 24 cookies) – for that buttery, sturdy base
- 6 tablespoons unsalted butter, melted – to bind it all together
- For the Filling:
- 16 ounces full-fat cream cheese, softened – the key to a luxuriously smooth texture
- 1 cup powdered sugar – dissolves easily for a silky filling
- 1 teaspoon vanilla extract – for that warm, classic flavor
- 1 cup heavy whipping cream – whipped to give the filling its light, mousse-like body
- Green and red gel food coloring – for that vibrant, elf-approved look
Step By Step
- First, line that 9×9 pan with parchment paper, letting a little hang over the sides. This is your lifesaver for getting these beautiful bars out later.
- Make the crust. Toss your shortbread cookies into the food processor and pulse until you have fine crumbs. Pour in the melted butter and pulse until it looks like wet sand. Press this mixture firmly and evenly into the bottom of your prepared pan. Pop it in the fridge to set while you make the magic happen.
- Now, for the filling. In a large bowl, use your electric mixer to beat the softened cream cheese until it’s completely smooth. This is important—no lumps allowed! Beat in the powdered sugar and vanilla extract until everything is well combined.
- In a separate bowl, whip that heavy cream until you get stiff, beautiful peaks. This should take about 2-3 minutes.
- Gently fold the whipped cream into the cream cheese mixture. Go slow and be gentle so you don’t deflate all that air you just whipped in.
- Divide the filling evenly between two bowls. Add green gel food coloring to one bowl and red to the other, stirring until the color is uniform and wonderfully bold.
- Time to assemble! Dollop alternating spoonfuls of the red and green filling over the chilled crust. Then, take a knife or a skewer and gently swirl the two colors together just once or twice. You want pretty marbling, not mud.
- Cover the pan with plastic wrap and refrigerate for at least 4 hours, but overnight is honestly, honestly best. It gives the flavors time to meld and the bars time to get perfectly firm.
Tips For Success
- Make sure your cream cheese is truly softened. Leave it on the counter for a good hour before you start. This is the secret to a super smooth filling without any pesky lumps.
- Use gel food coloring, not the liquid kind. The gel gives you those bright, vibrant elf colors without watering down your filling.
- Don’t over-swirl! A few gentle figure-eights with a knife are all you need for that gorgeous marbled effect.
- For super clean slices, dip your knife in hot water and wipe it dry between each cut.
- And if you’re feeling extra, a little sprinkle of white sanding sugar on top looks just like fresh North Pole snow.
Variations & Substitutions
- No shortbread? Graham cracker crumbs work wonderfully for a slightly different, but still delicious, flavor.
- For a little crunch, stir 1/2 cup of crushed peppermint candies into the green layer. It’s like a candy cane surprise!
- If you need a nut-free option, just double-check your cookie labels to ensure the shortbread is safe.
- Not a fan of food coloring? You can use a tiny bit of strawberry powder for the red and matcha powder for the green. The flavor will change, but it’ll be just as festive.
Serving Ideas & Pairings
These bars are a star all on their own, but I love serving them alongside a plate of other easy Christmas treats for a real dessert spread. They’re perfect for your Christmas brunch table, right next to the coffee cake. Or, plate them up as the grand finale for your Christmas party food lineup. A cup of hot cocoa or a strong coffee is the perfect pairing to cut through the richness.
Storage & Reheating
Keep these bars covered in the refrigerator for up to 5 days. They also freeze beautifully! Just wrap the whole pan (or individual bars) tightly in a couple layers of plastic wrap and then foil. They’ll keep in the freezer for up to 2 months. Thaw overnight in the fridge before serving. No reheating needed—these are a cold, creamy treat!
Frequently Asked Questions
- Can I make these ahead of time for a Christmas party? Absolutely! These are one of the best make-ahead easy Christmas desserts. Making them the day before actually improves the flavor and makes them easier to slice.
- I need more Christmas dessert ideas. Are these kid-friendly? These are a huge hit with kids! They love the bright colors and sweet, creamy flavor. They’re some of the easiest Christmas treats you can make that everyone will adore.
- My filling seems a bit soft. What did I do wrong? Did you remember to whip the heavy cream to stiff peaks? That provides the structure. Also, make sure you give it the full chilling time. If it’s still a bit soft, just pop it in the freezer for 30 minutes before slicing.