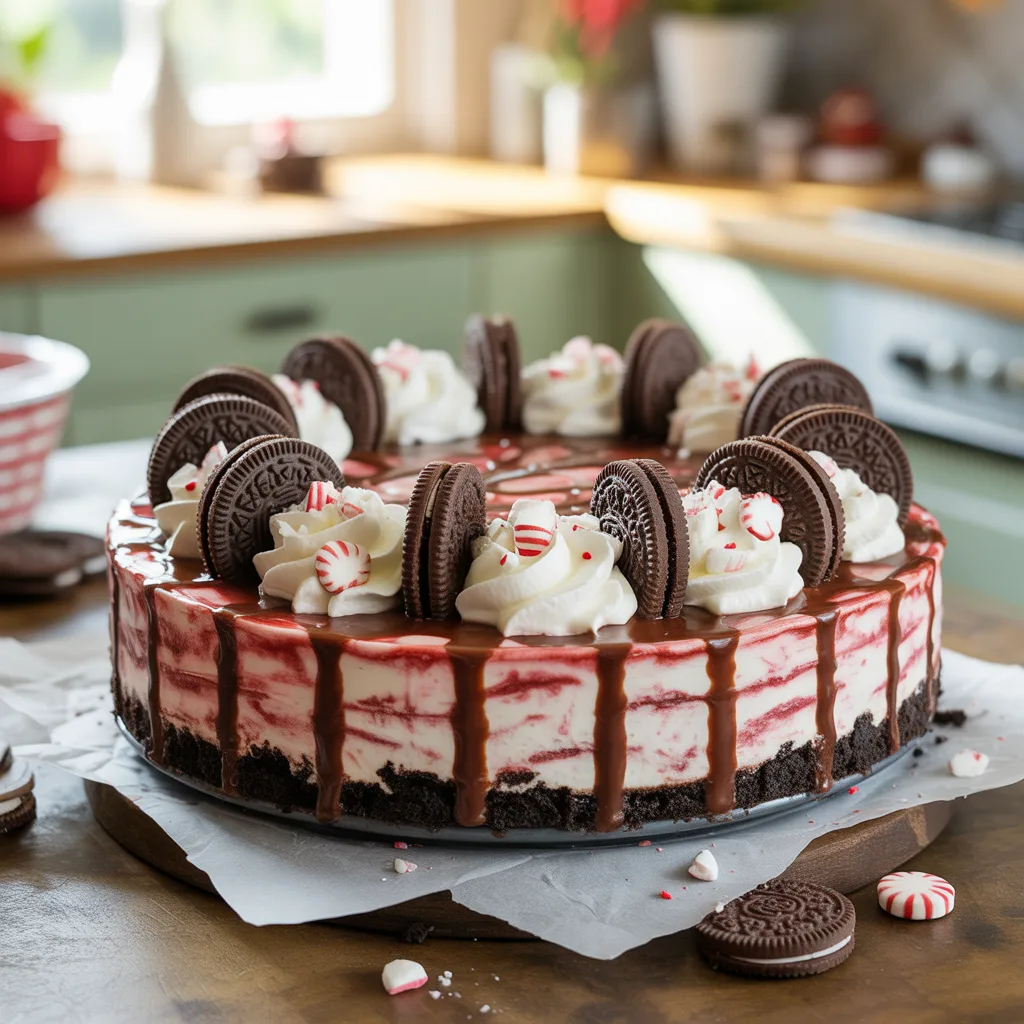
Is there anything more festive than the classic combination of chocolate and peppermint dancing together in a creamy, no-bake cheesecake? I don’t think so. This Holiday Oreo Peppermint Cheesecake Pie is my go-to showstopper for all the Christmas parties and family gatherings that fill our calendars this time of year. It starts with a simple, crunchy crust made from those beloved Holiday Oreos, filled with a lush peppermint-infused cheesecake filling, and topped with a cloud of whipped cream and crunchy candy cane bits. It’s the kind of dessert that looks like you fussed for hours but secretly comes together with minimal effort. Perfect for busy folks who still want to bring something special to the table.
Why You’ll Love This Holiday Dessert
You’re going to adore this recipe for so many reasons. First, it’s a no-bake wonder. That means your oven is free for the main course or those beloved holiday rolls, and your kitchen stays cool. Second, it’s incredibly forgiving. No worrying about water baths or cracks here! The flavor is pure holiday magic—rich, creamy, and refreshing all at once. And honestly, I love that it’s one of those easy Christmas desserts you can make a day ahead. When you’re juggling a dozen things for your Christmas brunch or dinner, having the dessert done and chilling in the fridge is an absolute lifesaver. So good.
Equipment Needed
You don’t need anything fancy for this recipe, which is part of its charm. A 9-inch pie plate is essential. An electric hand mixer or a stand mixer will make whipping the cream and cream cheese a breeze. A food processor is fantastic for the crust, but a zip-top bag and a rolling pin work just as well. You’ll also need a couple of mixing bowls, a spatula for folding, and measuring cups and spoons. That’s it!
Ingredients
- 1 (14.3 oz) package Holiday Oreos: For that festive crust and a little extra crunch in the filling.
- 5 tablespoons unsalted butter, melted: To bind the Oreo crumbs into a perfect, firm crust.
- 16 ounces full-fat cream cheese, softened: The essential base for a rich, creamy, and sliceable filling.
- 1 cup powdered sugar: Sweetens the filling smoothly without any graininess.
- 1 teaspoon pure vanilla extract: Adds a warm, classic flavor that complements the peppermint.
- 1 teaspoon peppermint extract: Gives that unmistakable, refreshing holiday flavor.
- 1 ½ cups heavy whipping cream, divided: Most gets whipped into the filling for lightnes, the rest for topping.
- 3-4 crushed candy canes or ½ cup peppermint baking bits: For a gorgeous, crunchy, and minty finish on top.
Step by Step Method
- First, make the crust. Pop the entire package of Oreos (filling and all) into a food processor and pulse until you have fine crumbs. If you don’t have a processor, place the cookies in a sturdy zip-top bag and crush them with a rolling pin. Transfer the crumbs to a bowl and stir in the melted butter until everything is thoroughly combined.
- Press the buttery crumb mixture firmly and evenly into the bottom and up the sides of a 9-inch pie plate. I find using the flat bottom of a measuring cup helps press it down neatly. Pop the crust in the freezer for at least 15 minutes to set while you make the filling. This step is key for a crust that holds its shape.
- In a large bowl, use an electric mixer to beat the softened cream cheese until it’s completely smooth and fluffy. This should take about 2 minutes. Scrape down the sides of the bowl to ensure there are no lumps.
- Add the powdered sugar, vanilla extract, and peppermint extract to the cream cheese. Beat on low speed at first to incorporate the sugar, then increase to medium-high until the mixture is smooth and well-combined.
- In a separate, clean bowl, beat 1 cup of the heavy whipping cream on medium-high speed until stiff peaks form. This means when you lift the beaters, the cream stands up straight without drooping.
- Gently fold the whipped cream into the cream cheese mixture using a spatula. Be patient and fold gently until no white streaks remain. You want to keep all that airy lightness you just whipped in.
- Take your set crust out of the freezer. Spoon the filling into the crust and spread it out into an even layer. Smooth the top with your spatula.
- Cover the pie loosely with plastic wrap and refrigerate for at least 4 hours, but ideally overnight. This chilling time is non-negotiable—it allows the pie to set up perfectly so you can slice it cleanly.
- Right before serving, beat the remaining ½ cup of heavy cream until stiff peaks form. Spread it or pipe it over the top of the chilled pie. Sprinkle generously with the crushed candy canes.
Creative Variations for Holiday Baking
The beauty of this dessert is how easily you can make it your own. For a different festive twist, try using Mint Oreos instead of the Holiday ones for an even stronger mint-chocolate vibe. If you’re not a huge peppermint fan, you can swap the peppermint extract for a tablespoon of fresh lemon juice and some zest for a bright, lemon cheesecake pie. For a decadent chocolate version, melt a cup of semi-sweet chocolate chips, let them cool slightly, and fold them into the cream cheese mixture along with the whipped cream. And for a fun, kid-friendly option, you could top it with colorful sprinkles instead of candy canes for any of your holiday treats.
Leftovers & Reheating Tips
Leftovers? Just cover the pie plate tightly with plastic wrap or transfer slices to an airtight container. It will keep happily in the fridge for up to 4 days. The crust might soften a tiny bit after a day or two, but it’ll still taste delicious. This pie also freezes beautifully for longer storage. Wrap the whole pie or individual slices tightly in plastic wrap and then a layer of aluminum foil. It can be frozen for up to 2 months. Thaw it overnight in the refrigerator before serving. There’s no need to reheat this chilled dessert!
Serving Ideas & Pairings for the Perfect Finish
This pie is a star on its own, but a little pairing can make it even more special. I love serving it with a hot cup of coffee or a glass of cold milk to balance the richness. If you’re putting together a dessert spread for Christmas party food, it pairs wonderfully with lighter options like sugar cookies or a fruit platter. For an elegant touch, drizzle a little chocolate sauce on the plate before placing the slice. And if you’re serving it after a big holiday meal, a small slice is the perfect, refreshing finish.
Doneness Test for Cheesecake Pie
Since this is a no-bake recipe, the doneness test is all about the set. After its chilling time in the fridge, the filling should be firm to the touch and not jiggle loosely when you gently shake the pan. It should be firm enough to slice cleanly with a sharp knife. If it seems too soft, just give it more time in the fridge. Chilling it overnight is always your best bet for the perfect, sliceable texture.
FAQs About Holiday Oreo Peppermint Cheesecake Pie
- Can I make this pie ahead of time for my Christmas party? Absolutely! In fact, I highly recommend it. Making it a day ahead allows it to set completely and makes your day-of preparation so much easier. It’s one of the best make-ahead Christmas dessert ideas.
- My cream cheese was a little lumpy. How can I avoid that? The key is to make sure your cream cheese is truly softened to room temperature. Take it out of the fridge at least an hour before you start. If you’re short on time, you can microwave the blocks (out of the foil) for 10-15 seconds on low power, but be very careful not to melt it.
- What are some other easy Christmas treats I could make with this theme? If you love these flavors, you could use the same filling to make mini cheesecake cups in a muffin tin with Oreo crusts. They’re perfect for grab-and-go holiday appetizers or for a dessert buffet. You could also simply fold crushed candy canes into the filling for extra crunch in every bite.
There you have it, friends. My ultimate Holiday Oreo Peppermint Cheesecake Pie is waiting for you to bring a little effortless joy to your table this season.