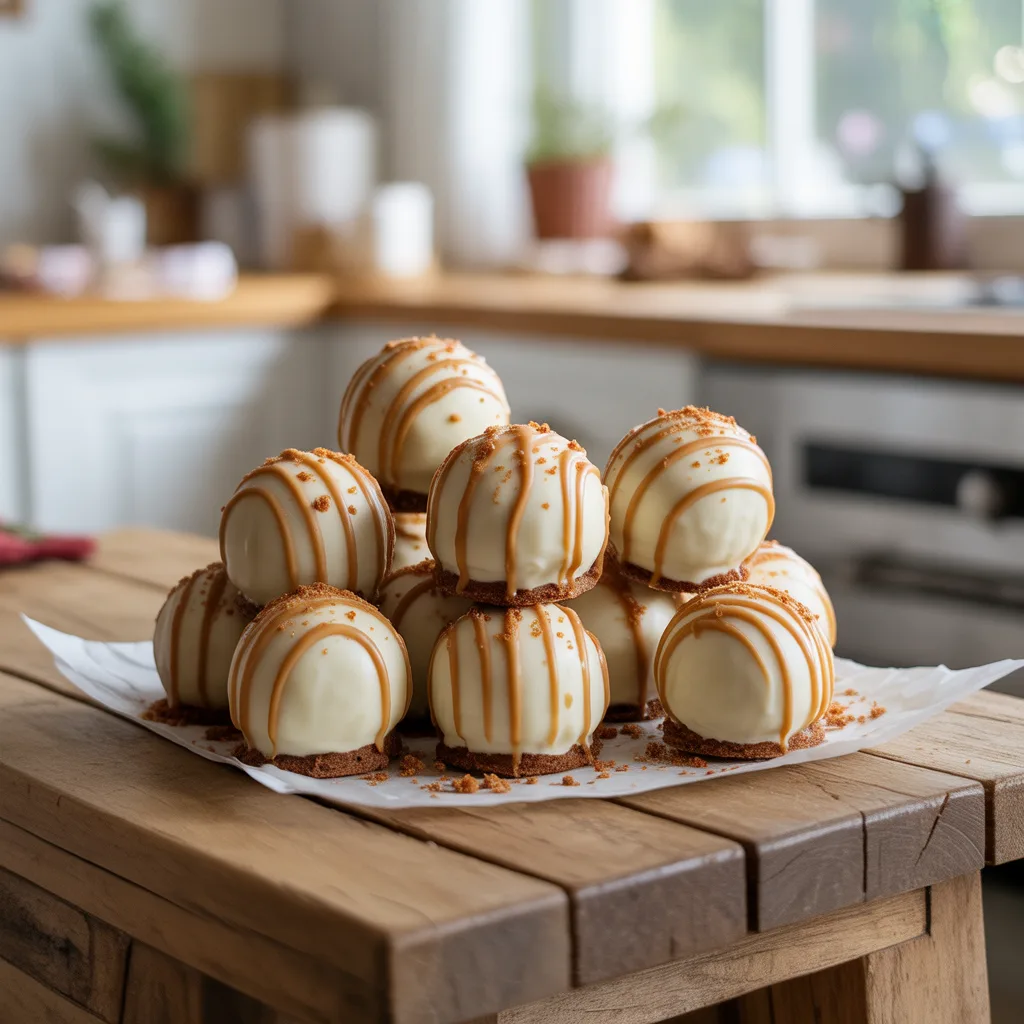
Does the thought of holiday baking fill you with equal parts excitement and a little bit of dread? I get it completely. You want to pull off something spectacular, but who has hours to spend in the kitchen? That’s why I am just so in love with these White Chocolate Gingerbread Cheesecake Truffles. They taste like the coziest part of the season, all rolled into one elegant, no-bake bite. And honestly? They’re a guaranteed crowd-pleaser.
Top Reasons To Make It
You’re going to adore these little gems, and here’s why. They come together without ever turning on your oven, which is a true gift during the busy holiday rush. They’re the perfect make-ahead dessert, so you can cross one thing off your list days before your Christmas party. They combine the warm spices of gingerbread with the creamy luxury of cheesecake, all dipped in sweet white chocolate. So good. And they look absolutely stunning on any platter—a true showstopper that’s secretly simple.
Ingredients
- 1 cup gingersnap cookie crumbs (about 20 cookies): for that classic, spiced gingerbread base.
- 8 oz cream cheese, softened to room temperature: this is the creamy, tangy heart of our cheesecake filling.
- 1/4 cup molasses: adds that deep, rich flavor essential to gingerbread.
- 1/4 cup powdered sugar: sweetens the filling without any graininess.
- 1 tsp ground ginger: for that warm, spicy kick.
- 1/2 tsp ground cinnamon: adds a comforting, familiar warmth.
- 1/4 tsp ground cloves: gives a touch of deep, aromatic spice.
- Pinch of salt: to balance all the sweet and spicy flavors.
- 12 oz white chocolate melting wafers: for a smooth, easy coating that sets up perfectly.
- Optional: ground cinnamon or crushed gingersnaps for garnish.
Instructions
- Make the Filling: In a medium bowl, use an electric mixer to beat the softened cream cheese until it’s completely smooth and creamy. This should take about 1-2 minutes.
- Add Flavor: Beat in the molasses, powdered sugar, ginger, cinnamon, cloves, and salt until everything is fully combined and the mixture is uniform.
- Incorporate Crumbs: Gently fold the gingersnap crumbs into the cream cheese mixture using a spatula. The mixture will be thick.
- Chill: Cover the bowl with plastic wrap and refrigerate for at least 2 hours, or until the mixture is very firm. This chilling step is crucial for easy rolling.
- Roll Truffles: Use a small cookie scoop or a spoon to portion the mixture. Roll each portion between your palms to form a smooth, 1-inch ball. Place the balls on a parchment-lined baking sheet. If your hands get sticky, lightly dampening them with water can help.
- Chill Again: Place the baking sheet back in the freezer for about 15-20 minutes. This extra chill ensures the truffles won’t melt when you dip them.
- Melt Chocolate: Melt the white chocolate wafers according to package directions, usually in 30-second bursts in the microwave, stirring between each burst until smooth.
- Coat Truffles: Using a fork or a dipping tool, dip each chilled truffle ball into the melted white chocolate, letting the excess drip back into the bowl. Place it back on the parchment paper.
- Garnish: If desired, immediately sprinkle the top of each truffle with a little cinnamon or crushed gingersnap crumbs before the chocolate sets.
- Set: Allow the chocolate coating to harden completely at room temperature. This usually takes about 30 minutes. Then, they’re ready to serve or store!
Pro Tips For Perfect Truffles
- Your cream cheese must be truly soft. Leave it on the counter for a good hour before you start. This prevents lumps in your filling.
- Don’t skip the first chill time. A firm filling is so, so much easier to roll into neat balls.
- If the mixture is too sticky when rolling, pop it back in the fridge for another 15 minutes.
- For a super smooth coating, make sure your melted chocolate is fluid but not too hot.
- Honestly, if you’re short on time, you can skip the dipping and just roll the finished balls in cocoa powder or more crushed cookies for a simpler, yet still delicious, treat.
- Have fun with it! This is a great recipe to get the kids involved in the rolling.
Variations & Substitutions
Feel free to make these White Chocolate Gingerbread Cheesecake Truffles your own. For a dairy-free version, use your favorite plant-based cream cheese and vegan white chocolate. If you don’t have molasses, a dark maple syrup can work in a pinch, though the flavor will be a bit different. You can also play with the spices—a little dash of nutmeg would be lovely. For a different coating, try dipping them in dark or milk chocolate instead for a richer flavor contrast.
Storage & Reheating
Store your finished truffles in a single layer in an airtight container in the refrigerator. They will keep beautifully for up to one week. You can also freeze them for up to 3 months; just thaw in the refrigerator overnight before serving. There’s no need to reheat these, as they are best served chilled straight from the fridge.
Serving Ideas & Pairings
These truffles are a star on any dessert board or as a sweet ending to your Christmas brunch. Arrange them on a festive plate next to some fresh clementines and a few sprigs of rosemary for a gorgeous presentation. They pair wonderfully with a hot mug of coffee, a glass of cold milk, or even a spicy chai tea latte. They’re the perfect little bite to have waiting for guests as the ultimate holiday treat.
Frequently Asked Questions
- Can I use regular chocolate chips instead of melting wafers? You can, but melting wafers are formulated to set with a snap and are much easier to work with. If using chips, add a teaspoon of coconut oil to help thin the chocolate for dipping.
- My mixture is too soft to roll, what happened? It likely needed more chilling time. Pop the whole bowl back into the fridge for another 30-60 minutes until firmer.
- Are these good for Christmas party food make-ahead? Absolutely! They are one of the best easy Christmas desserts to make ahead, as the flavors only get better after a day in the fridge.
- Can I make these without a mixer? You sure can. Just make sure your cream cheese is very soft and use a sturdy spatula and some arm muscle to mix everything until smooth.