Sweet, creamy comfort layered into every single bite. These little jars come together without turning on the oven, making them just right for busy days or last-minute cravings. Perfect for family gatherings, potlucks, or a quiet night on the couch when you want something special without all the fuss.
Why You’ll Love This No-Bake Cherry Cheesecake Jars
- No oven needed: Keeps your kitchen cool and stress-free from start to finish.
- Simple ingredients: Everything is easy to find and likely already in your pantry or fridge.
- Perfect portions: Individual jars make serving easy—no slicing or mess.
- Creamy and balanced: Smooth cheesecake filling paired with a buttery crumb base and sweet cherries.
- Make-ahead friendly: Chill ahead so dessert is ready when you are.
- Beginner-approved: Straightforward steps that don’t require any fancy skills.
Ingredients You’ll Need
These ingredients come together to create layers of creamy filling and sweet topping with that classic cheesecake feel. If you’re craving easy dessert jars, this combination hits that perfect balance of richness and sweetness without any complicated steps.
- 1½ cups graham cracker crumbs: Forms the base of the jars; the amount ensures each jar has a sturdy, crumbly layer that holds together without being too thick.
- 3 tbsp melted butter: Binds the crumbs so they press down nicely and stay in place; too little and the crust won’t hold, too much and it becomes greasy.
- 8 oz (225g) cream cheese, softened: The heart of the filling; softening it helps achieve a smooth, lump-free texture that blends easily.
- 1 cup heavy whipping cream: Whipped to give the cheesecake filling its light, airy structure; this amount creates that fluffy consistency.
- ⅓ cup powdered sugar: Sweetens the filling while keeping it smooth; it dissolves easily compared to granulated sugar.
- 1 tsp vanilla extract: Adds a warm, subtle flavor that rounds out the creamy filling.
- 1 can (21 oz) cherry pie filling: Brings sweetness and that signature fruity layer; the quantity ensures a generous topping for each jar.
- Whipped cream, for topping: Adds a soft, creamy finish on top of the jars.
- Extra graham crumbs for garnish: Gives a little crunch and ties the layers together visually and in flavor.
- Fresh cherries for topping (optional): Adds a fresh touch and a pretty finish if you have them on hand.
How to Make No-Bake Cherry Cheesecake Jars
I love how these come together in just a few simple steps—nothing fancy, just good old-fashioned layering and mixing. If you can stir and scoop, you’ve got this handled.
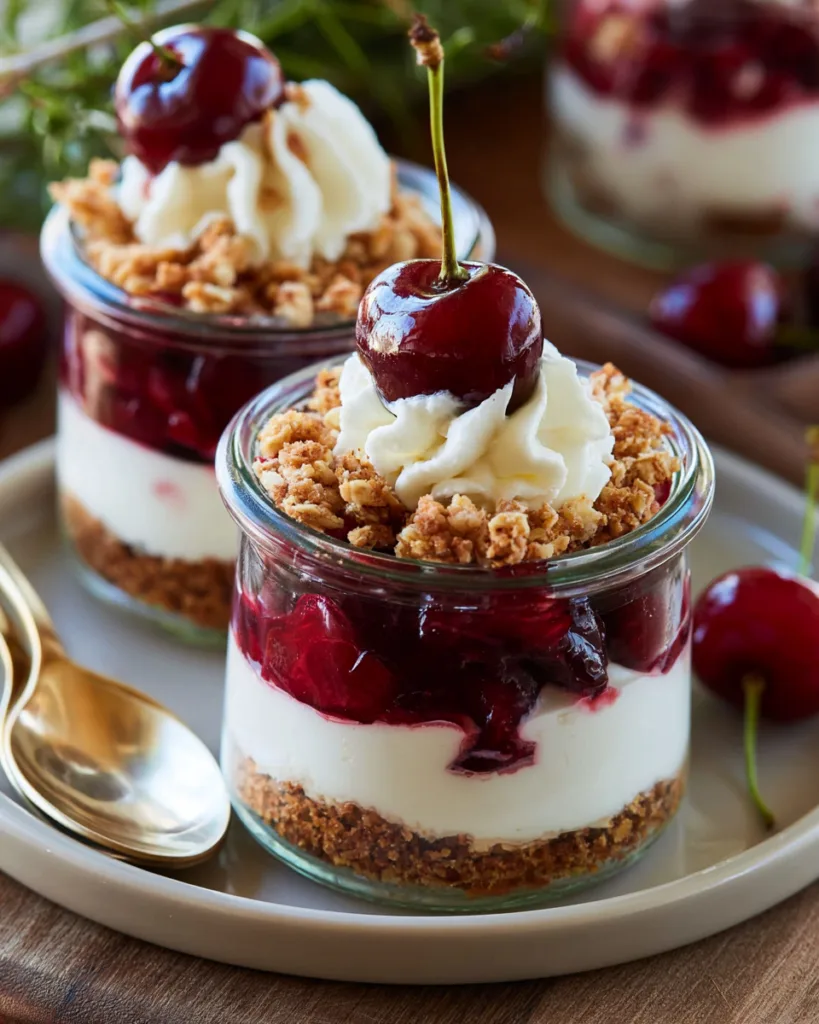
- Mix the graham cracker crumbs with the melted butter until everything is evenly coated and looks like damp sand.
- Spoon the crumb mixture into the bottom of each jar, then gently press it down to form an even base layer.
- Beat the softened cream cheese with the powdered sugar and vanilla extract until the mixture is completely smooth and creamy.
- Whip the heavy cream in a separate bowl until stiff peaks form, then gently fold it into the cream cheese mixture until fully combined.
- Layer the cheesecake filling over the crust in each jar, using a spoon or piping it in for a neat finish.
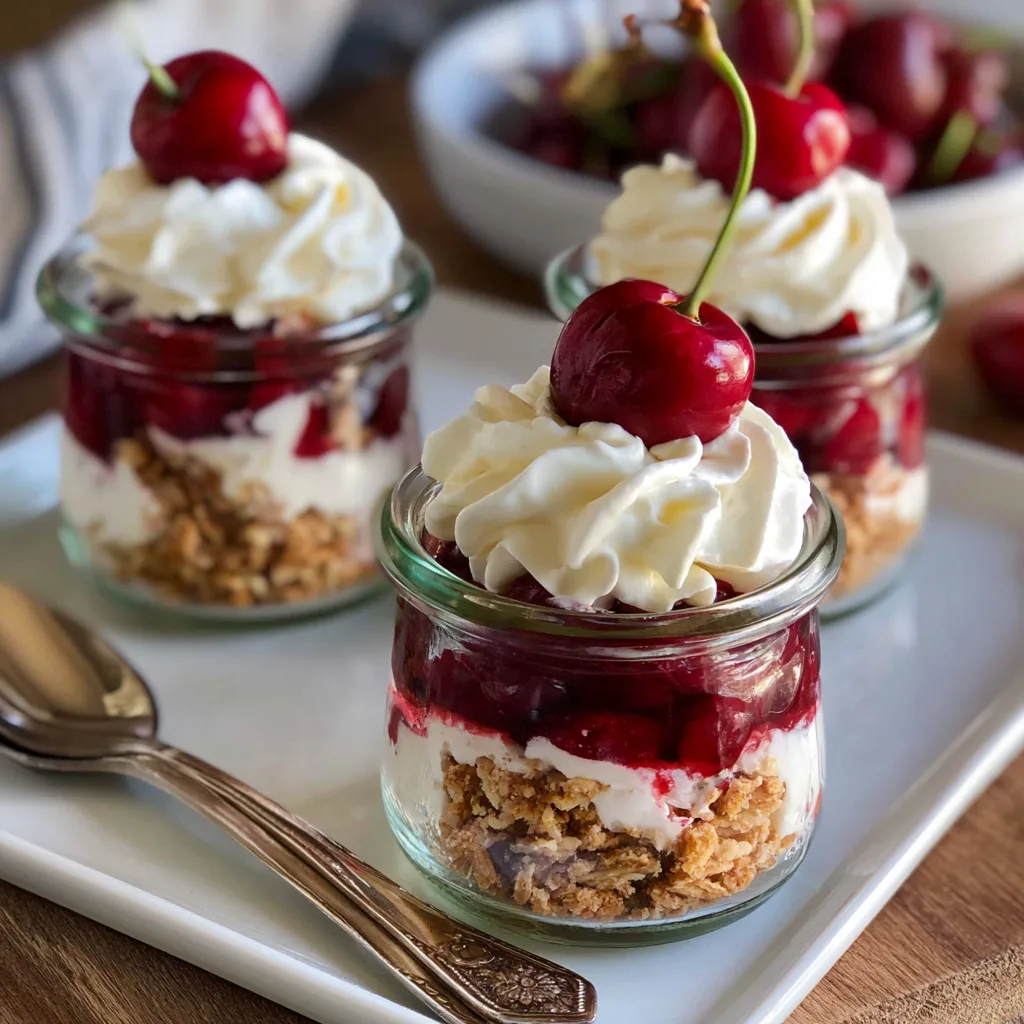
- Add a generous layer of cherry pie filling on top, then finish with whipped cream, extra graham crumbs, and a cherry if you like. Chill the jars for 1–2 hours before serving.
Tips for the Best No-Bake Cherry Cheesecake Jars
- Soften the cream cheese well: This helps you avoid lumps and gives you that smooth, creamy filling.
- Mix the crust thoroughly: Make sure every crumb is coated with butter so the base holds together when pressed.
- Fold gently: When combining the whipped cream with the filling, take your time so the mixture stays light and fluffy.
- Press the base evenly: A flat, even crust layer keeps each bite balanced and prevents crumbling.
- Chill before serving: Giving the jars time to set helps the layers hold together nicely.
Storage & Make-Ahead Tips
Fridge: Store the jars covered in the refrigerator for up to 3–4 days. Keep them chilled until ready to serve so the filling stays firm and creamy.
Freezer: You can freeze the assembled jars for up to 3 months. For best texture, thaw them in the fridge before serving.
Make-ahead: These are perfect to prepare a day in advance. Assemble the layers, cover, and refrigerate until you’re ready to serve.
What to Serve With No-Bake Cherry Cheesecake Jars
These sweet little jars pair beautifully with simple sides that balance out their richness and make dessert feel extra special.
- Fresh fruit platters
- Light fruit salads
- Hot coffee or iced coffee
- Sweet tea or lemonade
- Simple vanilla beverages like milk or milkshakes
There’s just something about digging into a creamy, chilled dessert that feels like a little reward at the end of the day. These jars keep things easy, comforting, and downright satisfying—just the way homemade treats ought to be.
Frequently Asked Questions
Q: Can I make these without jars?
Absolutely. If you don’t have jars, you can use small cups, bowls, or any similar container. The layering process stays the same—just adjust the portion size based on what you’re using. The key is keeping those layers intact so you still get a bit of crust, filling, and topping in every bite.
Q: Why do I need to soften the cream cheese?
Softened cream cheese blends much more easily with the sugar and vanilla, giving you a smooth filling. If it’s too firm, you’ll end up with small lumps that are hard to mix out later. Letting it sit at room temperature before starting makes a big difference in the final texture.
Q: What does “stiff peaks” mean for the whipped cream?
When you lift your whisk or beaters, the whipped cream should stand up and hold its shape without collapsing. This step is important because it helps give the cheesecake filling structure and keeps it from becoming too loose once everything is combined.
Q: Can I skip folding and just mix everything together?
It’s best not to skip the folding step. Folding keeps the air in the whipped cream, which helps create that light, fluffy texture. If you stir it too aggressively, the mixture can lose that airy quality and become denser than intended.
Q: How do I keep the layers looking neat?
Using a spoon works just fine, but if you want cleaner layers, you can pipe the cheesecake filling into the jars. Taking your time while adding each layer also helps keep everything distinct and pretty, especially if you’re serving these for guests.
Q: Can I make these for a party ahead of time?
Yes, they’re a great make-ahead dessert for gatherings. Prepare them earlier in the day or even the night before, then keep them chilled until serving. This actually helps the layers set, making them easier to serve and enjoy.
Q: Do I have to add the toppings at the end?
The toppings are flexible, but they do add a nice finishing touch. The whipped cream, extra crumbs, and optional cherry on top bring both texture and a little visual charm. You can keep it simple or dress it up depending on the occasion.
No-Bake Cherry Cheesecake Jars
Ingredients
Method
- Mix the graham cracker crumbs with melted butter until evenly coated.
- Spoon the mixture into the bottom of each jar and gently press it down.
- Beat the cream cheese, powdered sugar, and vanilla until smooth and creamy.
- Whip the heavy cream to stiff peaks in a separate bowl.
- Gently fold the whipped cream into the cheesecake mixture until combined.
- Spoon or pipe the cheesecake filling over the crust layer.
- Add a generous layer of cherry pie filling on top.
- Finish with whipped cream, extra crumbs, and a cherry on top, then chill for 1–2 hours before serving.