Bright, creamy, and downright irresistible, these bars bring a little sunshine to any table. With simple ingredients and no oven required, they’re perfect for busy days when you still want something homemade. Whether it’s a family get-together, a potluck, or just a weeknight treat, these bars fit right in.
Why You’ll Love This No-Bake Cherry Lime Pie Bars
- No oven needed: Keeps your kitchen cool and stress-free.
- Simple ingredients: Everything is easy to find and budget-friendly.
- Make-ahead friendly: Chill time does the hard work for you.
- Balanced flavors: Sweet cherry meets tangy lime in every bite.
- Creamy texture: Smooth, rich filling layered over a buttery crust.
- Family favorite: Kid-approved and perfect for sharing.
Ingredients You’ll Need
These ingredients come together to create layers of creamy, tangy, and sweet goodness. If you love an easy dessert with a citrusy twist, this one checks all the boxes without any fuss.
- 2 cups graham cracker crumbs: Forms the base of the crust; the amount ensures a sturdy layer that holds together when sliced.
- ½ cup melted butter: Binds the crumbs together and gives the crust its rich, firm texture once chilled.
- 8 oz (225g) cream cheese, softened: Creates a smooth, creamy filling; softening helps it blend without lumps.
- 1 can (14 oz) sweetened condensed milk: Adds sweetness and helps thicken the filling for that signature silky consistency.
- ⅓ cup fresh lime juice: Brings a bright, tangy flavor that balances the sweetness; the quantity ensures a noticeable citrus kick.
- Zest of 1 lime: Adds extra citrus depth and a fresh pop of flavor throughout the filling.
- 1 cup cherry pie filling: Provides a sweet, fruity layer with a soft texture that contrasts the creamy base.
- 1 cup whipped topping: Lightens the top layer and adds a fluffy finish to the bars.
- Extra crumbs or lime zest for topping: A simple garnish that adds a little texture and visual appeal.
Every layer plays its part here—nothing fancy, just good, honest ingredients working together to make something special.
How to Make No-Bake Cherry Lime Pie Bars
Now don’t you worry—this is the kind of recipe that feels like a breeze once you get going. I’ve made this on busy afternoons with kids running around, and it still comes out just right every single time.
- Mix the graham cracker crumbs with the melted butter until everything is evenly coated, then press the mixture firmly into a lined pan and place it in the fridge to chill for 15 minutes.
- Beat the softened cream cheese until smooth, then mix in the sweetened condensed milk until fully combined and creamy.
- Add the fresh lime juice and lime zest, mixing until the filling thickens into a smooth, creamy consistency.
- Spread the lime filling evenly over the chilled crust, making sure to reach all the edges.
- Spoon the cherry pie filling over the top, then gently swirl or layer it across the surface.
- Spread the whipped topping over everything and smooth out the top into an even layer.
- Chill the pan in the refrigerator for 4–6 hours until fully set, then slice into bars and serve.
Tips for the Best No-Bake Cherry Lime Pie Bars
- Press the crust firmly — A well-packed crust holds together better when slicing and serving.
- Use softened cream cheese — This helps create a smooth filling without lumps.
- Mix until fully combined — Proper mixing ensures the filling sets evenly and stays creamy.
- Layer gently — When adding the cherry filling, keep the layers defined or lightly swirled without overmixing.
- Chill completely — Giving the bars enough time to set makes slicing clean and easy.
Storage & Make-Ahead Tips
Fridge: Store the bars in an airtight container in the refrigerator for up to 3–4 days. The texture stays firm and creamy, making them perfect for enjoying over a few days.
Freezer: You can freeze these bars for up to 3 months. Wrap them tightly or store in a freezer-safe container, then thaw in the fridge before serving.
Make-ahead: These bars are ideal for making ahead since they need several hours to chill. Prepare them the day before your event and let them set overnight for the best results.
What to Serve With No-Bake Cherry Lime Pie Bars
These bars are sweet and creamy with a bright citrus note, so they pair nicely with simple, balanced sides that don’t overpower their flavor.
- Fresh fruit
- Hot coffee or iced coffee
- Cold lemonade or citrus drinks
- Light salads
- Simple snack platters
There’s just something special about a dessert that comes together this easily and still feels like a little treat you made with love. These bars have that sweet-tart balance that keeps folks coming back for “just one more.”
Frequently Asked Questions
Q: Can I use bottled lime juice instead of fresh?
Fresh lime juice is used in this recipe to provide a bright, tangy flavor that balances the sweetness of the filling. Bottled juice can be used if needed, but the flavor may not be as vibrant. The amount listed ensures the filling thickens properly, so it’s important to keep the same measurement.
Q: Why does my filling need to be thick before chilling?
After mixing the lime juice into the cream cheese and sweetened condensed milk, the filling should become thick and creamy. This step is important because it helps the bars set properly during chilling. If the mixture is too thin, the final bars may not hold their shape when sliced.
Q: How do I get clean slices?
Clean slices come from a well-chilled dessert and a firmly pressed crust. Once the bars have set for the full chilling time, use a sharp knife to cut through the layers. Wiping the knife between cuts can help keep the edges neat and defined.
Q: Can I skip the whipped topping?
The whipped topping adds a light, airy layer that balances the richness of the filling. While the bars will still hold together without it, the overall texture will be denser. Keeping it in gives a more balanced bite across all layers.
Q: Do I have to swirl the cherry filling?
Swirling is optional and mostly affects the appearance. You can gently swirl the cherry filling into the lime layer or simply spread it evenly on top. Either way, the flavor stays the same, so it’s all about your preference.
Q: What size pan works best?
A standard square or rectangular pan works well for this recipe, as long as it allows enough space to create distinct layers. Lining the pan makes it easier to lift the bars out and slice them neatly once they’ve set.
Q: Can I make this for a summer gathering?
Absolutely. Since these bars are served chilled and don’t require baking, they’re especially convenient for warm-weather occasions. The combination of creamy filling and citrus flavor makes them a refreshing option for sharing.
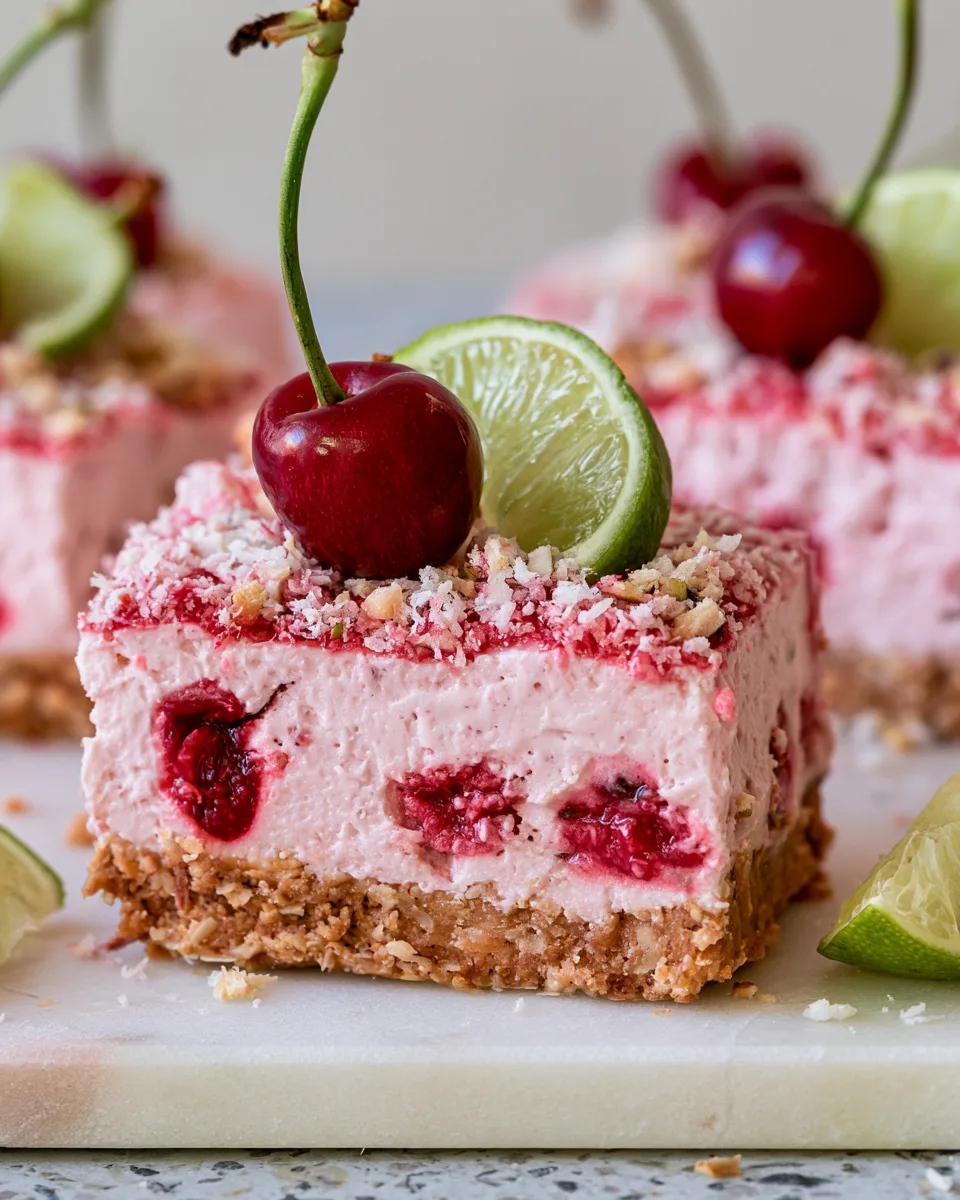
No-Bake Cherry Lime Pie Bars
Ingredients
Method
- Mix graham cracker crumbs with melted butter until evenly combined.
- Press the mixture firmly into a lined pan and chill for 15 minutes.
- Beat the softened cream cheese until smooth.
- Mix in the sweetened condensed milk until fully combined.
- Add fresh lime juice and lime zest and mix until thick and creamy.
- Spread the lime filling evenly over the chilled crust.
- Spoon cherry pie filling on top and gently swirl or layer it.
- Spread whipped topping over everything and smooth the top.
- Chill for 4–6 hours until set, then slice into bars.