Rich, creamy layers come together in the most comforting, chocolatey dessert that feels like a little celebration in every bite. Made with simple, store-bought ingredients and no oven required, it’s the kind of treat anyone can pull off—even on the busiest days. Perfect for family gatherings, potlucks, or a sweet weeknight surprise.
Why You’ll Love This No-Bake Chocolate Lush
- No oven needed: Everything comes together without baking, which makes it perfect for warm days or busy kitchens.
- Layered goodness: Each bite brings a mix of cookie crust, creamy filling, and chocolate pudding.
- Beginner-friendly: Simple steps and forgiving layers make this great for first-time dessert makers.
- Make-ahead friendly: It sets up beautifully in the fridge, so you can prep it in advance.
- Crowd-pleaser: That chocolate-on-chocolate combination always disappears fast.
- Comforting texture: Soft, creamy layers with a slight crunch from the crust keep every bite interesting.
Ingredients You’ll Need
This no-bake chocolate dessert keeps things simple while still delivering big flavor. Every ingredient plays its part in building those classic layers we all love.
- 2 cups chocolate cookie crumbs: These form the base of the dessert, giving it a firm yet slightly crumbly texture. The amount ensures full coverage of the dish so every slice holds together nicely. You can swap with any similar chocolate cookie crumbs if needed.
- ½ cup melted butter: This binds the crumbs into a crust that sets firmly in the fridge. The ratio is key—too little and the crust falls apart, too much and it gets greasy.
- 8 oz (225g) cream cheese, softened: Adds a smooth, slightly tangy layer that balances the sweetness. Softening it helps achieve a lump-free texture when mixed.
- 1 cup powdered sugar: Sweetens the cream cheese layer while keeping it silky smooth. The fine texture blends easily without any graininess.
- 2 cups whipped topping, divided: Lightens both the cream cheese layer and the topping. Dividing it ensures you get a fluffy middle and a smooth, airy finish on top.
- 1 package (3.9 oz) instant chocolate pudding mix: Creates that rich chocolate layer that sets quickly. The instant version is important here so it thickens properly without cooking.
- 2 cups cold milk: Helps the pudding mix set into a thick, spreadable consistency. Cold milk is key for proper thickening.
- ½ cup mini chocolate chips or chocolate shavings: Adds little bursts of chocolate throughout the top layer, giving a bit of texture contrast.
- Extra chocolate curls for garnish: A simple finishing touch that makes the dessert look just a little extra special without extra effort.
How to Make No-Bake Chocolate Lush
I love desserts like this because they look like you spent all afternoon in the kitchen, when really the steps are simple and straightforward. Just take your time with each layer, and let the refrigerator do the hard work for you.
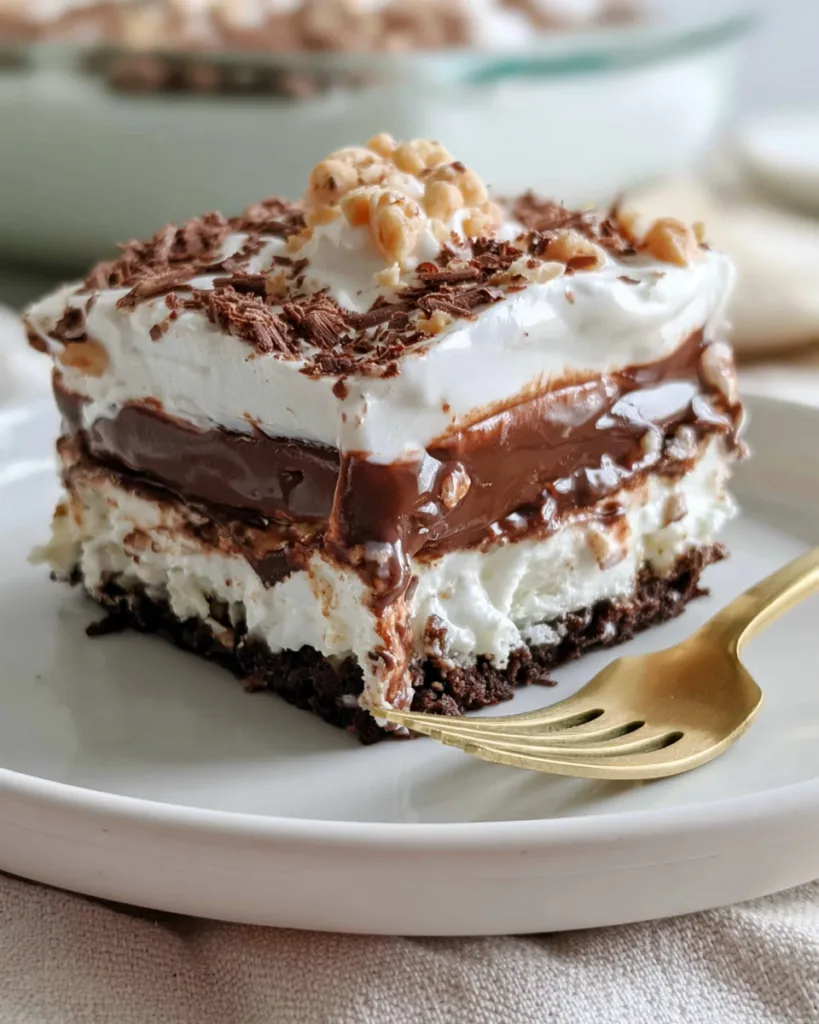
- Mix the chocolate cookie crumbs and melted butter together until all the crumbs are evenly coated. Press the mixture firmly into the bottom of a 9×9-inch dish to create an even crust layer.
- Beat the softened cream cheese and powdered sugar together until the mixture is smooth and fluffy. This creates the creamy middle layer that balances the rich chocolate flavors.
- Fold 1 cup of the whipped topping into the cream cheese mixture. Once combined, spread it evenly over the prepared cookie crust, making sure the layer reaches all the edges of the dish.
- Whisk the instant chocolate pudding mix and cold milk together in a separate bowl until the pudding thickens. Spread the pudding evenly over the cream cheese layer.
- Top the pudding with the remaining whipped topping. Smooth it into an even layer so each slice has a beautiful finish.
- Sprinkle the top with mini chocolate chips, chocolate shavings, or chocolate curls. Refrigerate for 4–6 hours before slicing and serving so the layers can fully set.
Tips for the Best No-Bake Chocolate Lush
- Press the crust firmly — A well-packed crust helps every slice hold together when served.
- Start with softened cream cheese — This makes it much easier to achieve the smooth, fluffy texture called for in the recipe.
- Fold gently — Folding the whipped topping into the cream cheese mixture helps maintain a light, airy consistency.
- Let the pudding thicken — Whisk until the pudding mixture thickens before adding it to the dessert so the layers stay distinct.
- Spread each layer evenly — Taking an extra minute to smooth the layers creates cleaner slices and a prettier presentation.
- Chill completely — The full refrigeration time helps the dessert set properly and makes serving much easier.
Storage & Make-Ahead Tips
Fridge: Cover the dish tightly and store it in the refrigerator. The dessert stays fresh for up to 3–4 days, and the chilled layers maintain their creamy texture.
Freezer: Wrap the dish well and freeze for up to 3 months. Thaw in the refrigerator before serving for the best texture.
Make-ahead: This dessert is an excellent make-ahead option because it already requires chilling time. Prepare it the day before serving and keep it refrigerated until you’re ready to slice and enjoy.
What to Serve With No-Bake Chocolate Lush
This rich and creamy dessert pairs wonderfully with simple accompaniments that let the chocolate layers remain the star of the table.
- Fresh fruit
- Hot coffee
- Cold milk
- Hot tea
- Vanilla ice cream
- Fresh whipped cream
There’s something so comforting about pulling a chilled dessert from the refrigerator and watching everyone hurry back for seconds. With its creamy layers and easy preparation, this No-Bake Chocolate Lush is the kind of recipe that fits right into busy family life.
Frequently Asked Questions
Q: Why does the crust need to be pressed firmly into the dish?
Pressing the chocolate cookie crumb mixture firmly into the bottom of the dish helps create a stable base for the layers above it. If the crust is loosely packed, it may crumble apart when you try to cut and serve the dessert. A firm crust makes slicing cleaner and helps each piece stay together.
Q: Can I make this dessert ahead of time?
Yes. In fact, making it ahead works very well because the dessert needs several hours in the refrigerator to set. Preparing it earlier in the day or even the night before gives the layers time to firm up, making serving easier and helping the flavors come together nicely.
Q: Why should the cream cheese be softened?
Softened cream cheese blends much more smoothly with the powdered sugar. Using cream cheese straight from the refrigerator can leave small lumps in the mixture, making it harder to achieve the fluffy texture described in the recipe. Allowing it to soften first helps create a smoother filling layer.
Q: What does folding the whipped topping into the cream cheese mixture do?
Folding combines the whipped topping without deflating it too much. This helps keep the cream cheese layer light and airy rather than dense. The result is a creamy texture that contrasts nicely with both the cookie crust and the chocolate pudding layer.
Q: How do I know when the pudding layer is ready?
The recipe calls for whisking the instant chocolate pudding mix and cold milk until thickened. Once the mixture has noticeably thickened and is spreadable, it is ready to be layered over the cream cheese mixture. Following this step helps the pudding stay in place instead of running into the other layers.
Q: Can I use chocolate chips or chocolate shavings on top?
Absolutely. The recipe includes mini chocolate chips or chocolate shavings as a topping option, and extra chocolate curls can also be used for garnish. Any of these choices add a decorative finish and reinforce the chocolate flavor throughout the dessert.
Q: Why does the dessert need to chill for 4–6 hours?
The refrigeration time allows all the layers to set properly. During this time, the crust firms up, the pudding stabilizes, and the entire dessert becomes easier to slice. Skipping or shortening the chilling period can make serving more difficult and may affect the appearance of the layers.
No-Bake Chocolate Lush
Ingredients
Method
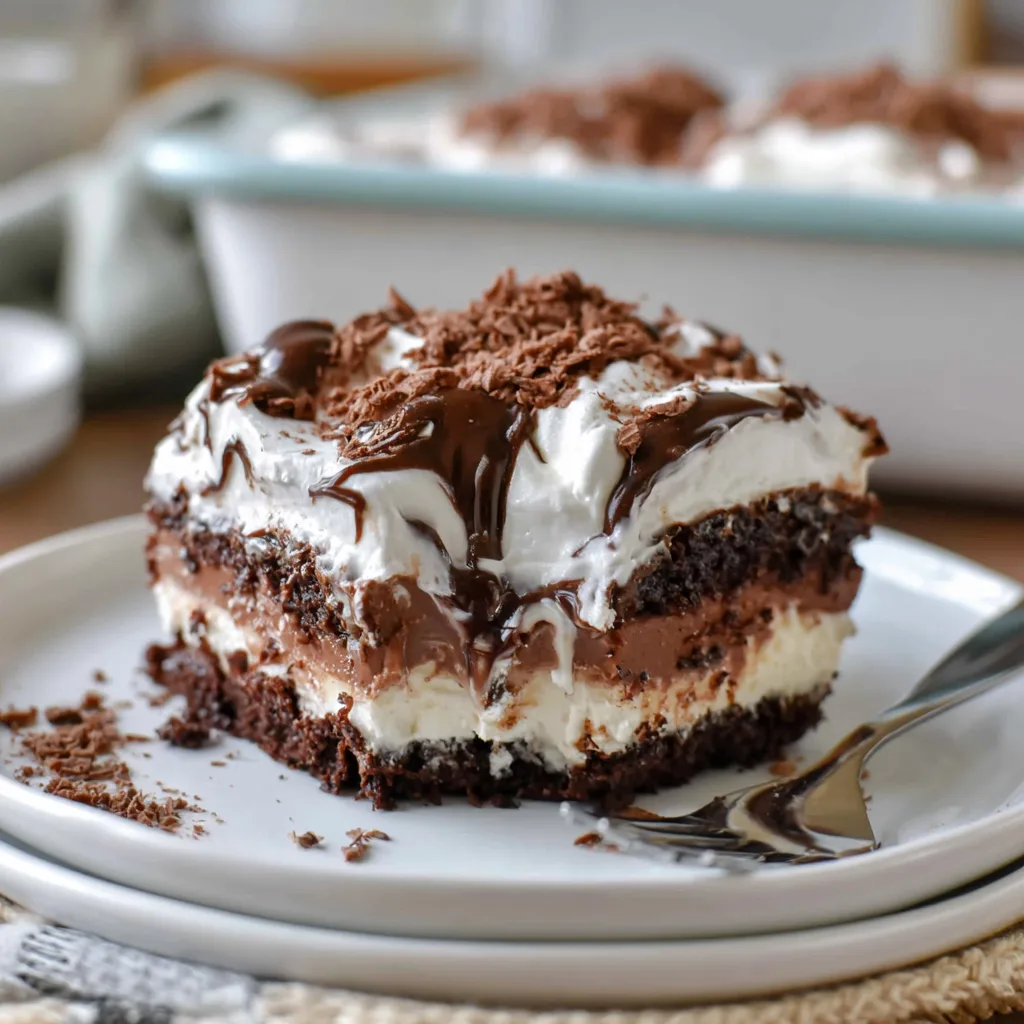
- Mix the chocolate cookie crumbs with the melted butter.
- Press the crumb mixture firmly into the bottom of a 9×9-inch dish.
- Beat the softened cream cheese and powdered sugar until smooth and fluffy.
- Fold 1 cup of the whipped topping into the cream cheese mixture.
- Spread the cream cheese mixture evenly over the cookie crust.
- Whisk together the instant chocolate pudding mix and cold milk until thickened.
- Spread the chocolate pudding evenly over the cream cheese layer.
- Top with the remaining whipped topping and smooth into an even layer.
- Sprinkle with mini chocolate chips, chocolate shavings, or chocolate curls.
- Refrigerate for 4–6 hours before slicing and serving.